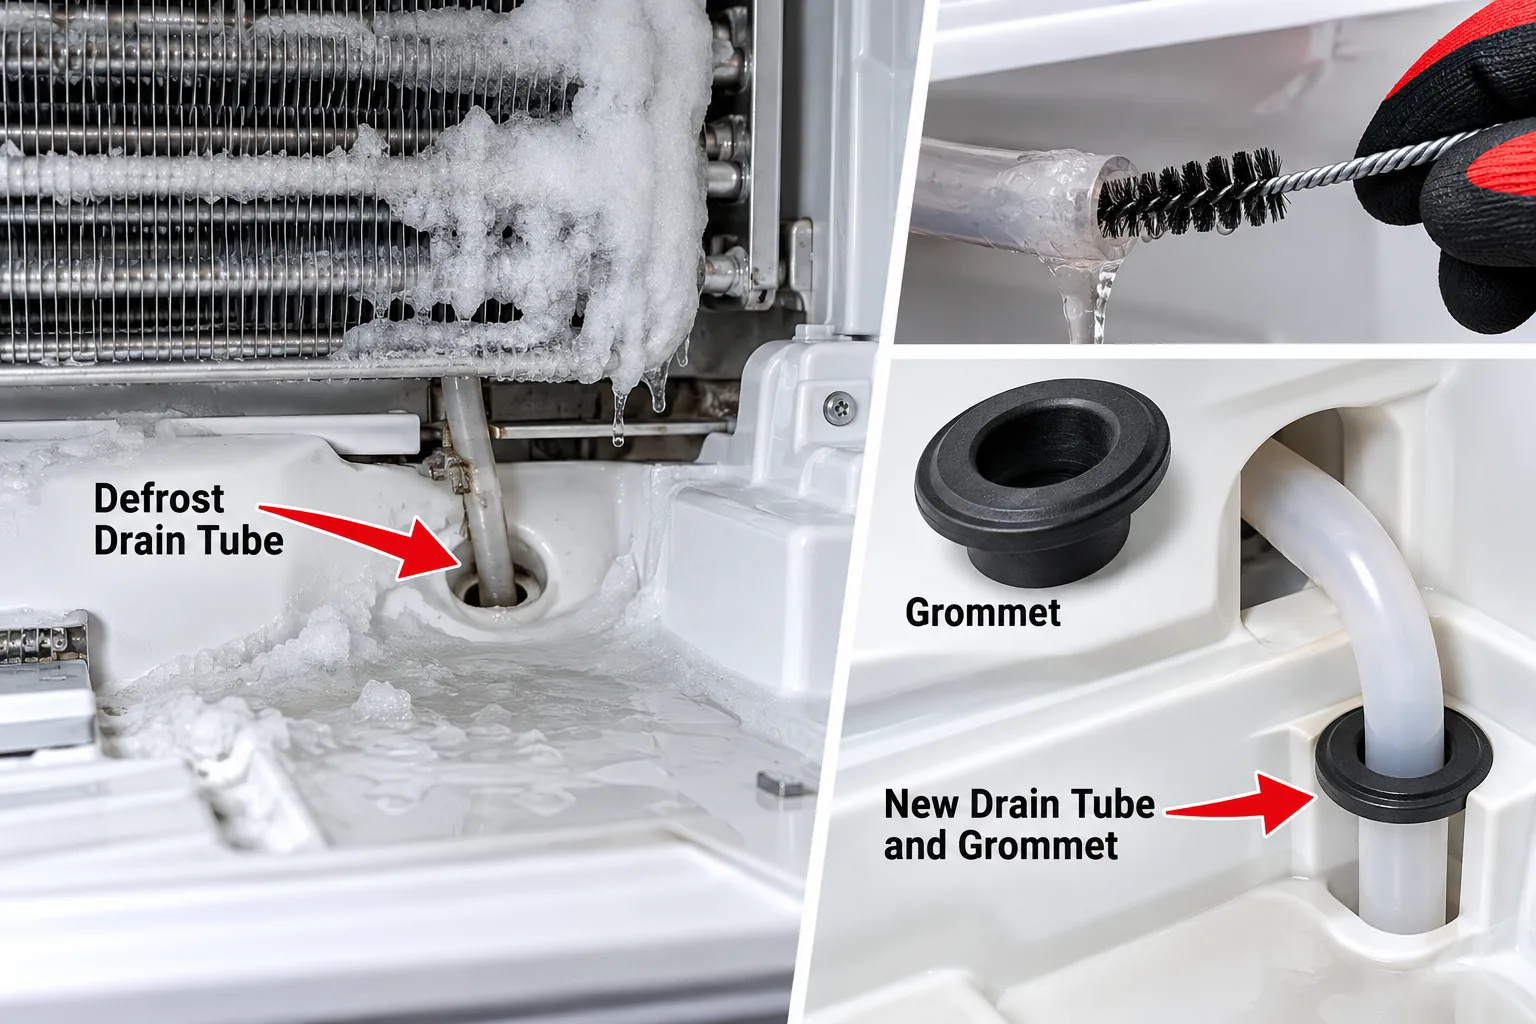
Most of the time, you don’t need to replace a frozen defrost drain tube at all — you need to thaw it. Warm water poured down the drain hole from inside the freezer, combined with gently melting the ice plug where the tube exits at the back near the drain pan, clears most cases in under 30 minutes with zero parts. Full replacement of the tube and duckbill grommet only becomes necessary when the grommet itself has cracked or collapsed, which usually shows up as water leaking even after the ice is gone.
- Two free steps — thawing with warm water and checking the drain hole for debris — solve most cases before you touch a single part.
- French door bottom-freezer models often have separate drain paths for the fridge and freezer sections — thawing the wrong one won’t help.
- The duckbill grommet is a specific, known-fail part on a lot of Whirlpool and Kenmore bottom-mount units, not just a generic rubber plug.
- If water’s still showing up after the ice is gone, that’s your sign the grommet needs replacing, not more thawing.
Why the Defrost Drain Freezes Up in the First Place
Every frost-free refrigerator runs a defrost heater a few times a day to melt frost off the evaporator coils, and that meltwater is supposed to run down a small drain tube into a pan under the fridge where it evaporates. When that tube gets partially blocked — by ice, food debris, or a collapsed duckbill grommet — the water backs up instead of draining and refreezes right in the tube, narrowing the opening with each cycle until it’s plugged solid. I’ve traced this same pattern on fridge after fridge over 30-plus years of repair work, split between Air Force aircraft maintenance and appliance and food service equipment repair, and the ice plug almost always sits just an inch or two in from where the tube exits near the drain pan. Most of the time that’s the entire problem — a straightforward ice clog with nothing to replace. Less often you’re dealing with actual food debris in the line, or a grommet that’s cracked or collapsed, and each of those calls for a different fix than simply melting ice.
If you’re not sure where your own drain hole is, this guide on a frozen freezer drain dripping into the refrigerator covers the most common hole locations before you start poking around back there.

Everyone Assumes the Whole Drain Tube Needs Replacing — It Usually Doesn’t
The most common wrong assumption I run into is that a frozen drain automatically means a broken drain, and people jump straight to ordering a new tube and grommet kit before they’ve even tried thawing it out. If the fridge was draining fine a few weeks or months ago and suddenly stopped, ice is almost always the cause, not a failed part. Save the parts order for after you’ve confirmed thawing doesn’t fix it.
One mistake I see just as often: someone grabs a wire coat hanger and jams it straight down the drain hole from inside the freezer without warming anything first. That’s a great way to puncture the duckbill grommet or tear a hole in the tube itself — plastic gets brittle when it’s frozen solid, and a stiff wire doesn’t care. If you’re going to probe the line at all, do it after the ice has started to melt, with something flexible like a pipe cleaner or a length of aquarium airline tubing, never a rigid metal hanger.
| Cause | Likelihood | Fix Cost | DIY Time |
|---|---|---|---|
| Ice-clogged drain tube | Most common | Free | 15-30 min |
| Food/mineral debris clog | Occasional | Free-$5 | 15-30 min |
| Collapsed or cracked grommet | Less common | $8-20 | 30-45 min |
| Cracked or misaligned tube | Rare | $15-25 | 30-45 min |
Watch This First: Clearing and Replacing the Drain Tube
This video walks through both sides of the repair — melting the ice plug from the drain hole inside the freezer, and pulling the exterior tube and duckbill grommet if thawing alone doesn’t stop the leak. It’s worth watching before you start if you’ve never had the back panel off your fridge, since the drain hole location and the grommet fitting look a little different depending on where the tube exits the cabinet.
How Do You Know If It’s the Grommet, Not Just Ice?
What you’ll see: you thawed the drain, water ran through fine for a day or two, then the leak or the frozen puddle came right back — or worse, it never stopped even with the ice gone. What’s happening: the duckbill grommet, the small one-way rubber flap that seals the tube where it meets the drain pan fitting, has gone stiff and cracked, or collapsed inward so it doesn’t seal or flow right anymore. What to do: at that point you’re replacing the grommet (and often the short section of tube it’s attached to), not thawing anything else.
This is the part almost nobody explains well. The duckbill grommet isn’t just a generic rubber plug — on a lot of Whirlpool and Kenmore bottom-mount refrigerators built from roughly the mid-2010s on, it’s a specific, known wear part (Whirlpool lists the replacement fitting as W11566763), and it fails in a pretty predictable way: the rubber gets brittle from repeated heat-cool cycling near the compressor compartment, the “duckbill” lips stop closing fully, and you get a slow drip that looks like a frozen drain even when the tube itself is completely clear. If you’ve already thawed the line twice and you’re still getting water on the floor, stop thawing and go straight to checking this part — that’s the counter-intuitive shortcut most guides skip entirely.
(And here’s a scenario almost nobody covers: on French door bottom-freezer models, there are sometimes two separate drain paths — one for the fresh food section evaporator, one for the freezer. Someone can easily spend an hour thawing the freezer-side drain when the leak is actually coming from the fridge-side coil above the crisper drawers. If your fridge section is dripping and the freezer floor is bone dry, you’re looking at the wrong drain.)
Clearing an Ice-Clogged Drain Tube (Free Fix)
Grab a turkey baster, a cup of warm (not boiling) water, and about 20 minutes. This is the sequence I always use:
- Unplug the refrigerator. This is a water-and-electricity job — don’t skip this step even though it feels obvious.
- Locate the drain hole inside the freezer, usually at the back of the floor or behind a small access panel near the evaporator coil. If you’re not sure where yours is, check this walkthrough on finding the freezer drain hole on most common layouts.
- Pour warm water into the drain hole using the turkey baster, a little at a time. You’re trying to melt the ice plug from the top down, not flood the compartment.
- Check the back of the fridge where the tube exits near the drain pan (usually behind the lower access panel, held on with a 1/4-inch nut driver on most Whirlpool and GE models). Feel for the ice plug and warm it gently with a hair dryer on low, or a damp warm cloth — never a heat gun, and never anything that could melt the plastic tube itself.
- Confirm drainage by pouring a little more warm water down the drain hole and watching (or listening) for it to reach the pan below.
Budget 15 minutes if the clog is minor, up to 30 if the ice plug is stubborn. I used to rush this step and just dump hot water down fast, and more than once I ended up with water pooling somewhere I couldn’t see instead of draining — slow and steady works better than trying to blast through it. AppliancePartsPros covers the upright-freezer version of this same fix if your layout looks different from a standard fridge.
Replacing the Drain Tube and Duckbill Grommet
If thawing didn’t stop the leak, or the grommet is visibly cracked, split, or collapsed when you pull the back panel, it’s time to replace it rather than keep thawing.
- Unplug the fridge and pull it away from the wall far enough to access the back panel comfortably — 18 to 24 inches is usually enough.
- Remove the rear access panel with a 1/4-inch nut driver or Phillips screwdriver, depending on the model.
- Locate the drain tube fitting and grommet where the tube exits the cabinet and connects to the drain pan below. On most Whirlpool and Kenmore units this is a short rubber elbow with the duckbill valve built in.
- Pull the old tube and grommet free — it usually twists or pulls straight off the fitting, no tools needed once the panel’s out of the way.
- Push the new grommet/tube assembly onto the fitting firmly until it seats. You should feel it click or seat snugly — a loose fit will just leak again.
- Reinstall the access panel, plug the fridge back in, and run a water test down the interior drain hole to confirm it flows through and lands in the pan.
Budget 30-45 minutes your first time through this, closer to 15 once you’ve done it before. The replacement fitting runs $8-20 depending on your model — AppliancePartsPros has a walkthrough for the Whirlpool W11566763 fitting specifically if that’s your part number. A full tube-and-grommet kit for other brands typically lands in the $15-25 range.
Don’t force a rigid metal probe down the drain tube while it’s still frozen solid — you can crack the tube or puncture the grommet, turning a free fix into a $15-25 parts job. If you need to clear debris, use something flexible after the ice has softened, never a coat hanger or screwdriver.
Most of this repair is well within DIY range — the fitting itself costs $8-25, versus $150-250 for a service call on the exact same job. Call a pro instead if: the drain pan itself is cracked or missing, the tube runs through a section of the cabinet you can’t access without pulling major components, or you’re finding ice buildup on the evaporator coil itself (that’s usually a separate issue — a failing defrost heater or thermostat, not the drain).
What Stops This From Coming Back?
Once the drain’s clear or the grommet’s replaced, check it again every 6-12 months, especially if you keep the fridge in a garage or another spot with temperature swings — heat cycling is part of what breaks the grommet down in the first place. Keeping the drain hole clear of food debris when you clean the freezer floor also goes a long way; run a quick check with the turkey baster whenever you’re doing a deep clean, just to make sure water still flows freely.
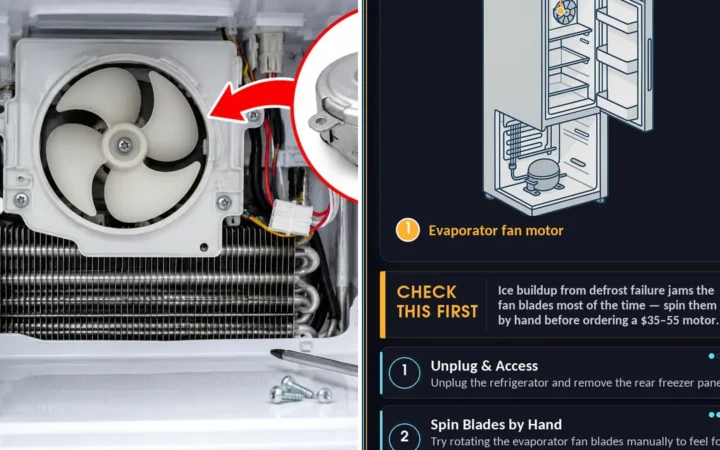
If you’re also dealing with a fan that’s making noise on top of the drain issue, that’s usually unrelated but worth checking — a failing evaporator fan motor can sometimes cause enough extra frost buildup to overload the drain during defrost cycles. A bad thermostat can play a similar role — if yours is stuck, here’s how to replace the thermostat on a Whirlpool refrigerator.
Frequently Asked Questions
Can I use a hair dryer directly on the frozen tube?
Yes, on low heat and kept moving — don’t hold it in one spot. It’s easy to melt the edge of the tube by getting impatient and leaving the dryer parked too close, so keep it moving and check progress every 30 seconds.
How long does it take to replace a frozen defrost drain tube if thawing doesn’t work?
Once you’ve confirmed you actually need to replace a frozen defrost drain tube and grommet rather than just thaw it, budget 30-45 minutes the first time. Most of that time is spent getting the back panel off, not the actual swap.
Why does water keep dripping even after I cleared the ice?
That’s almost always the duckbill grommet, not leftover ice. If you thawed the line and it’s still dripping a day later, pull the back panel and check the grommet for cracks or a collapsed shape before you do anything else.
Is a frozen drain tube the same as a clogged one?
Not exactly — a frozen tube is blocked by ice from backed-up defrost water, while a clogged tube is blocked by food debris or mineral buildup. Frozen is far more common, but food particles do turn up in enough drain tubes to make it worth checking.
Do I need to replace a frozen defrost drain tube every time it freezes?
No — most of the time you thaw it and you’re done. Full replacement only makes sense once the grommet itself has actually failed, which happens far less often than a plain ice clog. Don’t order parts before you’ve tried the free fix first.
If nothing here gets you fully dry after a couple of tries, it might be worth a broader look — check this guide on a freezer leaking water from the bottom for other causes that can mimic a frozen drain, or read up on RepairClinic’s defrost drain troubleshooting page for model-specific variations I haven’t covered here.

Written by Keith Schneerer
Certified Appliance Tech · Founder, RemoveAndReplace.com
Keith has spent 30+ years repairing machines, starting as a military mechanic and later maintaining food processing equipment before moving into appliance repair. He founded RemoveAndReplace.com to share field-tested repair advice.
More about Keith →