The Midea Duo portable AC ships with a horizontal sliding window kit only — no vertical adapter for sliding glass doors. Fix it with two Danby parts: Exhaust Adapter Module C (12120600006604) and Exhaust Adapter Module A (12120600006605) from danbyapplianceparts.com. About $16 for the parts, $17 for ground shipping — $33.26 total. Installs in under an hour with a jigsaw and foam weatherstrip.
 Midea duo air conditioner 12000 btu vent attachment for vertical door
Key Takeaways
- The Midea Duo does not include a vertical adapter for sliding glass doors — not in new boxes, not in refurbished ones. That’s not a defect, that’s how it ships.
- Order Danby Exhaust Adapter Module A (part 12120600006605) and Module C (part 12120600006604) — they fit the Midea Duo’s dual-hose exhaust without modification.
- Total cost including ground shipping lands at $33.26. Parts arrive in 3–10 business days.
- An improperly sealed exhaust path costs you roughly 20–30% of rated cooling output. On a 12,000 BTU unit that’s real money in Arizona summers.
- Plywood or rigid foam beats the stock plastic panel material in the long run — especially in desert heat.
Why The Window Kit In Your Box Doesn’t Fit A Sliding Glass Door
The stock kit that ships with the Midea Duo is built for a horizontal window opening — the panels telescope sideways to fill a gap roughly 26 to 48 inches wide. A sliding glass door opening is the opposite shape: tall and narrow, usually 78 to 80 inches floor-to-header. None of the included panels stack vertically to that height, and none of the brackets clamp to a glass door track. So you’re not missing a piece. The piece doesn’t exist in the box.
How The Midea Duo’s Dual-Hose Exhaust Works
Here’s what’s happening inside the box. The Midea Duo uses a hose-in-hose dual-exhaust design — one hose pulls fresh outdoor air in for the condenser, the other pushes hot air out.
 The restored Midea Duo 12000 BTU
I bought through Walmart didn’t include the vertical adapter for my sliding glass door
The Two Danby Parts That Actually Fit
Here’s what the manual won’t tell you. Danby and Midea use the same hose-in-hose exhaust architecture across several of their dual-hose portable AC models. I verified this the hard way on my own restored unit (MAP14HS1TBL class), but the same fit applies to the MAP14HS1TBLA variant and the matching Danby dual-hose units. The two-piece exhaust adapter module from Danby snaps onto the Midea Duo’s hose assembly without any sanding, shimming, or foul language.
| Part | Danby Part Number | Price (March 2026) |
|---|---|---|
| Exhaust Adapter Module C | 12120600006604 | $8.05 |
| Exhaust Adapter Module A | 12120600006605 | $8.22 |
| Ground shipping (3–10 business days) | — | $16.99 |
| Total | — | $33.26 |
Order them both right here — they’re a two-piece assembly and neither one works on its own. You can find the parts on the Danby Appliance Parts accessories page first piece here and the second piece here. Shipping is the bigger cost than the parts themselves, which is annoying but unavoidable on a parts-only order. If you’re also replacing any other components of your install, it’s worth bundling to spread the shipping.
 My actual order from March 23, 2026
Module A and Module C arrived inside a week and fit the Midea Duo’s exhaust hose without any modifications.
Step-By-Step: Installing The Vent Through Your Sliding Glass Door
This is the meaty part of the job. Manual says an hour. Budget two hours your first time.
- Measure the door gap. Open your sliding glass door to the width you want to commit to for the season. Measure the gap width and the full track height floor-to-header. Write both numbers down — you’re going to cut a panel to those dimensions minus about 1/16 inch each side for weatherstrip compression.
- Pick your panel material. You have two choices. Buy a pre-made tall sliding-door panel kit on Amazon (around $30–$45) or cut your own from 1/4-inch plywood or 1/2-inch rigid foam insulation board. I went with plywood because I had scrap in the garage and it holds up better than plastic in the Peoria sun. The stock plastic panels crack after one Arizona summer — I used to tell people they were fine — actually, scratch that, they’re fine if you live in Seattle. In Phoenix they’re toast by September.
- Snap the Danby modules together and position on the panel. Module A and Module C click together into a single adapter that accepts the Midea Duo’s dual hose on one side and seats into your panel on the other. Hold the assembly against the panel where you want the cutout (usually in the upper third so the hose runs down and out), trace the outline with a pencil, and mark your cut line.
- Cut the opening. Jigsaw for plywood, sharp utility knife for foam board. Go slow on the first 1/4 inch to keep the edge clean — you want a snug friction fit. If it’s loose, exhaust air recirculates and the unit fights itself. Test-fit the adapter assembly. If it wiggles more than a paper’s thickness, you need to shim with foam weatherstrip on the inside of the cutout.
- Seal all four panel edges with foam weatherstrip tape. This is non-negotiable. I’ve seen more portable ACs underperform from a leaky panel than from any mechanical fault in the unit itself (ask me how I know — first install I did in 2019 I skipped the weatherstrip because “the panel fits tight already” and spent the next three days wondering why the room wouldn’t get below 82). Use closed-cell foam tape, not the cheap open-cell stuff. The open-cell stuff turns to dust in one desert summer.
- Slide the panel into the door track and lock it in. Drop the panel vertically into the track where the sliding door opens. Push the sliding glass door closed against the panel — the door’s own weight and track friction hold the whole thing in place without a single screw. Connect the Midea Duo’s dual exhaust hose to the Danby adapter modules, power the unit on, and feel around the panel edges for warm-air leaks. If you feel any, add more foam tape to that edge.
Security note — this is important. A sliding glass door that’s wedged open with a plywood panel is easier to force than a fully closed door.

The finished install in my house — plywood panel, Danby adapter seated in the cutout, dual exhaust hose connected and venting outside.
What Happens If You Skip The Adapter And Just Wing It?
About 70% of the failure complaints I see on forums for the Midea Duo come back to bad venting, not the unit itself. The symptoms are obvious once you know what to listen for — the compressor cycles more frequently (you’ll hear it kick on and off every 4–5 minutes instead of running in long steady cycles), the room feels humid even though the unit is “cooling,” and the exhaust hose gets hot enough to feel warm through the insulation.
All three are signs that hot air is recirculating back into the room or that conditioned air is escaping through a bad seal. Efficiency loss runs 20–30% on a poorly sealed install. That’s a 12,000 BTU unit giving you 8,400 BTU of actual cooling while pulling the same wattage. Don’t skip the adapter. Don’t duct-tape the hose to a cracked door. Do the job once, do it right.
The Night I Figured This Out
I remembered that Danby and Midea source from the same Chinese OEM factories for a lot of their small appliances. Checked the Danby parts site. There it was. Two part numbers, sixteen bucks, done. After doing this kind of cross-brand parts hunting a few hundred times over 39 years, you’d think I’d check the OEM family first. Lesson learned (again).
Keep Your Vent Working — Seasonal Maintenance
Every spring, before the first 95-degree day, pull your panel out of the door track and check the foam weatherstrip on all four edges. Compressed foam loses its seal — and a 12-month-old strip is usually 30% thinner than it started.
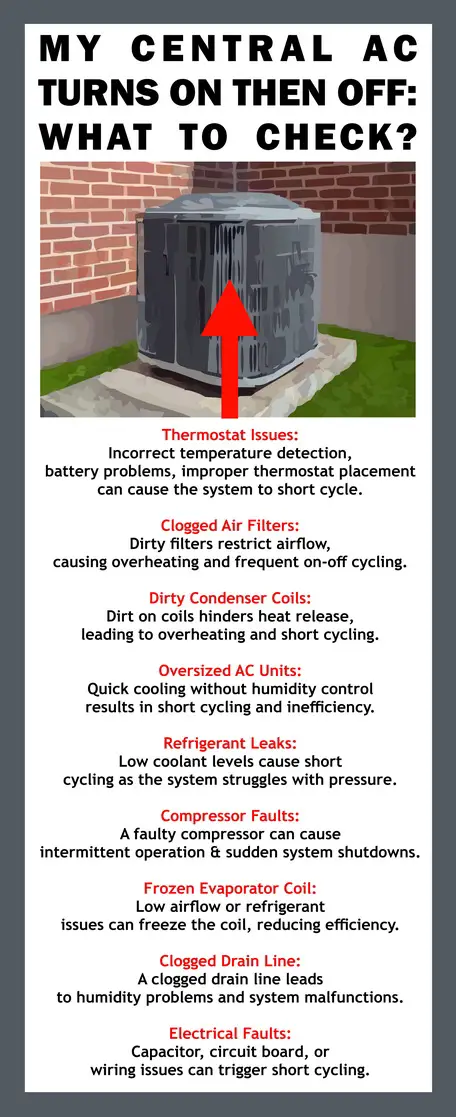
If you want to go deeper on getting the most out of a portable AC in hot climates, my guide on why a portable AC isn’t cooling the room covers the other 30% of efficiency killers that have nothing to do with the vent adapter. And if you’re troubleshooting a different brand entirely, the walkthrough on portable air conditioner troubleshooting hits the common failure points across every dual-hose unit I’ve worked on. For broader home cooling strategy, see why an AC short-cycles — the same seal-and-airflow principles apply.
When To Skip DIY: You shouldn’t need a pro for this — the whole job is measure, cut, seal, install. Order the two Danby parts, cut a panel, seal it, and move on.
Frequently Asked Questions
Will the Danby exhaust adapter parts fit my Midea Duo MAP14HS1TBL?
Yes. I used Module A (12120600006605) and Module C (12120600006604) from Danby on my restored MAP14HS1TBL-class Midea Duo and they seated onto the dual-hose assembly without modification. The Danby parts site also lists the same adapter modules as compatible with the MAP14HS1TBLA variant. If your Midea Duo uses the hose-in-hose dual exhaust (rectangular connector, not round), these parts will fit.
Can I use a universal portable AC sliding door kit from Amazon instead?
Sort of. You can use the tall panel material from a universal kit to fill the door gap — some of the better ones even include security brackets. But the universal adapter plates are built for single-hose round-connector units. The Midea Duo’s dual hose-in-hose connector won’t seal correctly against a universal plate. So you’d end up using the universal panel PLUS buying the Danby modules anyway. At that point just buy plywood, cut it yourself, and order the Danby parts. Costs less and seals better.
How long does Danby Appliance Parts ship the adapters?
Ground shipping runs 3–10 business days per the listing. My own order placed March 23, 2026 landed inside that window. They ship to the U.S. and Canada. No overnight or 2-day option — if you need the parts faster, you’re stuck with the Amazon universal plate route.
Is my refurbished Midea Duo defective because the adapter is missing?
No. This is the single most common confusion I see around these refurbished units. The Midea Duo’s retail box doesn’t always include the vertical sliding door adapter even when new — the stock kit is horizontal-window only. When refurbishers repackage the unit, they sometimes don’t notice the accessory gap and ship it as “complete.” Don’t start a return for this. I almost did the first time and I’m glad I didn’t — a $33 parts order from Danby is faster than a return-and-rebuy cycle.
What’s the difference between Exhaust Adapter Module A and Module C?
They’re the two halves of a single two-piece adapter. Module A and Module C snap together to form one complete connector — Module A handles the hose-end attachment, Module C seats into the panel cutout. I tried ordering just one thinking I could fabricate the other side; that was a waste of $8 and a week of shipping. Get both. Neither half works alone for this install.

Written by Keith Schneerer
Certified Appliance Tech · Founder, RemoveAndReplace.com
Keith has spent 30+ years repairing machines, starting as a military mechanic and later maintaining food processing equipment before moving into appliance repair. He founded RemoveAndReplace.com to share field-tested repair advice.
More about Keith →