Store bought wine racks are boringly average and a dime a dozen. Most common store bought racks are made with steel wire or wood and they are usually similar in design. If you are looking to have a one-of-a-kind wine rack in your home that will have people talking, see below. With about $80 dollars worth of wood and a weekend to build, you can make your own custom DIY wine rack too! To build this wine rack properly, you will need to have basic to expert woodworking tools. Wood clamps are a woodworkers best friend as you can see in the pictures below. Most of this wine rack build is done with a common wood glue and not wood screws. If you have an interest in building a similar custom wine rack out of wood see below for a step by step guide!
The first thing we recommend to do first is to create the bottom base of your wine rack based on the size of the room or location the rack will be in. Once the base is made you can further venture into creating the curved sides and the top. We have not given exact dimensions on this project as this is a very unique design that can vary at almost every step!
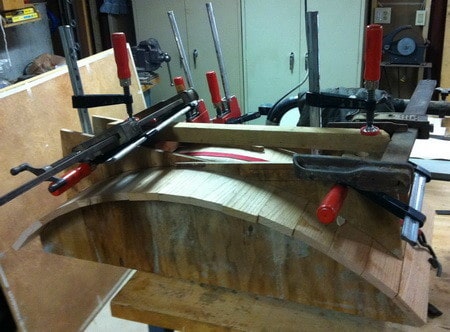 Start with a curved piece of wood to lay your wood strips on to create the curve on your wine rack.
Our pieces of wood were 2″ wide on the inside curved edge and 3″ wide on the outside curve.
Glue the wood strips together and clamp them down until they are fully dry.
NOTE: You can use any angle curve desired that will fit the design you have in mind.
You can also use just about any type of wood except plywood, use a good quality wood for durability.
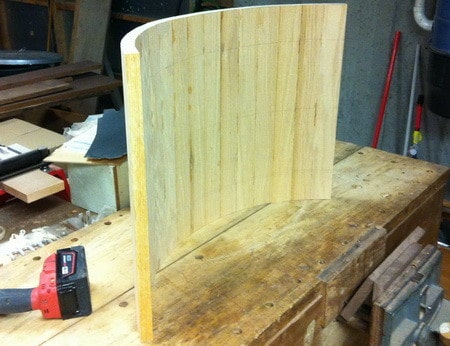 Once the glue is fully dry, remove the curved wood and do some light sanding if needed.
NOTE: If any of the edges are not aligned, you can cut them evenly using a wood saw.
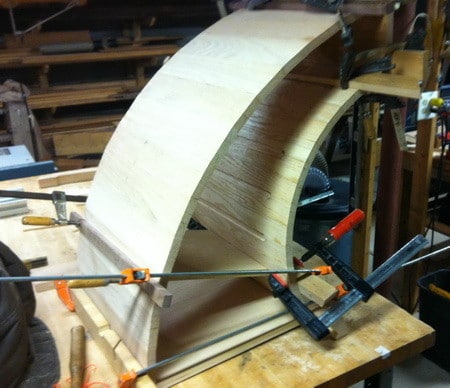 Next make the second “curve” using the same method as before.
Notice the one in the picture is not the same “angle” as the first one.
This is fine and will give the wine rack a unique one-of-a-kind look.
Once you have created a wooden base, the top, and both curves, glue them all together using clamps.
NOTE: The curves have “slats” on the insides for the wooden shelves to slide into.
The shelves will slide into place once everything is glued together as the slats are “routed” from the back.
ALSO: Size dimensions are not given as this project will be to YOUR size specifications.
Use the images here to understand the “scale” of the wood pieces you need to create.
The best way to do this is create the bottom base first based on the size of the area the rack will be used.
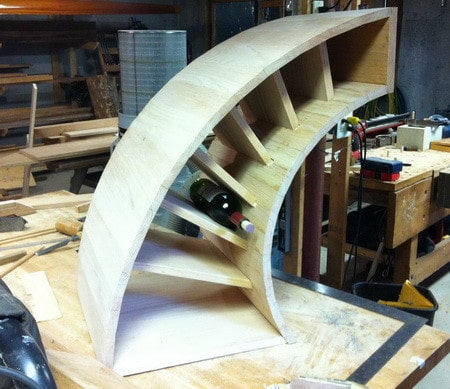 Once the glue is dry remove the clamps, slide in the shelves, and sand it for optimum smoothness.
NOTE: At this time it is best to “fit” the wine bottles to make sure everything is spaced properly.
If there are spacing issues then use a smaller or larger bottle in that particular shelf.
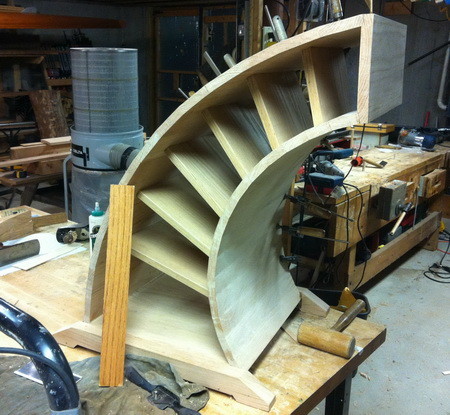 It is optional but you can add “feet” to the bottom of the wine rack to give it more of a unique look.
NOTE: Using just a normal 2×4 and cutting different angles in it can work great for the feet.
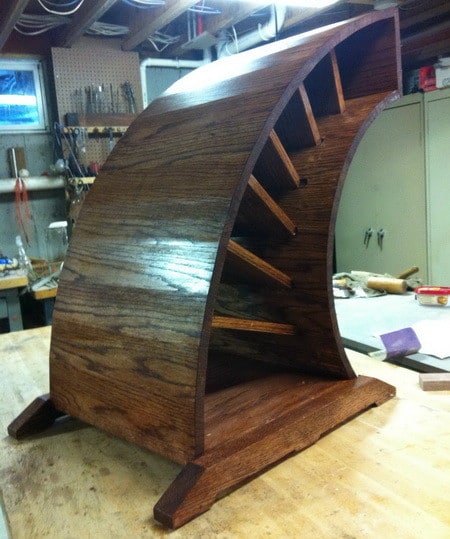 Next stain the wood using a wood stain color of your particular liking.
NOTE: The one above is stained in RED OAK and rubbed with Danish Wood Oil for an extra protective shine.
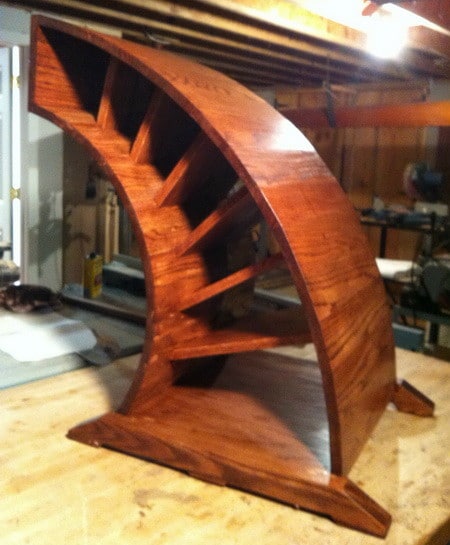 Staining the wood and applying multiple coats will give it a great deep color and help last a long time.
NOTE: Let the wood stain dry at least 3 hours in between coats for best results.
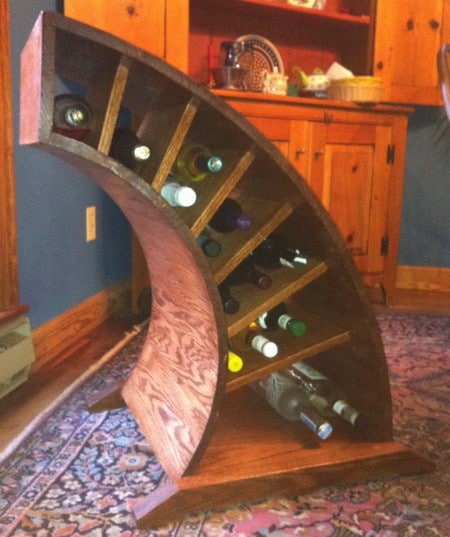 The finished project.

Written by Keith Schneerer
Certified Appliance Tech · Founder, RemoveAndReplace.com
Keith has spent 30+ years repairing machines, starting as a military mechanic and later maintaining food processing equipment before moving into appliance repair. He founded RemoveAndReplace.com to share field-tested repair advice.
More about Keith →