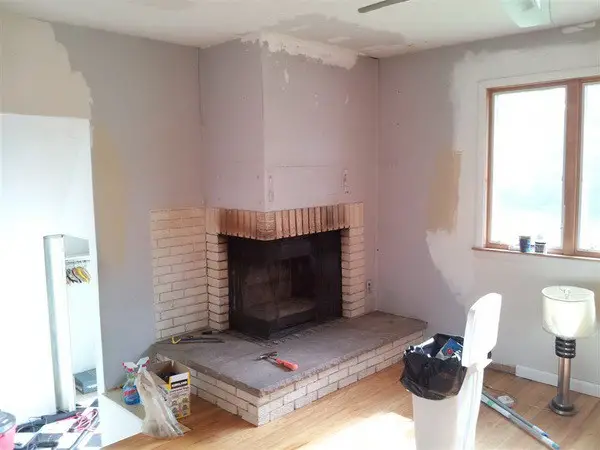
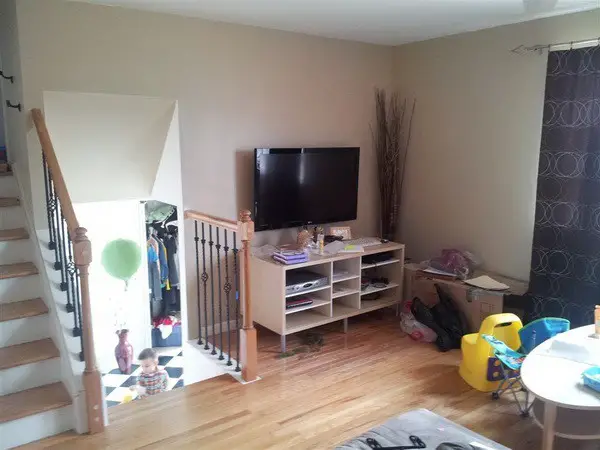
Back around 2013 my wife and I stared at a corner fireplace built in 1981 that we hadn’t lit in years. It was eating the one wall where an entertainment center needed to go. So I did what I’ve done my whole life with things that are in the way — I figured out how to take it apart safely. Here’s exactly how that job went.
Removing a fireplace yourself is doable, but the order matters: the chimney or vent comes out top-down first, then the firebox, then the hearth base, then you patch drywall and floor. The actual teardown took us about 2 hours. Budget a full weekend for the patch-and-paint work that follows. Wear head, eye, and face protection — this job throws debris.
- Confirm the fireplace isn’t load-bearing before you touch it — this is the step people skip and regret.
- The chimney/vent comes down from the top first; the firebox comes out last. Never reverse that.
- Our corner-unit teardown ran about 2 hours. The drywall, paint, and new flooring afterward ate far more time — around 2 hours each for drywall and paint.
- Protective head, eye, and face gear is not optional. Masonry and old firebox metal both bite.
- If it’s a masonry firebox tied into a bearing wall or a shared footing, that’s when I’d tell you to call a pro.
I spent 19 years doing aircraft maintenance in the Air Force and another 9 on commercial food-service equipment, so tearing structures apart in the right sequence is second nature to me now. But I’ll be honest — the first time I pulled a fireplace, I did it in the wrong order and paid for it. More on that below.
Before You Swing a Hammer: Is It Load-Bearing?
Here’s the thing nobody in the top search results tells you, and it’s the single most important check on the whole job. A corner fireplace — especially an older masonry one — can share a footing with the house foundation and can sit inside or against a bearing wall. If you rip it out without knowing that, you’re not just making a mess. You’re pulling structure. About 90% of the prefab metal-firebox units I’ve seen are fully non-structural and safe to remove solo. The other 10%, the old full-masonry builds tied into a bearing wall, need a structural eye first.
My first instinct, decades ago, was always “it’s just a fireplace, tear it out.” I worked that way for years. Then on a job in the 90s I started demoing a masonry corner unit and felt the ceiling flex — I’d been leaning weight on a joist path I didn’t know ran through that wall. I stopped, got a second opinion, and learned to check the framing above and the footing below every single time. That mistake changed how I approach every teardown.
Check the chimney is fully gone before you start on the firebox. In our project, the chimney on the roof had already been removed and the roof repaired professionally before I touched anything inside. Do it in that order. Pulling a firebox while the chimney is still standing invites a partial collapse and a wide-open hole in your roof.
Tools and What This Actually Costs
You don’t need a ton of specialty gear for this. Most of what you’ll grab you probably already own if you’ve done any demo work.
- Sledgehammer and a standard claw hammer
- Pry bar / flat bar
- Reciprocating saw (a sawzall) with metal and wood blades
- Drill and screwdrivers
- Shop vac and heavy contractor trash bags
- Head, eye, and face protection — hard hat or bump cap, safety glasses, and a face shield for the masonry work
- Dust mask or respirator
Cost-wise, if you own the tools, the removal itself is mostly your labor. Where the money goes afterward is materials — drywall sheets, joint compound, primer, paint, and in our case new wood flooring and a stair railing. A pro demo-and-patch crew for a job like this can run several hundred to over a thousand dollars depending on your area. Doing it myself, my out-of-pocket was materials and a weekend. That’s the trade: your time versus their invoice.
Step by Step: How To Remove a Fireplace
This is the sequence we followed, top to bottom. Follow it in this order and the job stays controlled instead of turning into a pile of surprises.
- Confirm the chimney/vent is already gone from the roof. As I said above, ours was removed and the roof repaired first. This is non-negotiable.
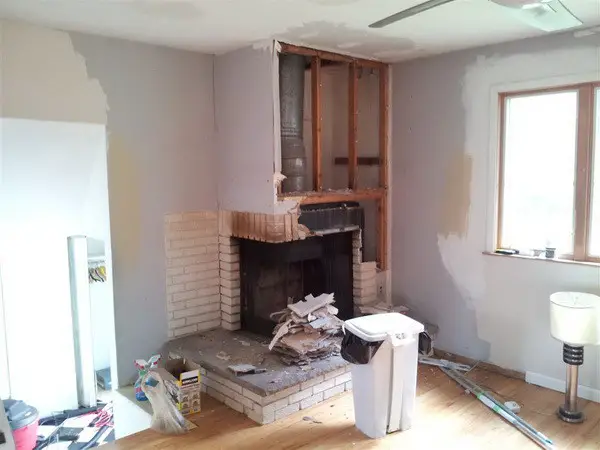
- Tear out the surrounding drywall. Pull all the drywall around the firebox so you can see the framing, the vent path, and how the unit is fastened to the structure.
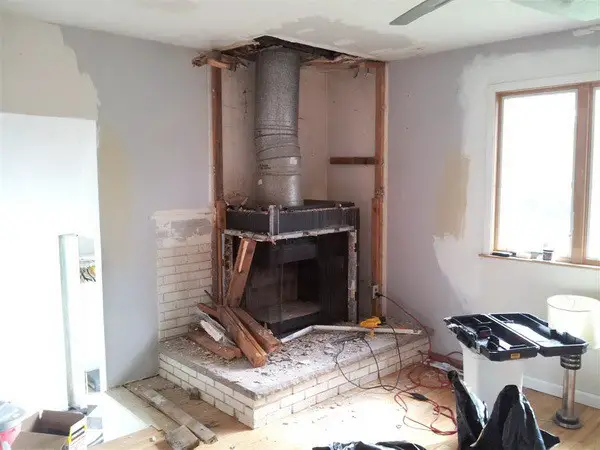
- Remove the chimney vent section inside the wall. With the drywall gone you can access and pull the interior vent run.
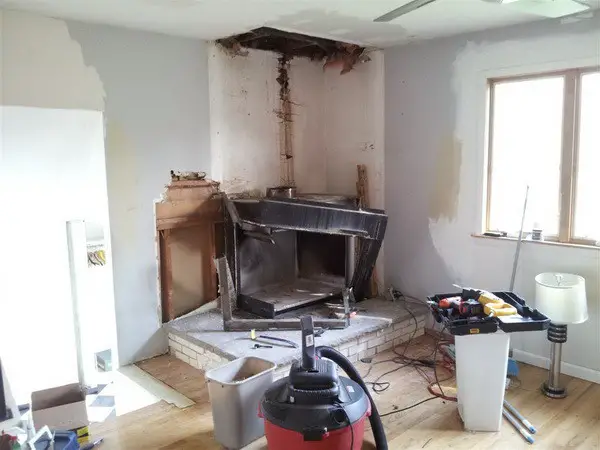
- Cut and pull the firebox free. Use the reciprocating saw for fasteners and framing ties, then work it loose.
- Remove the hearth / granite flooring base. This is heavy — get help lifting it out.
- Frame, then hang new drywall to close the wall back up flush with the rest of the room.
- Prime and paint.
- Finish the floor where the hearth used to be — we laid new wood flooring and added a stair railing while we were at it.

What Are You Seeing? Watch, Listen, and Feel As You Go
Demo isn’t just swinging — you read the job as it comes apart. A few things I pay attention to on a fireplace pull:
If you hear the framing above creak or groan when you pull on the firebox, stop immediately. That’s the sound I ignored on that 90s job. It means the unit is carrying more than its own weight. If you smell that old sooty, creosote reek getting kicked up, get your respirator on and a fan in the window — that dust isn’t something you want in your lungs all afternoon. And if the hearth base feels like it’s fighting you way harder than it should, don’t muscle it — check for a hidden mortar bed or fastener you haven’t cut yet.
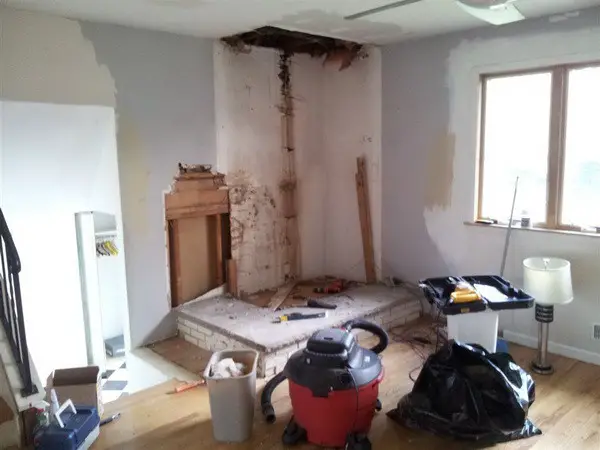
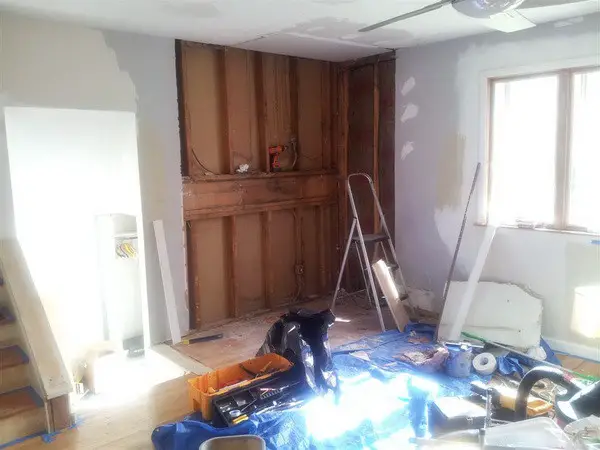
Closing It Back Up: Drywall, Paint, and Floor
The teardown was the fast part — about 2 hours. Putting the room back together is where the clock really runs. Framing and hanging new drywall took a chunk of the day, and painting was another 2 hours on top of that. Then we laid the new wood floor over where the hearth sat and added a stair railing.
Take your time taping and mudding that patch. A fresh drywall repair in the middle of an old painted wall will telegraph every lazy seam once the light hits it in the evening. Prime the whole wall, not just the patch, so the sheen matches.
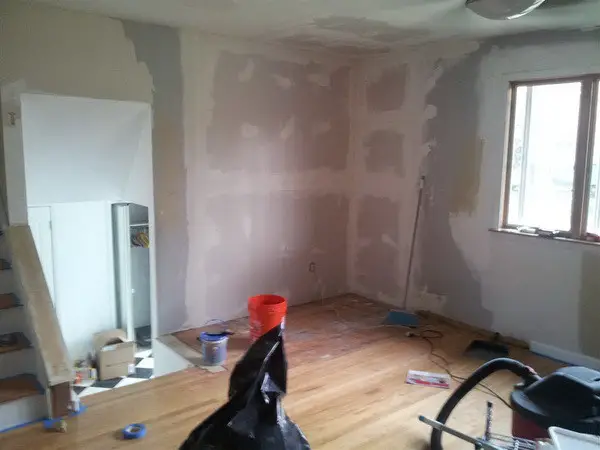
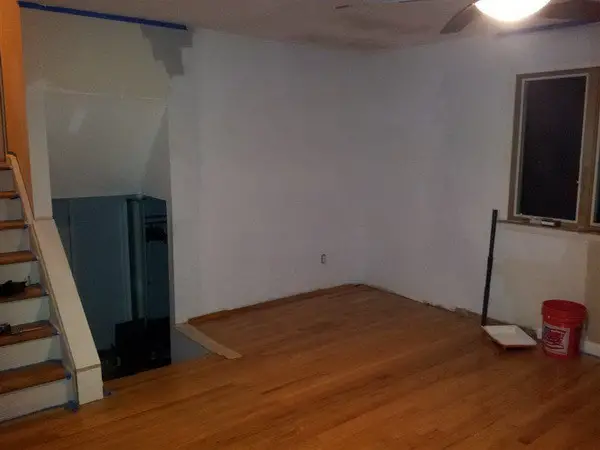
If you’re doing any of this because your fireplace was smoking up the room and you just gave up on it, it’s worth knowing that a lot of those smoke problems are fixable without a full teardown — I walk through the usual culprits in why a fireplace fills the house with smoke. And once the unit and its gas or vent connections are gone, don’t be surprised if a carbon monoxide alarm starts chirping — that’s usually a low battery or end-of-life sensor, not a fresh hazard, but check it anyway.
Watch a Fireplace Removal In Action
Reading the steps is one thing — watching a firebox actually come out of a wall makes the sequence click. Here’s a walkthrough that lines up with how we did ours.
When Should You Call a Pro Instead?
If your fireplace is a full masonry unit tied into a bearing wall or sharing the home’s footing, that’s my honest “don’t do this alone” line. Removing structure without knowing what’s carrying load can crack ceilings, sag floors, or worse. A structural check or a demo crew is money well spent there. For a standard non-structural corner unit like ours, you’re mostly trading a weekend of your time for a contractor’s several-hundred-dollar-plus invoice.
How To Stop Future Problems
Once the fireplace and its vent are out and the wall is closed, do two maintenance things right away. Test any carbon monoxide and smoke alarms in that room and replace the batteries — you’ve just altered the ventilation in the space. And every heating season after, glance at the exterior patch where the chimney used to sit on the roof; a badly done chimney cap-off will leak, and you want to catch that in year one, not year five when it’s rotted the sheathing.
Frequently Asked Questions
Can I really remove a fireplace myself?
Yes, if it’s a non-structural unit. I did our corner fireplace in about 2 hours of teardown. The catch is confirming it isn’t load-bearing first, and that the chimney is already down.
How long does it take to remove a fireplace?
The removal itself took us roughly 2 hours. But that’s the small part — I’d budget a full weekend once you count the drywall (a couple hours), paint (another 2 hours), and any flooring work. We also laid new wood floor and put in a stair railing, which stretched it further.
Do I need to remove the chimney first?
Absolutely, and it comes out from the top down. Ours was removed by a pro and the roof repaired before I touched the interior firebox. I’ve seen people try to yank a firebox with the chimney still standing — don’t. That’s how you end up with a collapse and a hole in your roof.
Is fireplace removal dangerous?
It’s genuinely hazardous, which is why I always wear head, eye, and face protection. You’ve got heavy masonry, sharp old firebox metal, and creosote dust. The bigger danger, though, is structural — pulling a load-bearing unit is where people get hurt or damage the house.
What do I do with the empty space after removal?
Frame it, hang new drywall flush with the wall, prime and paint the whole wall, then finish the floor where the hearth was. We turned ours into the wall for an entertainment center — which was the whole reason I started swinging in the first place.

Written by Keith Schneerer
Certified Appliance Tech · Founder, RemoveAndReplace.com
Keith has spent 30+ years repairing machines, starting as a military mechanic and later maintaining food processing equipment before moving into appliance repair. He founded RemoveAndReplace.com to share field-tested repair advice.
More about Keith →
Hi Liane,
This required two people to physically maneuver the metal flue above the roof while another person helps disconnect it inside of the attic and then assist by forcing it upward. This required plenty of elbow grease and brute strength. The more people you have assisting you the easier it will be. This is the way we removed the metal flue ourselves. It took some time but if done with patience it can be accomplished.
-RR
We are removing the same fireplace unit today. How did you take out the metal flue that leads to peak of house. We can not remove the individual sections. Thank you.