A loft bed is one of the best solutions for maximizing space in a bedroom with high ceilings. By building upward instead of outward, you gain a full sleeping platform while freeing up floor space below for a desk, closet, or lounge area. This build involves careful measuring, selecting the right lumber and fasteners, and assembling everything in the correct sequence to create a safe, sturdy structure that can last for years. With 9 years of commercial food service equipment repair experience, I’ve learned that proper bolt anchoring and load distribution make all the difference.
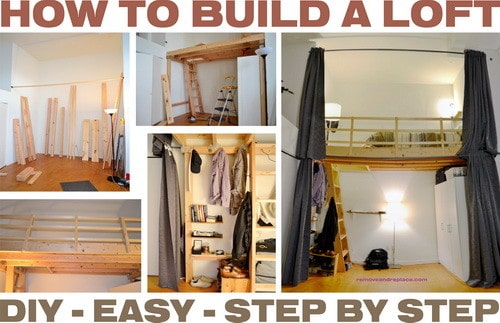
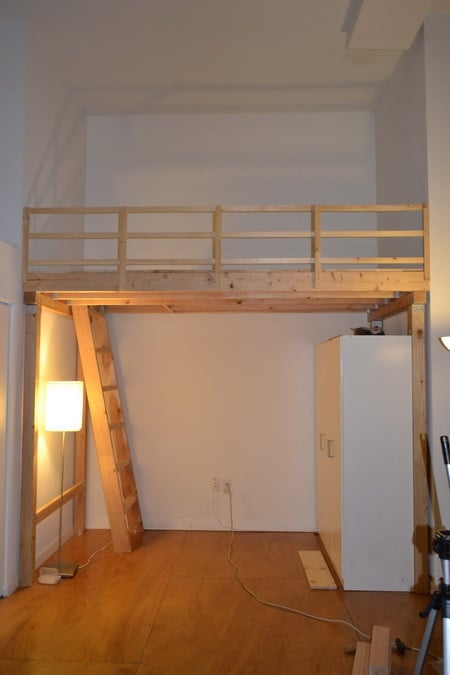
We completed our loft bed build in a 12-hour time span, using every inch of our high ceiling and creating a comfortable new living and sleeping area. Here’s exactly how we did it, step by step.
- A loft bed requires 4×4 posts bolted to walls, 2×6 joist beams, and careful load-bearing calculations for safety.
- Budget 12–16 hours for the full build, depending on your experience level and tool comfort.
- Anchor bolts, deck braces, and quality wood screws are essential for a structurally sound frame.
- Building a ladder, installing flooring, and adding railings are all doable with basic carpentry skills and hand tools.
- A finished loft creates usable space below for storage, a work zone, or additional furniture.
What You’ll Need: Materials and Tools
Materials List
Here’s exactly what we used to build our loft bed. Adjust quantities based on your ceiling height and room dimensions—this list reflects a standard loft for a room with 9–10 foot ceilings and roughly 100 square feet of space.
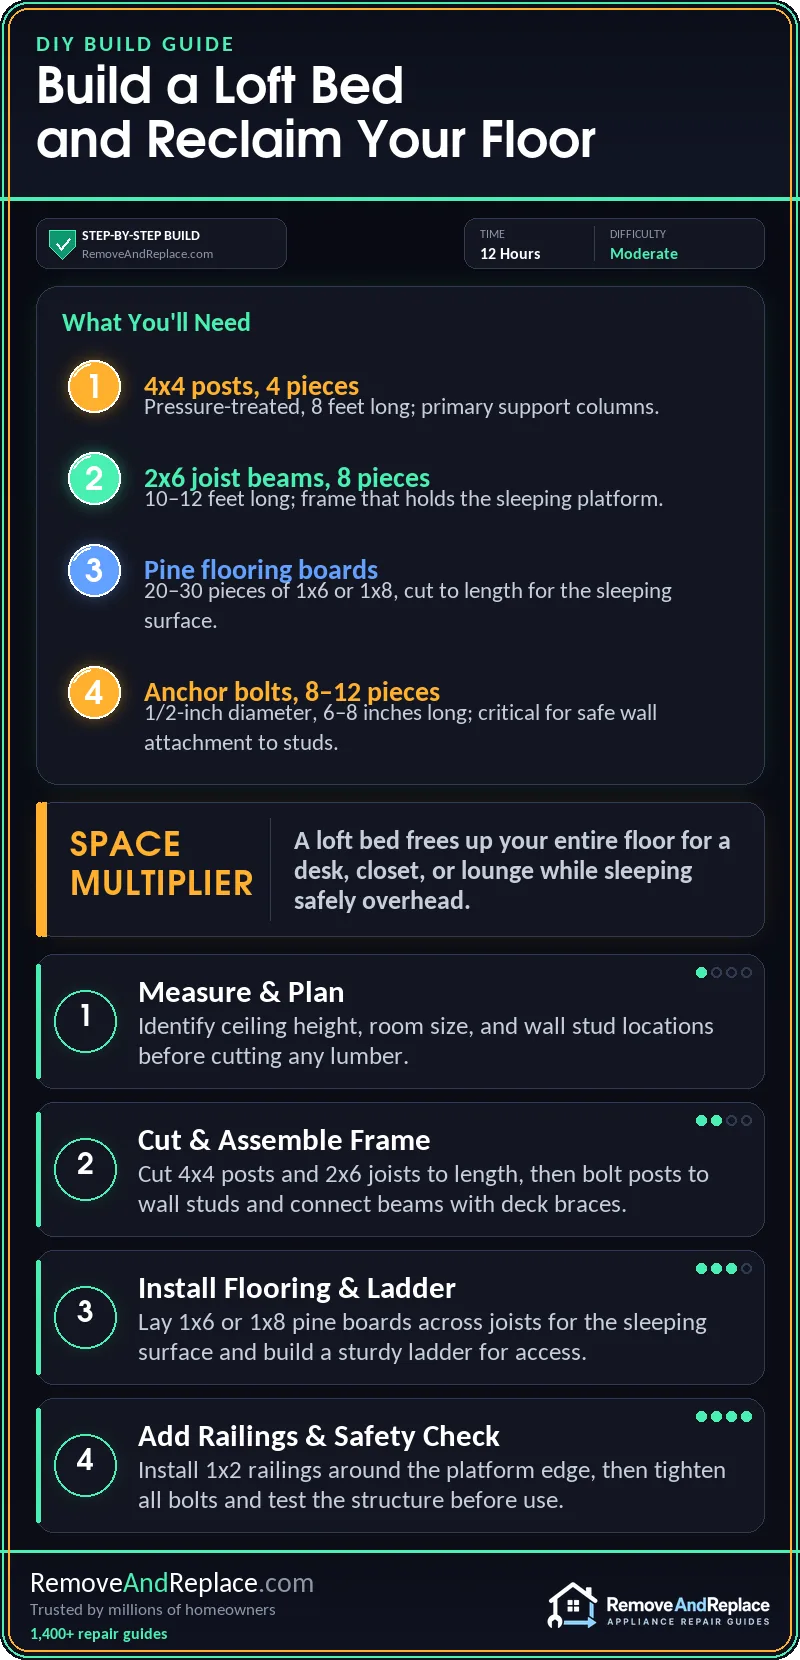
- 4×4 pressure-treated posts: 4 pieces, 8 feet long (approx. $25–35 each; $100–140 total) — these are your primary support columns.
- 2×6 joist beams: 8 pieces, 10–12 feet long (approx. $15–20 each; $120–160 total) — the frame that holds your sleeping platform.
- Pine boards for flooring: 20–30 pieces, 1×6 or 1×8, cut to length (approx. $3–5 per board; $60–150 total) — create the actual sleeping surface.
- 2×4 lumber for ladder steps: 2 pieces, 8 feet long (approx. $8–12 each; $16–24 total).
- 2×6 lumber for ladder sides: 2 pieces, 8 feet long (approx. $15–20 each; $30–40 total).
- 1×2 lumber for railings: 6–8 pieces, 8 feet long (approx. $2–4 each; $12–32 total).
- Anchor bolts (1/2-inch diameter): 8–12 bolts, 6–8 inches long with washers and nuts (approx. $2–4 each; $16–48 total) — critical for wall attachment.
- Deck braces (heavy-duty L-brackets): 12–16 pieces (approx. $3–5 each; $36–80 total) — reinforce beam-to-post connections.
- Wood screws (3-inch and 2.5-inch): 1–2 boxes (approx. $10–15 total).
- Bolts and nuts for connections: 1/2-inch grade 8 bolts, 20–30 pieces (approx. $1–2 each; $20–60 total).
Estimated total material cost: $400–750 (prices vary by region and lumber quality).
Tools You’ll Need
- Power drill with bits (for pilot holes and driving screws).
- Circular saw or miter saw (to cut lumber to length).
- Level (at least 4 feet long, to check posts and beams for square).
- Tape measure (25 feet minimum).
- Stud finder (to locate wall studs for anchor bolt placement).
- Socket wrench set (to tighten bolts and nuts).
- Pencil and carpenter’s square (for marking cut lines and checking right angles).
- Work gloves and safety glasses.
- Step ladder.
Before You Start: Safety and Planning
A loft bed must support your body weight plus the weight of the mattress, bedding, and anything else on the platform. Building codes typically require structures to support substantial loads, and in practice, you should overengineer it slightly. This means using quality lumber, anchoring to wall studs (never drywall alone), and checking every bolt and connection for tightness before sleeping on it.
Measure your ceiling height, room dimensions, and identify wall locations. Wall studs are typically 16 inches on center—a stud finder makes this easy. Plan your loft placement so the posts bolt directly into studs, and ensure at least 3 feet of headroom above the mattress for comfort.
Step-by-Step Build Instructions
Step 1: Prepare Your Space and Materials
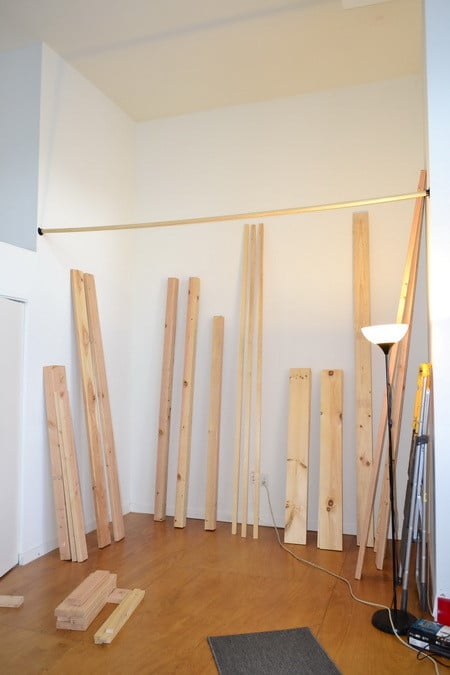
Clear the room completely and lay out all your lumber. Cut the 2×6 joists and 1×2 railings to their final lengths—we used a circular saw for speed and accuracy. Check every piece for warping or damage; use only straight, solid wood for support beams. Organize fasteners (bolts, screws, deck braces) in separate containers so they’re easy to grab.
Step 2: Install the Support Posts and Anchor Them to the Walls
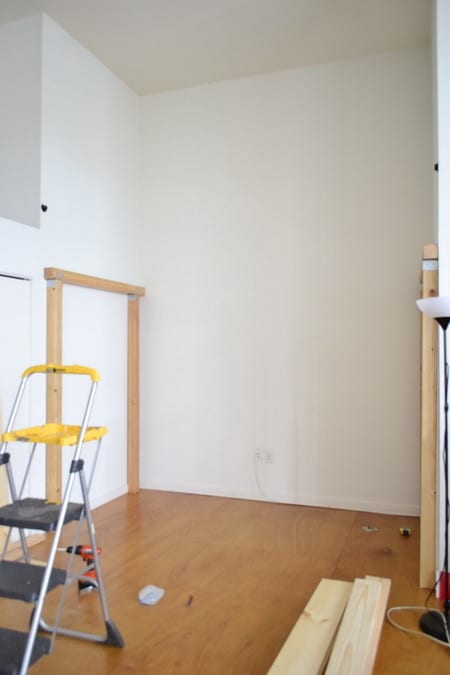
Position your four 4×4 posts in the corners of your planned loft footprint. Use a stud finder to locate the nearest wall studs—you need at least two studs per post for proper anchoring. Use a level to ensure each post is perfectly vertical before drilling.
Drill pilot holes through the 4x4s and into the wall studs. Insert 1/2-inch anchor bolts (6–8 inches long) through the post and into the stud, securing with washers and nuts on the back side. Tighten bolts firmly but do not overtighten—you want them snug enough that the post doesn’t shift, but not so tight that you strip the threads. I always install at least 3–4 bolts per post for maximum security, and I’d never settle for fewer—it’s the foundation of the whole structure. Skimping on fasteners is where most people get into trouble, and I’ve learned through years of hands-on repair work that you’re gonna want to over-anchor rather than under-anchor. The extra time spent here pays dividends in peace of mind and safety.
Step 3: Install the First Joist Beam
Your 2×6 joists run perpendicular to the wall and span the length of your loft. Measure carefully and position the first 2×6 joist so it runs parallel to and roughly in line with one wall. Attach it to the tops of two 4×4 posts using deck braces (heavy-duty L-brackets) and bolts. We used one deck brace per side (two total per connection) and tightened everything securely with bolts and washers.
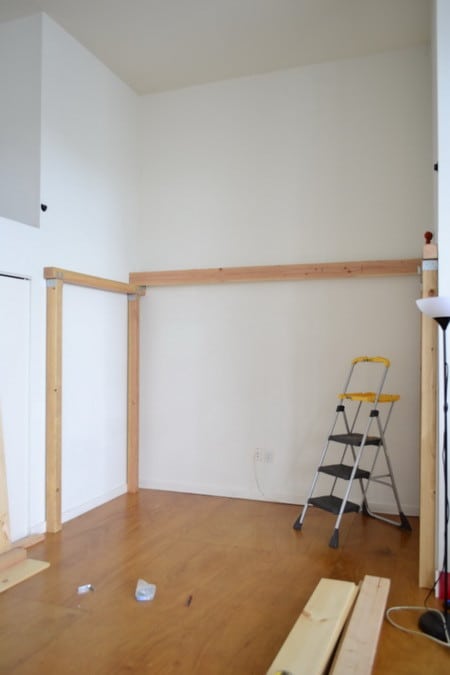
Step 4: Add a Second Joist Beam for Extra Sturdiness
Install a second 2×6 joist parallel to the first, roughly 2 feet away, using the same deck-brace and bolt method. This double-joist approach distributes the load and eliminates bounce or flex in the sleeping platform. We found that adding this second beam makes a real difference in how solid the platform feels. Attach the second joist using bolts driven through both beams into the deck braces.
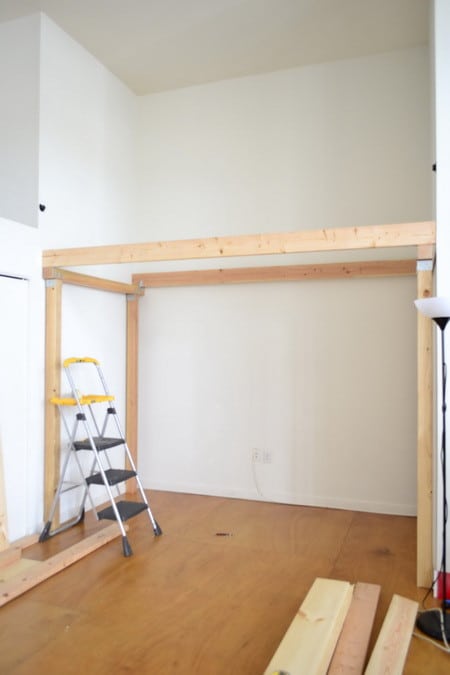
Step 5: Complete the Joist Frame with Two More Beams
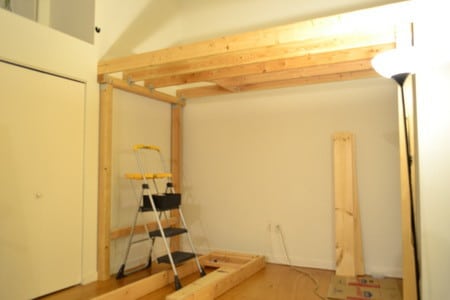
Install two additional 2×6 joists perpendicular to the first two, creating a complete rectangular frame. Use deck braces at every post-to-joist connection, and bolt everything securely. The result is a rigid four-point frame that anchors to all four posts. Check with a level to ensure everything sits dead level—a tilted platform is uncomfortable and stresses joints unevenly.
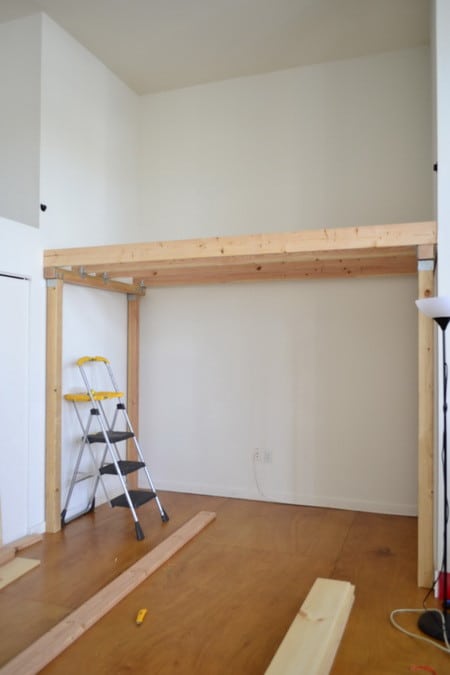
Step 6: Cut an Opening for Your Ladder
Mark out a square opening (roughly 2 feet × 2 feet, depending on your ladder width) in the joist frame for the ladder entry point. Use a saw to cut out this section. Be careful—you’re now removing part of the structural frame, so plan the opening to leave at least 2 feet of joist on either side of it for support.
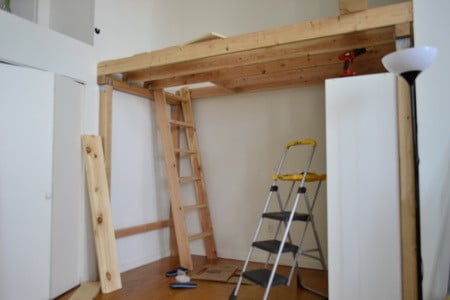
Step 7: Build Your Ladder
Construct the ladder using two 2×6 side rails and 2×4 steps bolted between them. Space steps roughly 12 inches apart for comfortable climbing. We drilled pilot holes through the 2×6 rails and bolted the 2×4 steps in place with washers and nuts—much stronger than simply screwing them. Sand the steps smooth so they’re comfortable to climb barefoot. I’d check the bolts on this assembly every few months, since the ladder gets used constantly and vibration can loosen fasteners over time. It’s one of those maintenance tasks that’s easy to skip but really pays off in safety.
Step 8: Install the Ladder in the Frame Opening
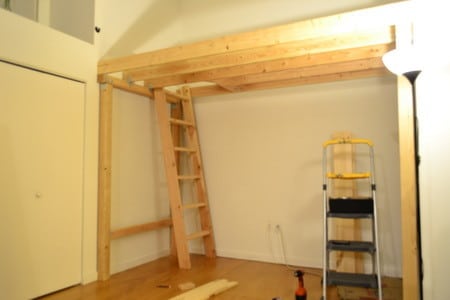
Bolt the completed ladder securely into the square opening you cut in Step 6. Position it so the top aligns with the loft platform and the bottom sits on the floor at a comfortable angle (roughly 70–75 degrees from horizontal is ideal). Use bolts and deck braces to fasten the ladder base to the floor—you don’t want it shifting when you climb.
Step 9: Lay Down the Pine Flooring
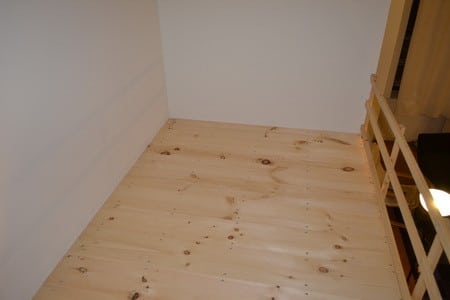
Cut 1×6 or 1×8 pine boards to fit your loft platform, accounting for the ladder opening. Lay boards perpendicular to the joists (so they span between the two parallel 2×6 beams) and screw each board down with 3-inch wood screws—two screws per board, per joist. This creates a solid, comfortable sleeping surface. Space boards so there are no gaps larger than 1/8 inch (to prevent toes or small items from falling through).
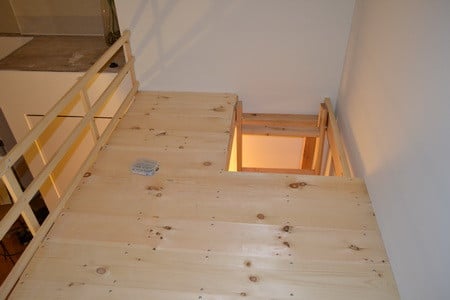
Where the ladder opening is, cut boards slightly short so they fit around it without tight squeezing—this prevents wood movement from binding the ladder. I always leave a little wiggle room here, because wood expands and contracts with humidity, so leaving space now saves headaches later. That’s something I’ve gotta do on every installation to avoid future problems.
Step 10: Install Safety Railings
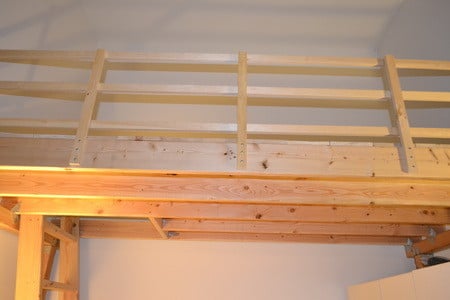
Safety railings prevent you from rolling off the loft platform during sleep. We built railings from 1×2 lumber, creating a frame that runs along the exposed edges of the loft (typically three sides, with the wall side left open if your loft is against a wall). The railing should be at least 36 inches high and built strong enough to stop a person from falling.
Attach the 1×2 rails to the joists using bolts—we used three bolts per post connection. Bolt the railing directly to the 4×4 posts at the corners for maximum strength. I always treat railings as one of the most important safety features, so I don’t skimp on fasteners here.
Step 11: Check All Connections and Tighten Everything
Before using your loft, go through every bolt, screw, and brace and make sure nothing is loose. Use a wrench to tighten bolts, checking that they’re snug but not stripped. Walk around the platform slowly, listening and feeling for any movement or flex. If you notice any creaking or shifting, track down the source and tighten that connection immediately. A solid loft should feel rock-solid—some tiny movement is normal, but anything significant means a connection needs attention.
Finishing Touches: Making Your Loft Complete
Storage and Organization Below
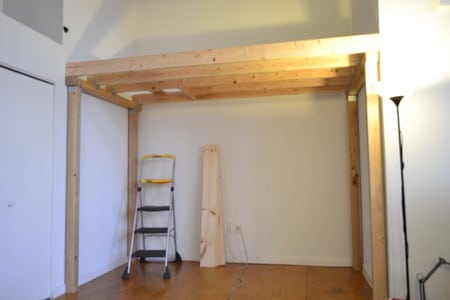
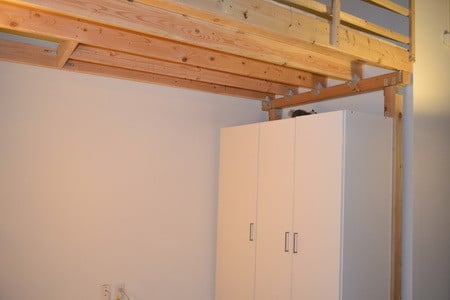
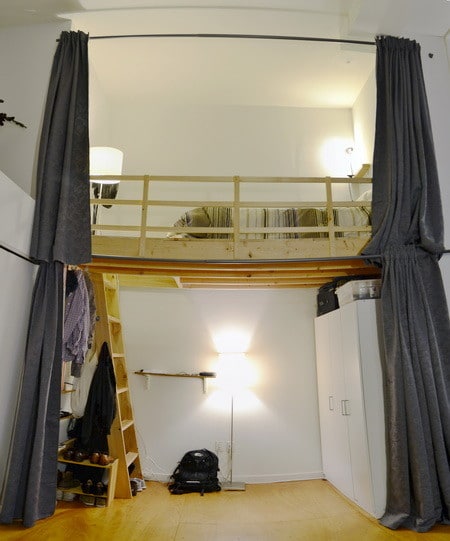
The space beneath your loft is now prime real estate. We installed a free-standing wardrobe closet for clothing storage, leaving room for a desk, shelving, or lounge seating. The beauty of a loft is that you’re not locked into one use—you can rearrange the space below as your needs change.
Add Shelving and Hooks for Extra Storage
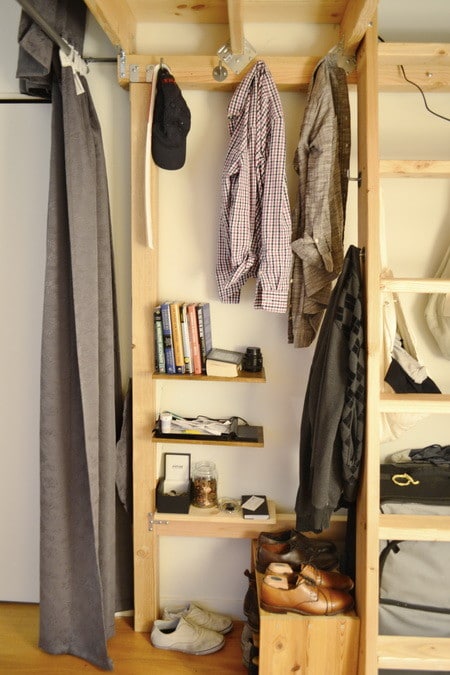
Install wooden shelving and hooks on the sides or underside of the loft to store books, gear, or decorative items. These don’t need to support heavy load, but make sure they’re bolted or heavily screwed in—don’t rely on small picture hangers. We added shelving to one side and hooks along the underside for bags and jackets.
Add Privacy with Curtains or Fabric
If you want privacy or light control, install curtain rods along the edges of your loft using metal pipe and brackets. We used metal pipe to hang curtains, creating an optional enclosure that makes the loft feel like a private retreat. Curtains are easy to open during the day and close at night—and they’re completely removable if you change your mind.
What Are the Safety Considerations When Building a Loft Bed?
Load-Bearing Capacity and Wall Anchoring
The most critical safety factor is anchoring your posts directly into wall studs. Never rely on drywall alone—that’ll fail almost immediately under load. Wall studs carry the full weight of the loft into your home’s frame, and that’s where the load belongs. Most bedroom walls have studs 16 inches on center, making it easy to position at least two studs per post. Always use grade 8 bolts for anchoring; they’re stronger and less likely to strip under stress.
Regular Inspection and Maintenance
I always recommend checking your loft connections every few months, especially if you’ve got kids using it or if there’s been any settling in your home. Look for loose bolts, cracks in wood, or any signs of movement. Bolts can gradually loosen over time due to vibration and wood movement, so routine tightening is just part of maintenance. In my experience, many early failures happen because people build the loft correctly but then never inspect it again.
Common Questions About Loft Bed Building
How much weight can a loft bed hold?
A properly built loft with bolted 4×4 posts and 2×6 joists should safely support typical scenarios with one or two people plus a mattress and bedding. Always overengineer—use more bolts and stronger fasteners than you think you need. In my experience, the over-built approach is always the right call.
Do I need a permit to build a loft bed?
In many cases, a permanent loft bed attached to your home’s walls falls under local building codes and may require a permit or inspection. Check with your local building department before you start. If you’re renting, check your lease—some landlords prohibit structural modifications. A proper permit inspection is actually a good thing: it means an official confirms your loft is safe.
Can I build a loft bed without attaching it to walls?
Technically, yes—you could build a freestanding frame using four large support legs bolted together. However, wall attachment is far superior because it distributes the load into your home’s structure. A wall-anchored loft is safer and will last longer. In my experience, wall-anchored designs are always the more reliable choice.
How long does a loft bed take to build?
We completed ours in 12 hours, but this assumes you have power tools and basic carpentry skills. If you’re new to building, budget 16–20 hours. The biggest time sink is usually cutting lumber to exact lengths and drilling pilot holes for bolts. Pre-cut lumber from your supplier can shave a few hours off the project.
Next Steps: Learn More and Explore Resources
If you want additional design ideas, detailed plans, or variations on the loft bed frame, check out Ana White’s free loft bed plans, which include extensive diagrams and material lists. Instructables also offers a step-by-step DIY loft bed guide with community comments and variations. For a slightly different approach, Shanty 2 Chic’s loft bed plans include design styling tips alongside the build instructions.
A loft bed is a rewarding project that transforms your room and costs far less than buying a pre-made unit. Take your time, bolt everything securely, and you’ll have a platform that supports you safely for years to come.

Written by Keith Schneerer
Certified Appliance Tech · Founder, RemoveAndReplace.com
Keith has spent 30+ years repairing machines, starting as a military mechanic and later maintaining food processing equipment before moving into appliance repair. He founded RemoveAndReplace.com to share field-tested repair advice.
More about Keith →


I absolutely love this loft bed and tutorial. I don’t have a nook to build one in. Also, the wall in my bedroom that a bed would be against is made of plaster… I love your design so much, do you think additions could be made so it could be free-standing?
I just built pretty much an exact copy, using your photos. I’m very happy with it. Thanks.
What size bed are you using? I’m making a similar style, however could 2×4 by used instead of 2×6 for a smaller area. Let’s say 4 feet by 8ft? (w/o the cut out for ladder of coursem will add ladder to outside.)
What size bed is that? and the dimension of the nook? :)
Luke,
Those deck braces were in an unmarked bin. You should just be able to find “square deck braces” at any home improvement store.
-RR
What are the square shaped braces you used to attach the 2×6’s to the 4×4? I know they’re deck braces but I can’t seem to find anything that looks similar. Is there a specific name or a link you can share?
This design is so easy and simple but I’m stuck on that brace!
Grace,
Approximately 300 pounds or 135 kilograms.
-RR