Nobody ever reports this one as a spring problem. They say the door “just falls” when they pull the latch, or it pops back up on their hands while they’re loading the bottom rack, and the complaint always sounds about the same. It used to hold where you left it, and now it doesn’t. It feels like the dishwasher turned on you.
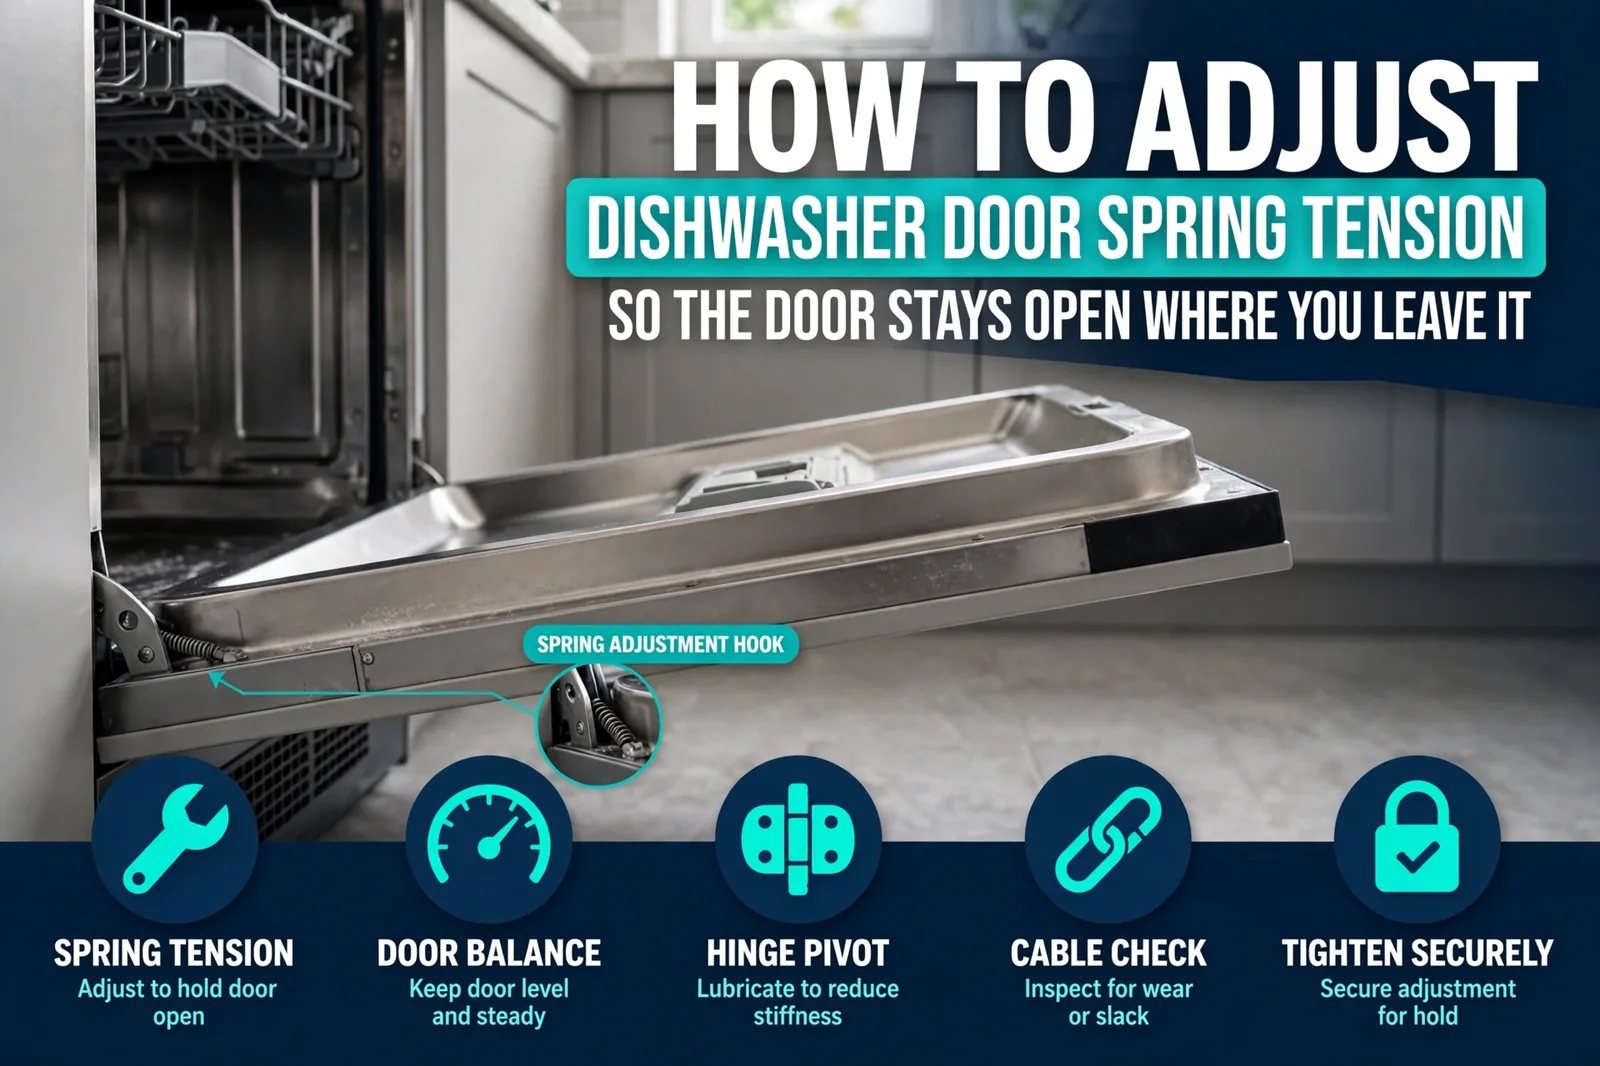
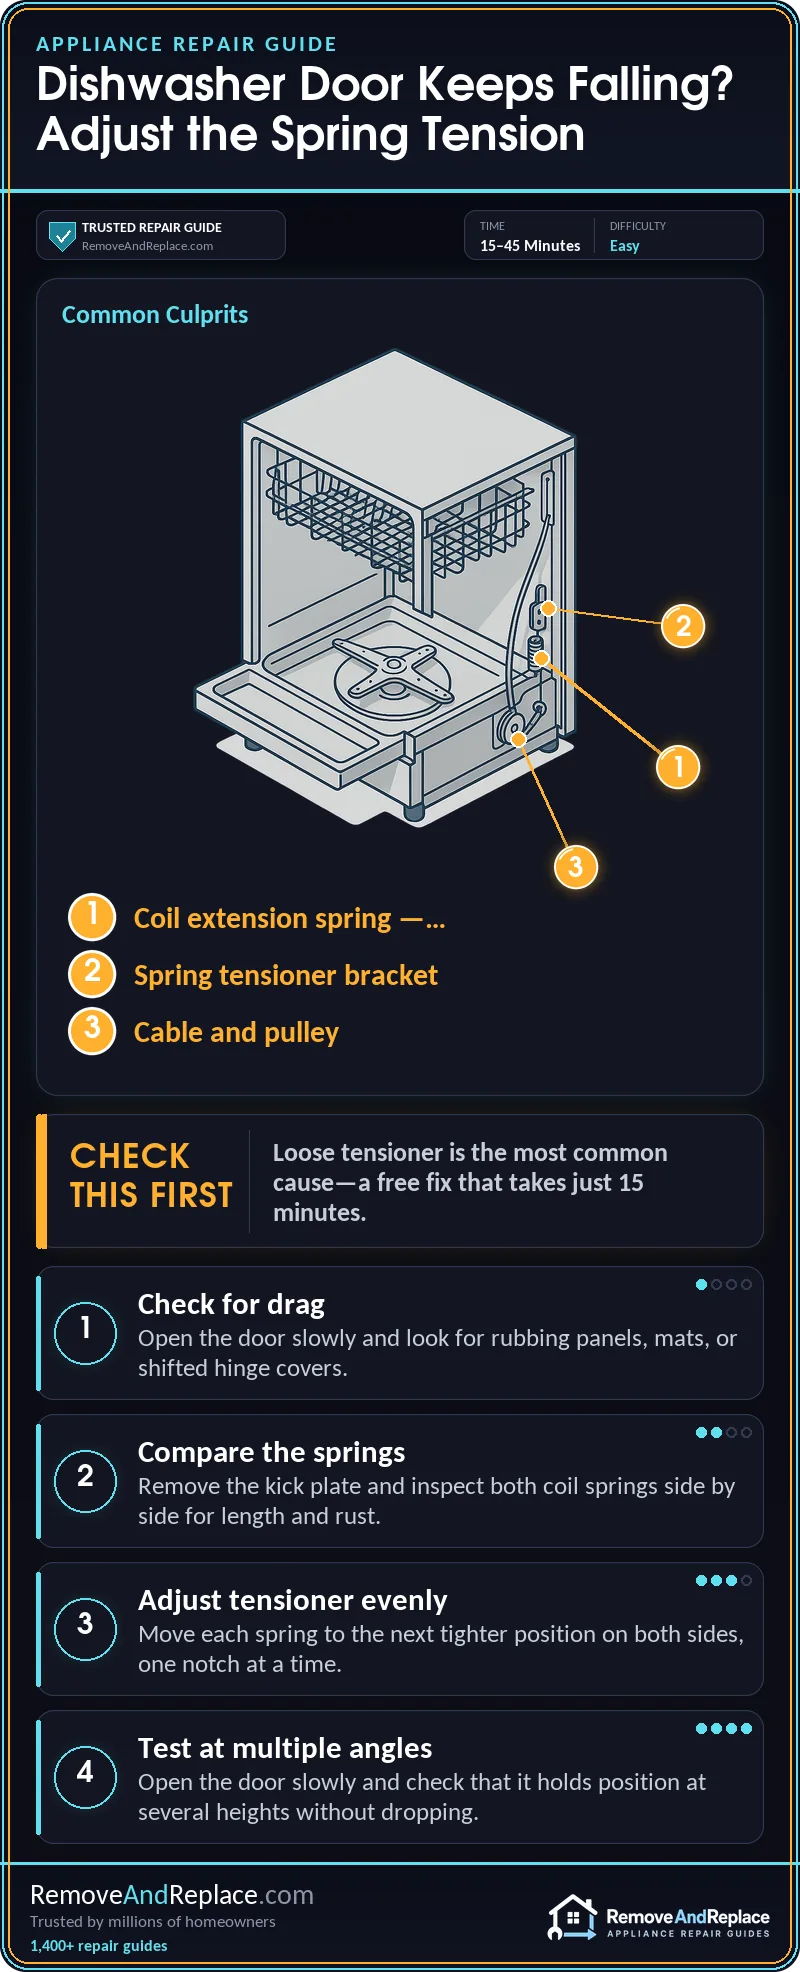
To adjust dishwasher door spring tension, move each spring one notch tighter at the tensioner behind the lower kick plate, to the matching position on both sides, then test the door at a few angles. If it still drops on the tightest setting, the spring or cable has failed and needs replacing.
- Rule out drag and a slipped cable before you touch the tensioner.
- Go one notch at a time and retest after each.
- A heavy custom panel or stainless front changes where the starting setting should be.
Why Does My Dishwasher Door Drop Open Too Fast?
A dishwasher door is a heavy hinged panel counterbalanced by a spring on each side, connected through a cable and pulley. When it drops open too fast or won’t stay where you leave it, that counterbalance has lost its pull. Stretched or weakened springs and a tensioner set too loose are the usual suspects; a slipped cable or a broken spring can cause it too. A loose tensioner is a free fix, while a failed cable or spring means buying a part: springs typically run about $10-30, and spring-and-cable kits about $30-50. Counterbalance springs and cables are familiar ground from my 19 years in Air Force aircraft maintenance, so I check cable, then springs, then tensioner.
Everybody assumes the spring stretched out and needs replacing. More often than people think, the tensioner is just set too loose, and sometimes a cable has slipped, which changing the tension won’t fix. That’s why the diagnosis comes before the screwdriver.
| Cause | Likelihood | Fix Cost | DIY Time |
|---|---|---|---|
| Tensioner set too loose | Most common | Free | Quick |
| Heavier panel or front added | Common after a panel swap | Free | Quick |
| Worn or broken spring | Common | $10-30 | Longer |
| Cable off pulley or frayed | Less common | About $30-50 (kit) | Longer |
Check for Drag First
Before you pull anything, rule out drag. It’s free and takes thirty seconds, and I check it first every time because a door that’s catching on something feels exactly like weak springs.
- Open the door slowly and watch for a rug edge or mat touching it.
- Look for a loose panel screw rubbing the tub.
- Check that the hinge covers haven’t shifted. If the door swings clean, keep going.
Is It the Spring or the Cable?
If the door drops evenly at every angle, suspect loose tension or tired springs. If one side sits lower than the other, suspect a slipped cable, though a broken spring or mismatched settings can do it too. Two minutes with the kick plate off will tell you which, and SearsPartsDirect’s page on doors that drop open too fast lines up with what I’m describing.
The common case first. A coil extension spring is a simple part, and a tired one looks different from its twin. Compare the left and right springs side by side: the weak one is slightly longer and its coils don’t sit snug like the good one’s, and sometimes it’s got a rusty bloom on it. You’ll usually feel it too. The door gives that soft, mushy drop with no resistance, instead of the steady push-back a healthy door has. Whirlpool-built units hook each spring into one of several holes or notches, and a spring that’s been sitting in the loosest one for years is the classic suspect.
Now the rare one. If the gap along the top edge of the door is wider on one side, or the door looks slightly twisted when it’s open, suspect a cable that’s ridden up off its pulley groove and jammed beside it. It tends to happen after a door gets yanked open with a loaded rack or after someone muscled a panel into place. Changing the tension won’t fix it, and cranking the springs tighter only makes things worse. Shine a flashlight down at the pulleys (you’re gonna want one, it’s dark in there) and check that each cable sits in its groove with no fraying at the ends.
If you see water stains or damp spots on the floor under the front edge, that’s a separate problem. That points to a leak at a hose connection or drain seal, not the springs.
Watch the Adjustment Before You Pull the Kick Plate
Watch how the spring sits before and after the change. Your unit’s layout may differ a bit by brand.
Step-by-Step: Tightening the Door Springs
Here’s how to adjust dishwasher door spring tension on a typical built-in unit. Layouts vary by brand, so confirm against your manual or the parts diagram for your model number. You’ll need a 5/16-inch nut driver (the size Whirlpool specifies; check what your unit takes), needle-nose pliers, a flashlight, and your phone. Plan on it taking longer the first time.
Turn the dishwasher off at the breaker, not just the control panel. Never disconnect a spring or cable with the door unsupported. It drops flat, can damage the hinge, and your hands are right there. Wear gloves, because those coil ends are sharp.
- Open the door fully so it’s resting in its lowest position, with the power still off at the breaker.
- Remove the lower kick plate. It’s held by screws along the bottom front on most units, though some need the lower panel lifted off.
- Take a photo of both springs and where each one is hooked. Don’t skip this; it’s the only way to put things back the way they were. Whoever hid the one adjustment people actually need behind a kick plate with screws that strip if you look at them wrong never did this on their knees on a kitchen floor.
- Find the tensioner on each side. On Whirlpool and KitchenAid stainless tubs the spring hooks to the rear leg and a tensioner screw sits in hole 1, 2 or 3 of the front leg; on plastic tubs you move the spring end to a different notch. Other brands use a different adjuster, so go by your manual. Note which position each side is in.
- Move each spring one position tighter, using the pliers to unhook and re-hook it. On a screw-type adjuster, make equal adjustments on both sides.
- Test the door. Lift it to about 45 degrees and let go, then try near-horizontal. Then roll out the lower rack with a couple of heavy pans in it, which is roughly what loading does to the door. It should hold at every angle without creeping.
- If it still drops, go one more notch on both sides and retest. If it tries to pop up when you release it, you’ve gone too far, so back off one notch.
- Refit the kick plate, restore power, check that the door latches with a light push, and run a short cycle.
The wrong fix I see most is cranking both springs to the maximum to fight a door that’s really dropping because of a slipped cable. I’ve made that mistake myself, tightening until the door felt solid, and the downside is real: an over-tensioned door pops itself back up and puts extra strain on the latch. Tighten one notch at a time and stop when it holds.
Custom Panel or Heavy Stainless Front? Re-Balance for the Weight
A panel-ready cabinet front or a thick stainless door adds weight the factory setting was never meant to carry, and it’s one of the things most guides skip. After a panel swap, re-adjust until the door stays put at about 45 degrees, keeping both sides on the same notch, then run the loaded-rack test from step 6. If the tightest position still can’t hold the door, check the springs and cables for wear, and ask a parts desk about the right springs for your model rather than rigging something up.
When Adjusting Stops Working
If the tensioner is already on its tightest position and the door still drops, the spring is done. A replacement spring runs about $10-30, and no more adjusting will change that. Other signs it’s past adjusting: a spring visibly longer than its twin with spaced-out coils, rust that’s eating into the wire, or a cable that’s frayed or won’t stay in its pulley groove. SearsPartsDirect’s repair guide and Bluestar’s step-by-step both walk through the swap itself.
When to Call a Pro
A spring typically runs about $10-30 and a spring-and-cable kit about $30-50, depending on brand and where you buy it. A service call for the same repair typically runs about $90-200. If you’re comfortable with a nut driver and a pair of pliers, you’re saving on the order of $100. Call a pro if:
- The hinge arm or door frame is bent or cracked.
- You find damaged or corroded wiring down where the springs live.
- The inner door panel has to come apart to reach the cable on your model.
Keeping the Door From Drifting Again
Don’t use the open door as a step or a seat, and don’t set a stack of heavy pots on it while you load. Lower it gently instead of letting it fall. Once a year, when you pull the kick plate to clean under there, compare both springs side by side. If one has started to look longer than the other, it’s time for a pair, since replacing them together keeps the tension equal on both sides. After any panel swap, redo the loaded-rack test from step 6. And if the racks themselves are the thing giving you grief, this guide on top rack cleaning issues covers that side of it.
FAQ
Do both springs need the same tension setting?
Yes, set both sides to match. Whirlpool and KitchenAid both say so, and some models use one tensioner screw per side moved between holes while others use notches, so follow your manual for how. Mismatched springs make the door tilt or drop unevenly, and I’ve never seen a case where uneven settings turned out to be the right answer.
Can I fix this without pulling the dishwasher out from the cabinet?
Usually, yes. On most built-ins the springs sit behind the lower kick plate, so I start there before I even think about unscrewing the unit from the counter. If yours hides the tensioner behind the inner door panel, check your manual or the parts diagram for your model. Own a portable unit instead? The portable dishwasher installation and maintenance guide is the better reference.
Will tightening the springs fix a door that won’t latch or start?
No. Springs and latches are separate parts, so a door that closes but won’t start a cycle points at the latch or door switch. The latch and door-switch checks in this no-start guide apply on most brands.
How long can I keep running it with a drooping door?
Not long, because a door that free-falls is hard on hinges, cables, and shins.
Is it worth fixing the door spring on an older dishwasher?
If the rest of the machine is healthy, yes. It’s one of the cheapest repairs on a dishwasher, and I’d happily do it on a ten-year-old unit. I’d think twice only if the tub is rusting through or the pump is already failing, because a spring isn’t worth chasing on a machine that’s dying somewhere else.
That’s the whole job. If the door holds at three angles with a loaded rack out, go load the dishwasher and forget it exists, which is how it should be.

Written by Keith Schneerer
Certified Appliance Tech · Founder, RemoveAndReplace.com
Keith has spent 30+ years repairing machines, starting as a military mechanic and later maintaining food processing equipment before moving into appliance repair. He founded RemoveAndReplace.com to share field-tested repair advice.
More about Keith →