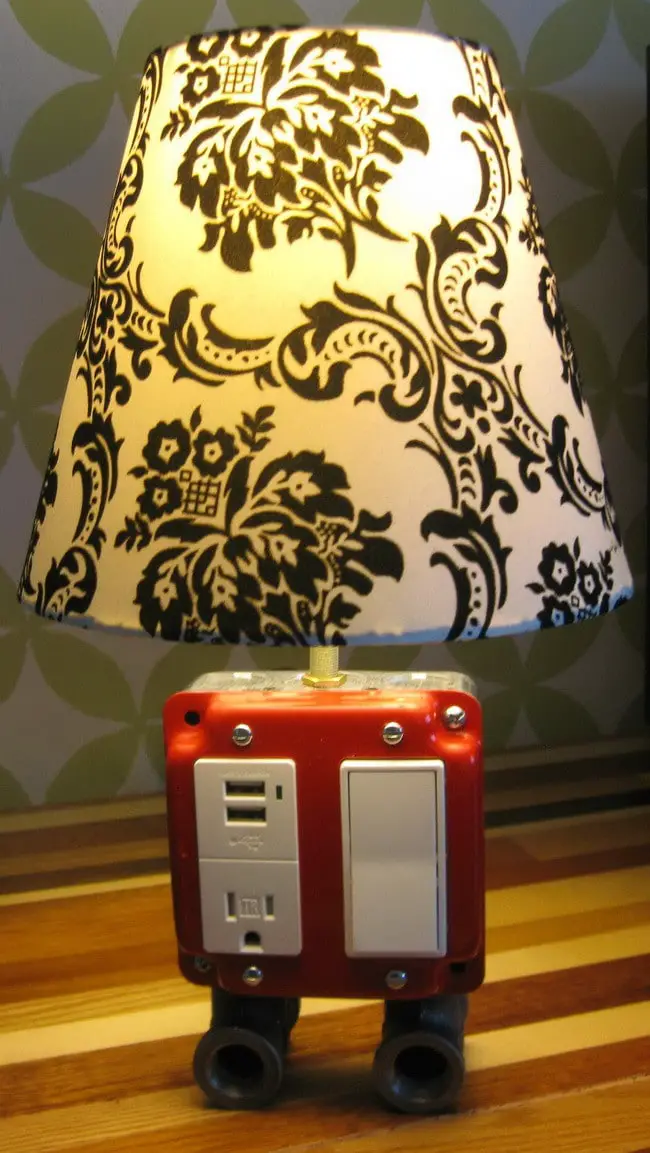
Here is a fun diy project that only takes a few hours and will run you around $50 dollars. The combo Lamp, electrical outlet and USB charger.
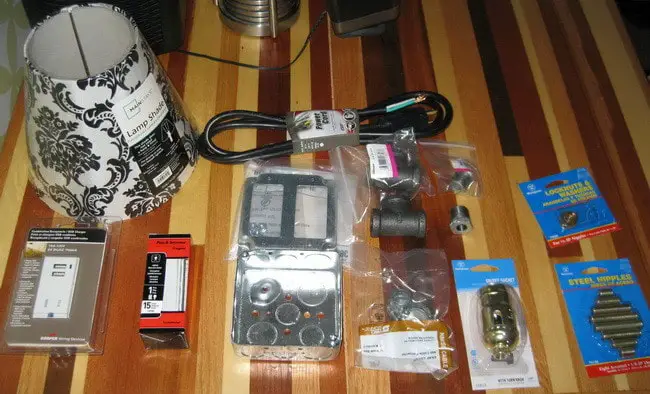
Here is everything that you will need with prices included:
Junction box – $1.02
Cover – $1.25
Outlet and 2.1 AMP USB – $15
Snaplock Connector – $1
1/8 nipples – $5
Wirenuts – $1
Rust-Oleum Spray Paint – $3.87
Electrical Tape – $1.50
Nuts and washers – $1.50
1/2 T – $4
Grounded cord (3 wire) – $5
Light switch – $2.97
Lamp Socket – $5
Galvanized bushing – $4.50
Lamp shade – $5
Total cost – $59.85
Hi-Res Printable Illustrated Parts List
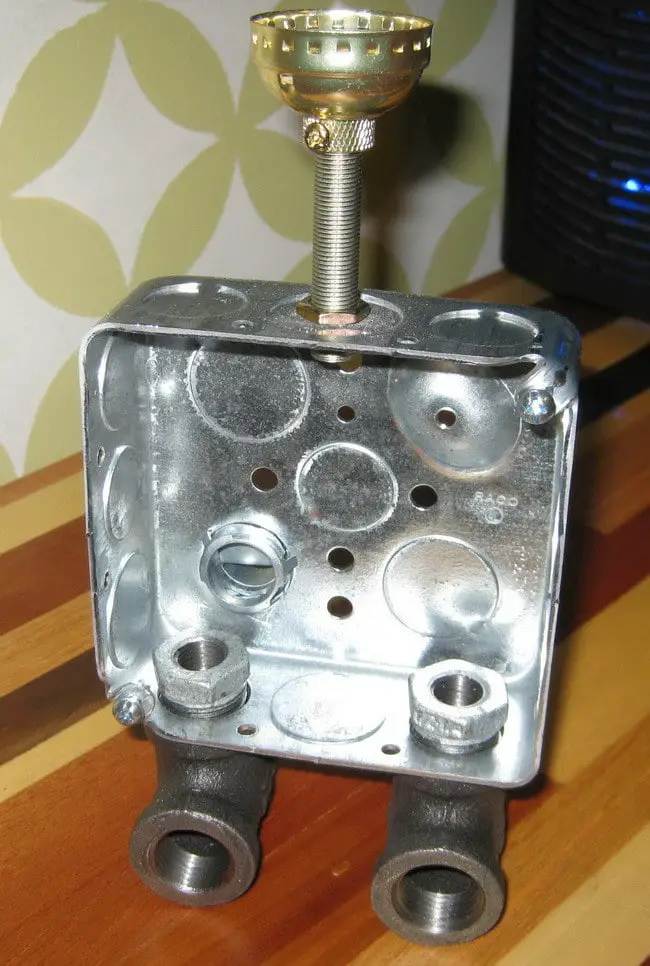
THE LIST – Outlet with usb, light switch, junction box. (there will be a variety of styles deep, square, plastic, metal).
The feet are galvanized and painted fittings from the plumbing section. Two “tees”, and some threaded reducer bushings to connect through the knockouts of the junction box.
In the lighting section they’ll have diy lamp kits, and will have threaded rods, harps to hang the shade on if needed.
You could always just print out the pics, or put them on your phone if possible, show them to the person at the home improvement store and they will help you find everything.
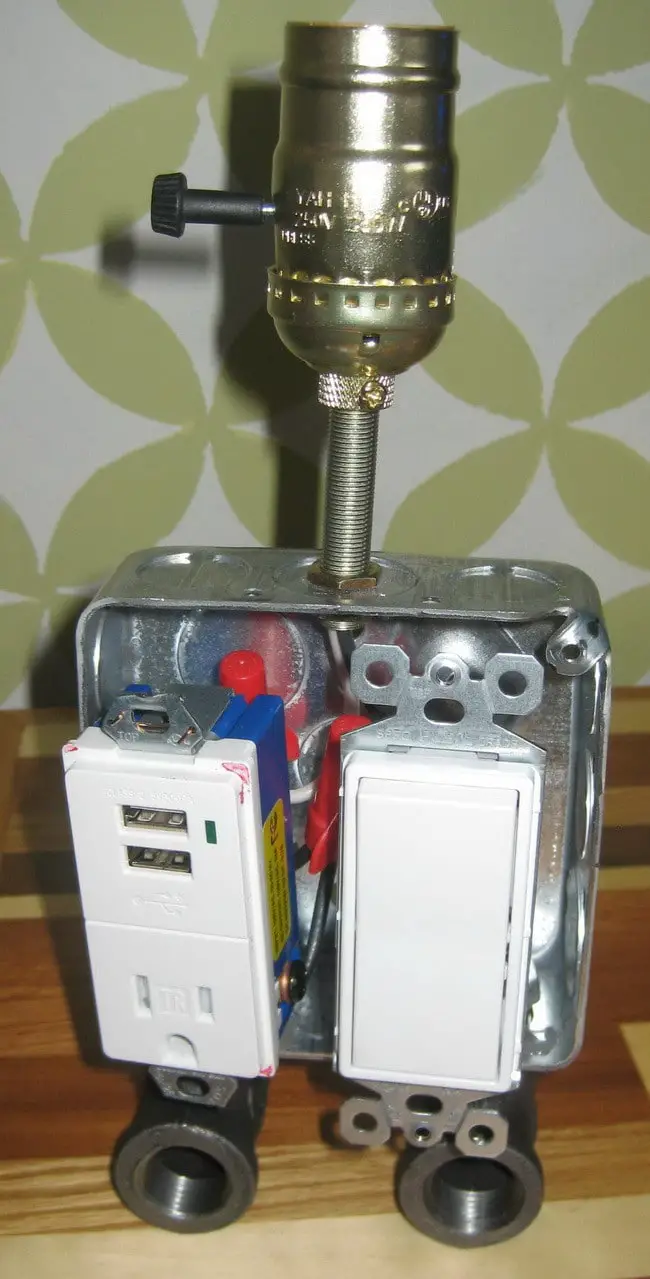
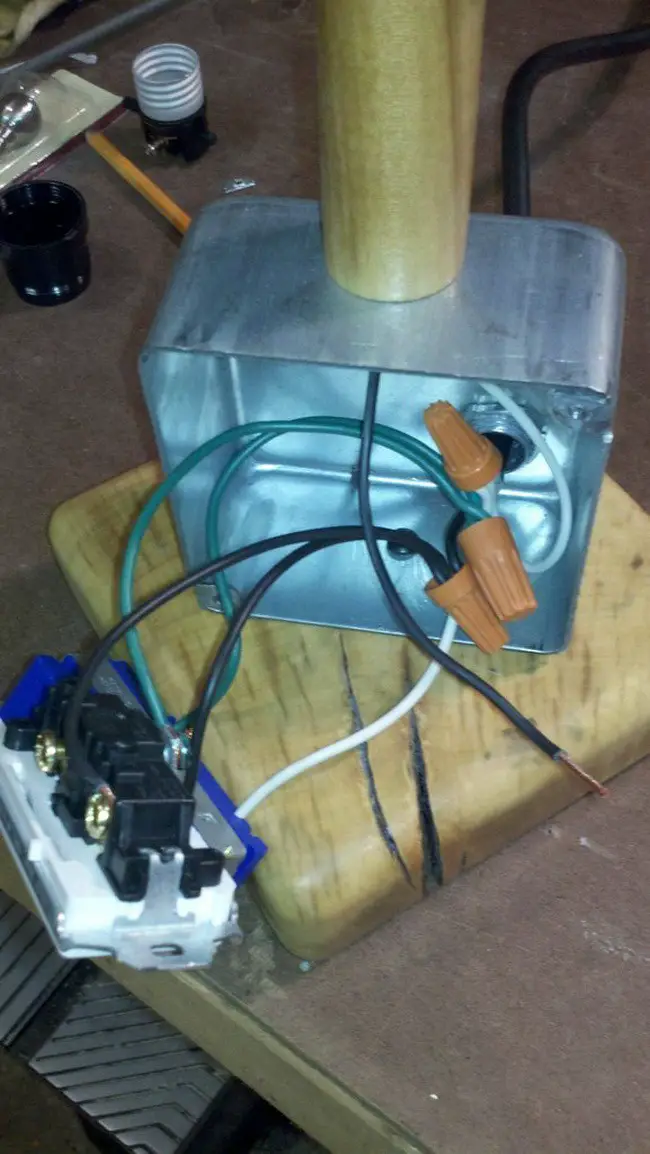
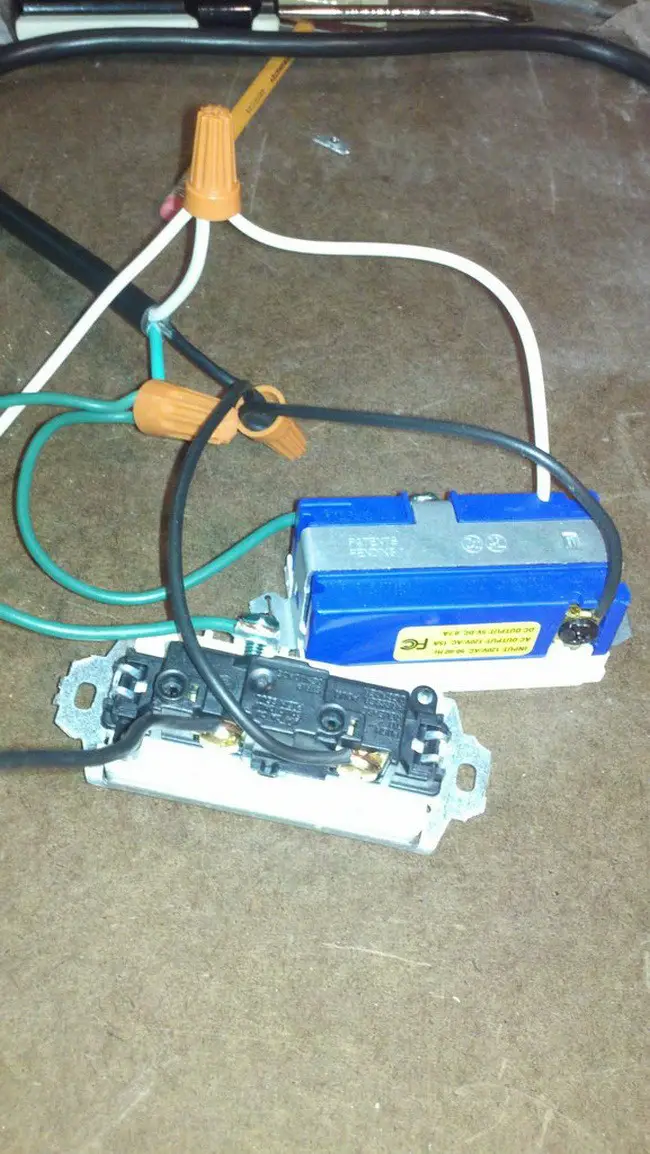
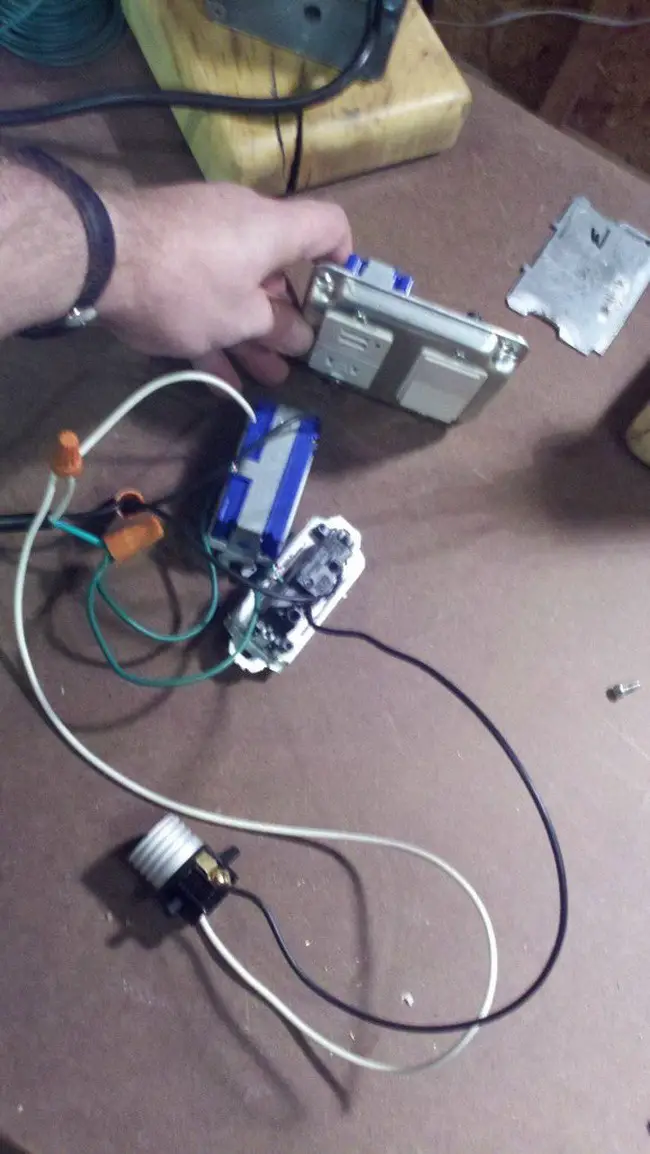
For those of you not an electrical genius, here is a not so professional way of hooking up the wiring – Connect green ground from cord to the green ground of the switch, outlet, AND THE METAL CASE, and the light socket if it has a shell ground. (As long as the metal body of the box is grounded, you are ok.)
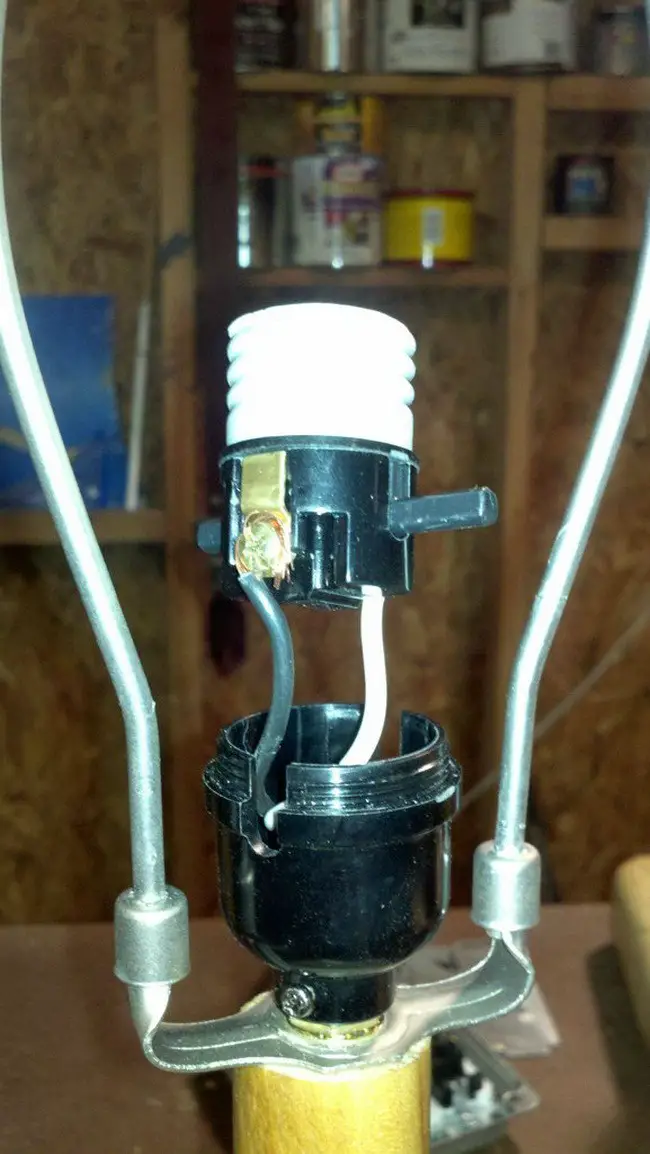
Connect the white neutral wire of the cord to the terminal labeled neutral on the outlet (usually a silver screw) and to the white or outside threaded part of the light socket.
Connect hot black of the cord to the hot of the outlet (usually gold screw) and to one side of the switch. Connect the other side of the switch to the center hot terminal of the light socket.
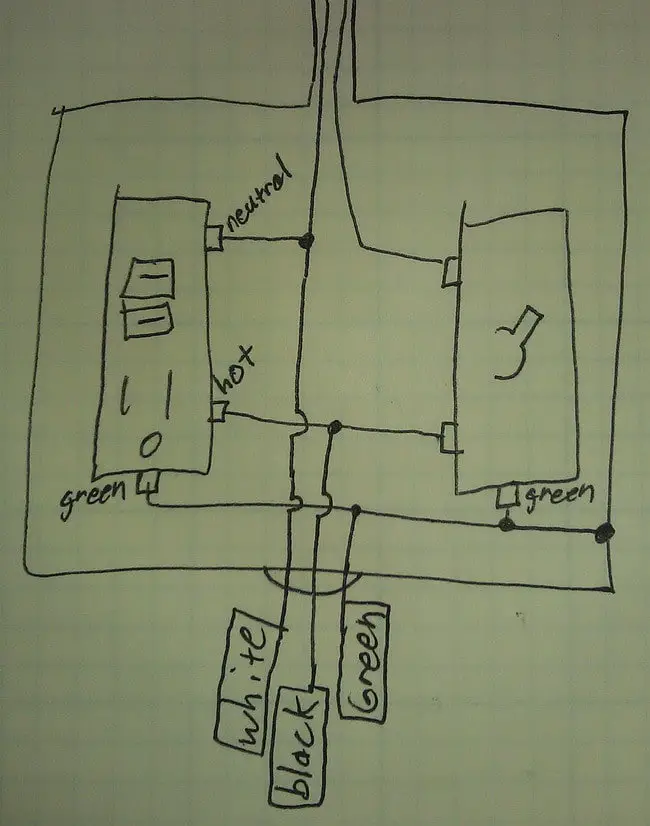
You will need 4 more pieces of wire to get power to the outlets. Have a look at the wiring schematic above. We actually cut about 5 inches of wire off of the end of the cord we bought and used that for the extra wiring. 4 pieces of wire are needed to complete the wiring – A small white wire (neutral) A small black wire (hot) and two green wires (ground). The black wire will go from the USB outlet directly to the switch. The white wire will get spliced from the USB outlet to the white wire. (2 small green wires used here) One green wire will go from the green ground screw on the USB outlet to the green screw on the switch and the second will be grounded into the metal housing box. (NOTE: The black wire is the “hot” wire, power travels from the wall and up and into the switch (look at schematic above) the switch is used only to turn on and off the light. The USB outlet is ALWAYS powered regardless which way the switch is turned on or off.) Remember, it is a good practice to wrap the outlets with electrical tape to cover the screws when using metal junction boxes (you do have the option to use a plastic junction box instead). When you are pushing all that stuff back in and something touches the metal, it will cause a spark and or shock so wrap well in electrical tape.
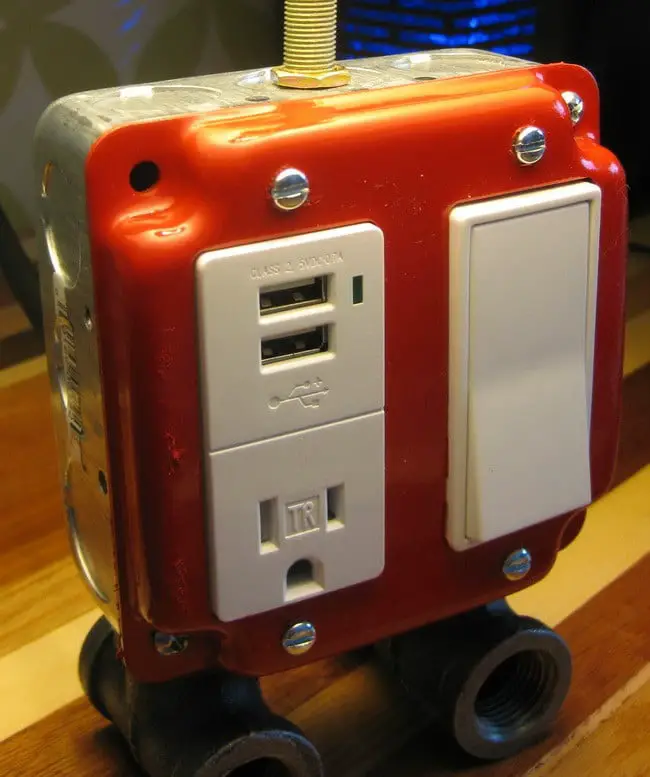 The power comes in from the wall to the outlet, then from the outlet to the switch, and from the switch to the light. So yes, the outlet works when the lamp is turned off. Also make sure the USB / Outlet is rated at 2.1 amps so it won’t be an issue charging your iPad.
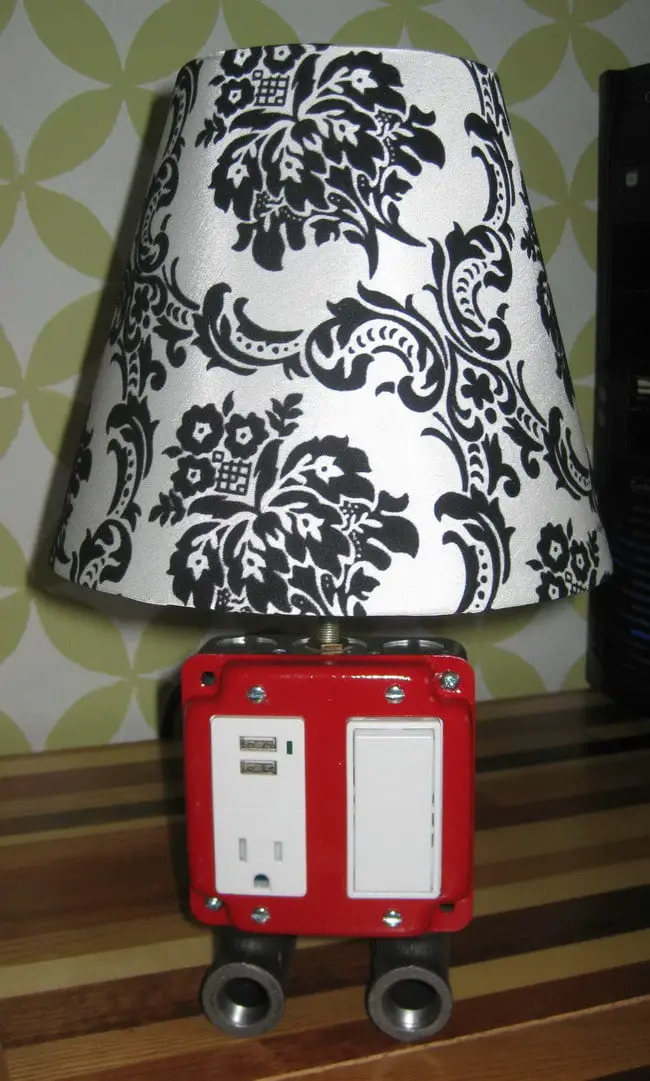
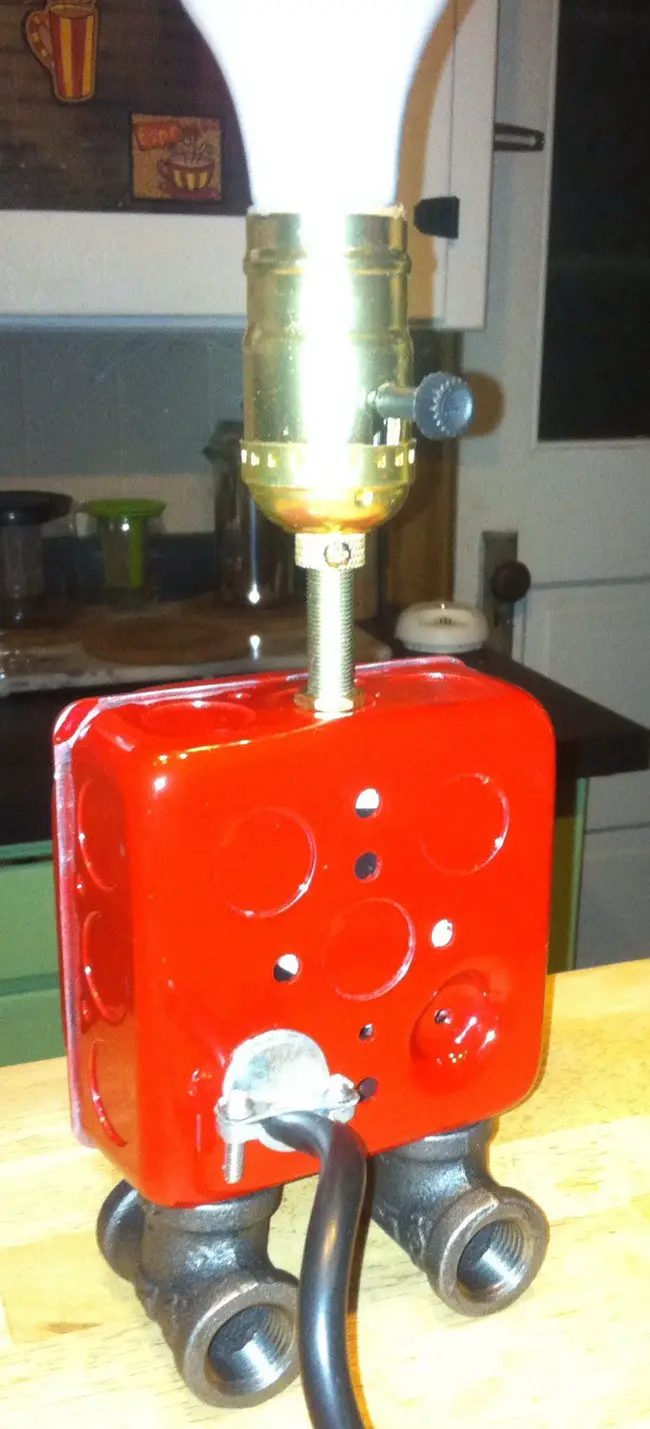
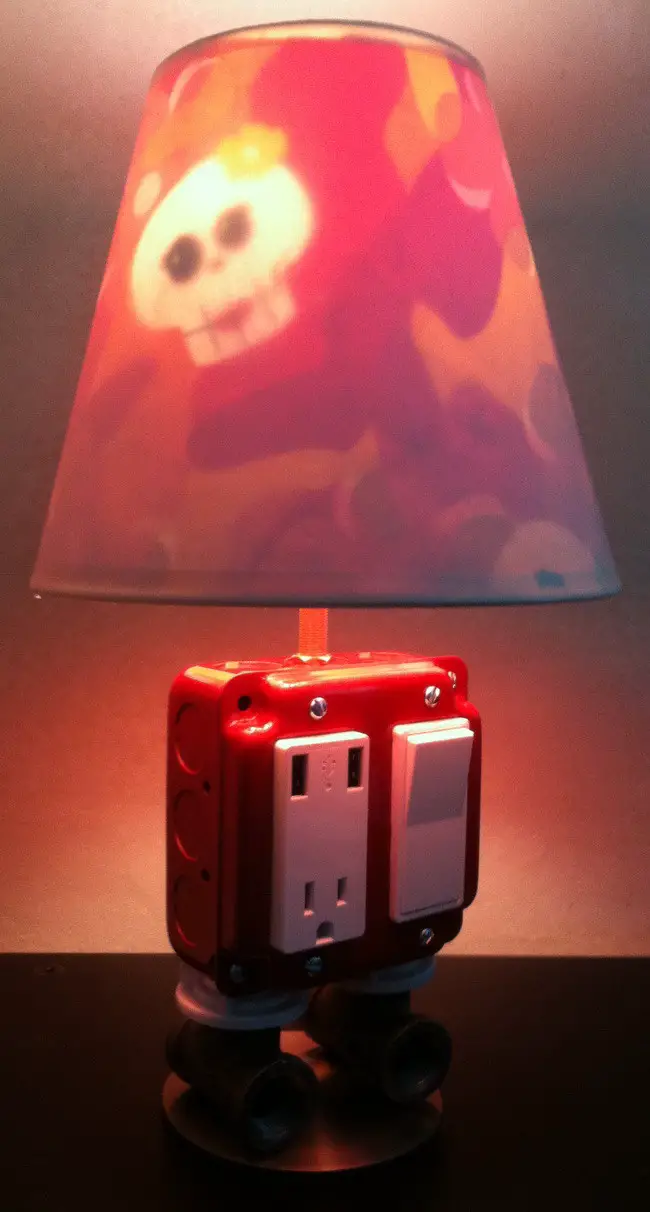
The above USB Charger/Lamp Combo was sent in by one of our readers.
They followed our plans and went a few steps further by creating a custom lampshade.
When off, the lamp shade is white. Turned on, the cool colors appear!
Also notice the bottom circular plate that the lamp stands on.
This adds for a better appearance and keeps the lamp sturdy.
(A special thanks to Mark Justin for sending this photo to us)
*** FOR THOSE HAVING ISSUES WITH WIRING – PLEASE SEE BELOW *** 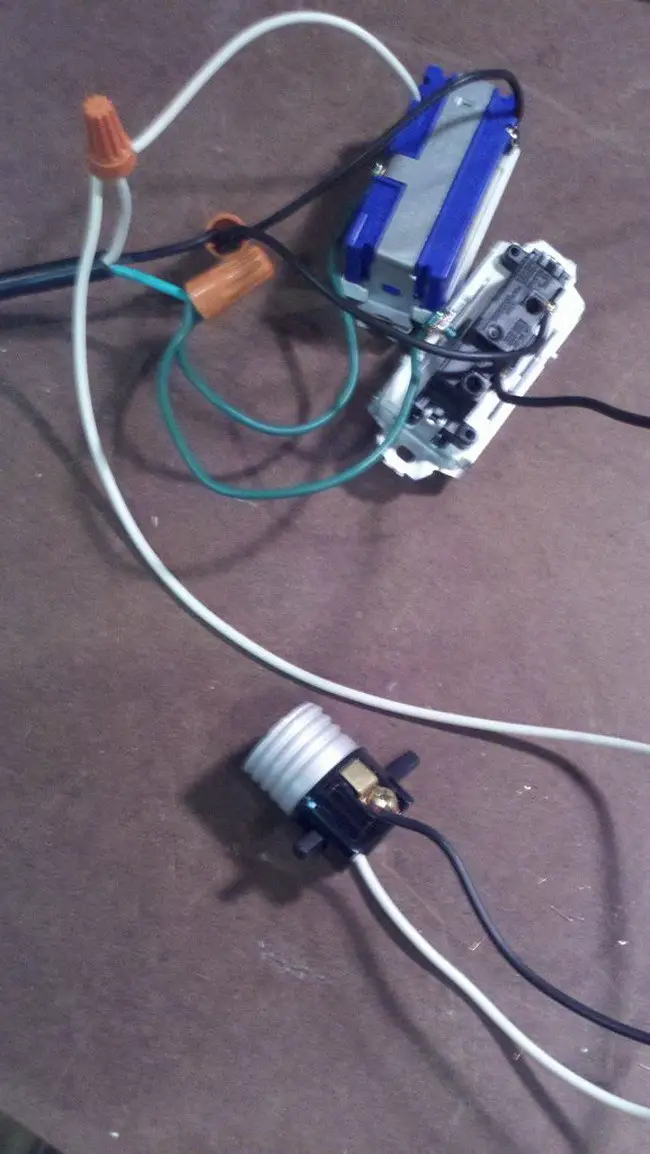
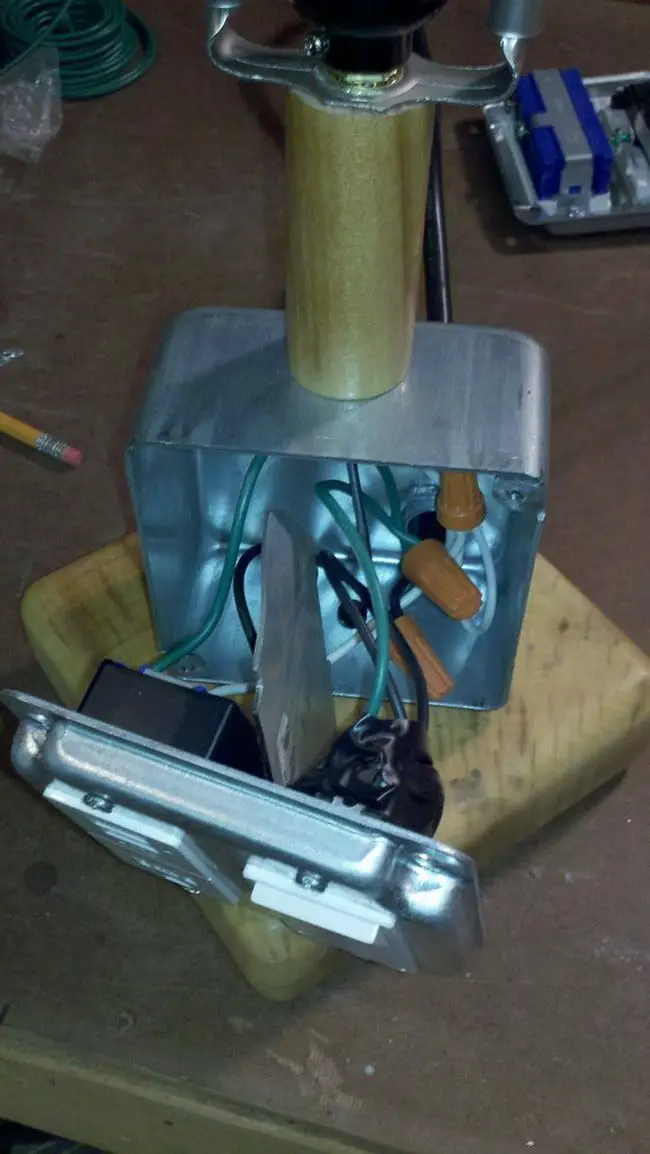
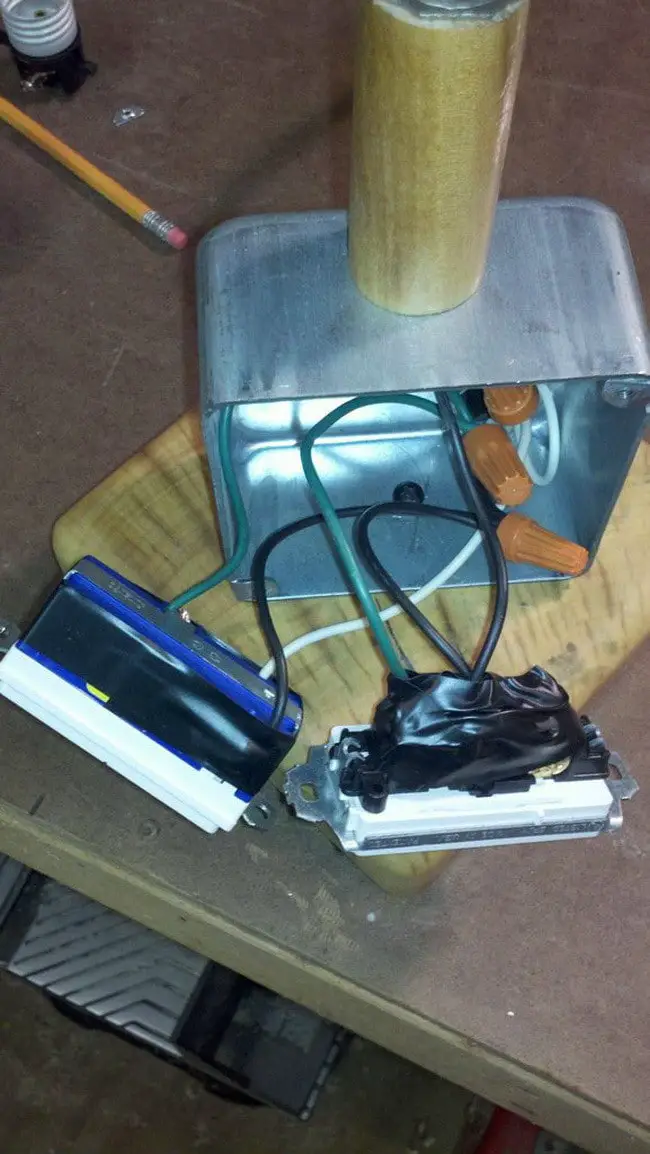

Written by Keith Schneerer
Certified Appliance Tech · Founder, RemoveAndReplace.com
Keith has spent 30+ years repairing machines, starting as a military mechanic and later maintaining food processing equipment before moving into appliance repair. He founded RemoveAndReplace.com to share field-tested repair advice.
More about Keith →


Mitchell,
My box did not have a built in lug/threaded hole on it to attached a ground wire, so I secured the stripped end of my ground wire between two of the plumbing fittings which hold the feet to the box. The wire is held snugly between them, effectively grounding all metal parts of the electrical box. Let me know if you need any more clarification!
Thanks,
Travis
Mitchell,
Some boxes have a threaded hole in it to add a ground wire.
-RR
How did you ground into the metal box without running a screw through your housing?
Kyle,
You may have used a box that is not wide enough to hold all wires and switches. What is the exact size of the box? Either that or possibly you used larger (wider, deeper) switches that we have in the example.
-RR
Im having troubles with my switches and plugs not fitting inside of the extended exposed cover and not fitting down inside the junction box? what do i do? or did i happen to grab the wrong size box and cover?
Shea,
It is only necessary to switch the “hot” wire, as this is where the electricity “flows” in from. Neutral is constantly hooked up to the lamp, and the hot is switched.
Why does the switch not need a neutral wire?