If you have a patio and want to build a nice but cheap wooden bench, then see our simple tutorial below. This DIY wooden patio bench will cost you around $40 dollars in wood and $6 dollars for the box of wood screws to put it together. We did not stain our bench as we like the look of it the way it is. If you plan to use wood stain on your wood bench then add in a few more dollars. This woodworking project took us nearly 3 hours to fully complete. From cutting the wood pieces to attaching the wood pieces together. So if you have $40 bucks and want a fun and simple DIY wood project, see below for our step by step build through pictures.
The wood and materials needed for this DIY patio bench project:
Quantity of 4 – 4 x 4 x 16 = Bench legs
Quantity of 5 – 2 x 4 x 11 = End pieces and sitting surface base
Quantity of 4 – 2 x 4 x 48 = Top (sitting surface)
Quantity of 2 – 2 x 4 x 44 = Horizontal pieces (from leg to leg)
Quantity of 4 – 2 x 4 x 14 = End of top surface sides (2 on each side)
Quantity of 1 – Box of 3 1/2″ Long wood screws
Quantity of 1 – Bottle of wood glue
Optional Material Needed = Can of wood stain, Can of wood sealer, Paint Brush
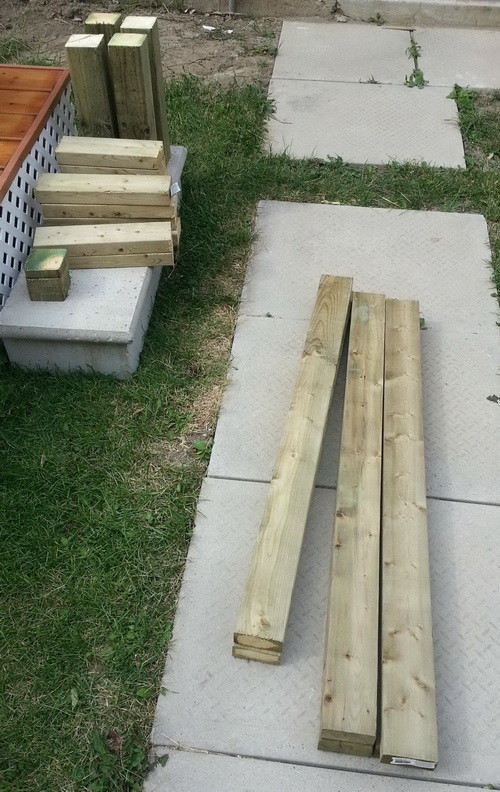
Here is all of our wood cut and ready to be made into our DIY bench.
The wood pictured in the above image are the following sizes and quantities:
4 – 4 x 4 x 16
5 – 2 x 4 x 11
4 – 2 x 4 x 48
2 – 2 x 4 x 44
4 – 2 x 4 x 14
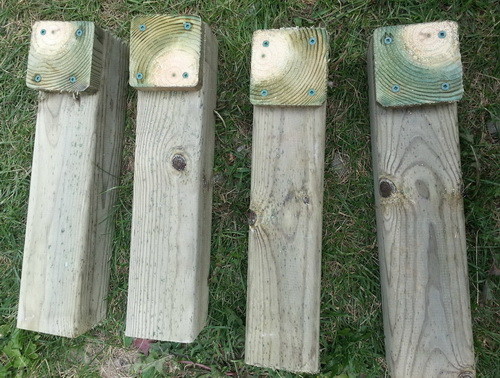
Here are the 4 X 4 pieces of wood that will become our patio bench legs.
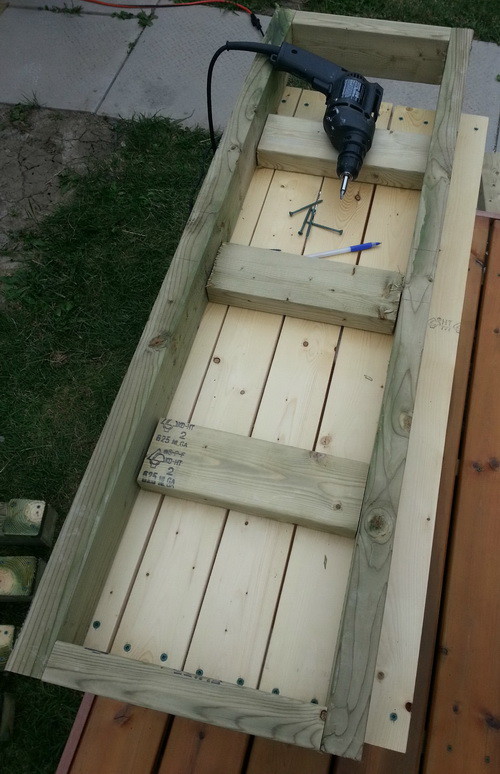
The first thing we did was to attach the top sitting frame assembly together.
The 5 – 2x4x11″ and the 2 – 2x4x44″ pieces.
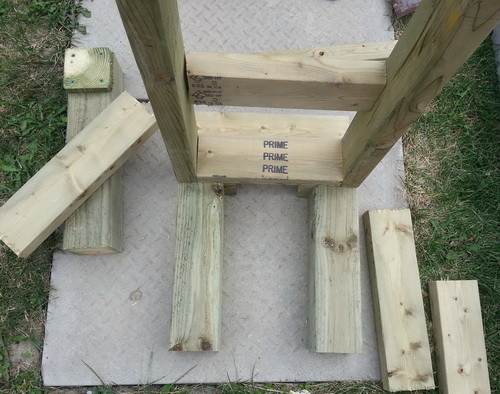
Next, we screwed the 4×4 legs into the top sitting assembly structure.
Secure these with 4 of the wood screws on each leg.
Using some wood glue here is also helpful to secure the pieces together.
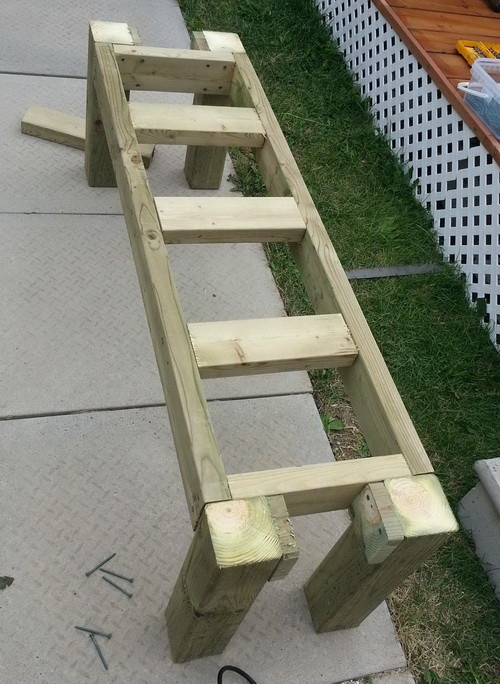
Our patio bench is coming together as the legs and the sitting assembly have been securely attached.
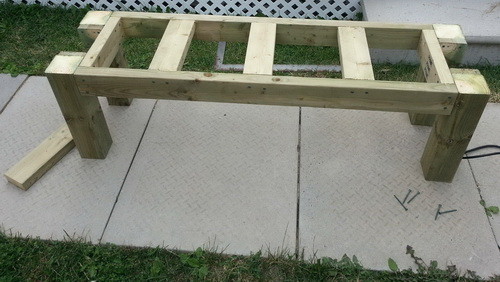
Here is another view of our bench before the top sitting area is attached.
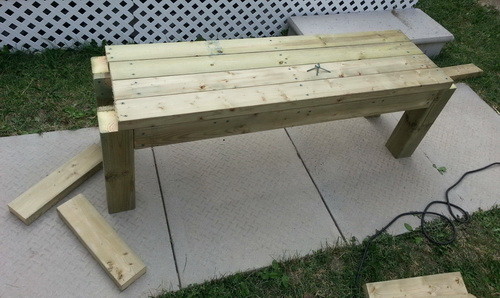
The next step is to get the 4 – 2x4x48″ pieces of wood and attach them to the top of the bench.
This will be where people will be sitting so make sure the wood is free of splinters and rough areas.
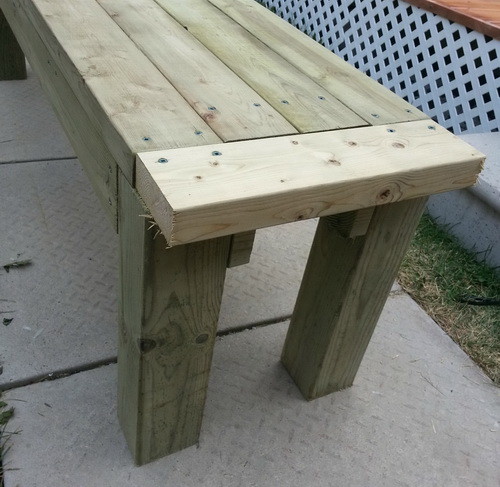
The end of our bench now needs the 4 – 2x4x14″ pieces to be attached.
(The next picture shows the location of the other piece of wood of this size)
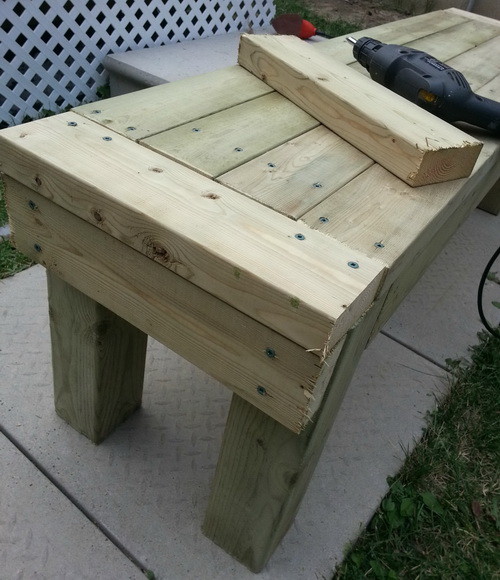
Once these 4 pieces of wood are attached to the sides of your bench, it is complete.
Note the splintering wood, it is recommended to use a fine grit sandpaper and sand the bench smooth.
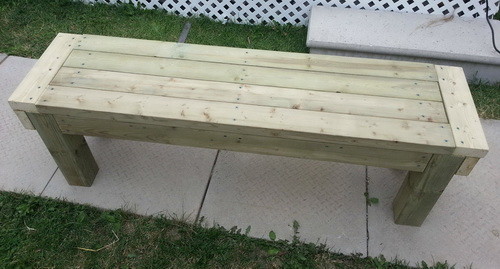
Here is the finished product. The easy to build DIY wooden patio bench is as sturdy as a rock!
If desired, you can either paint the bench or stain it with a wood stain that matches your patio.
Also, it is best to use a wood sealer compound to keep it shielded from the elements.

Written by Keith Schneerer
Certified Appliance Tech · Founder, RemoveAndReplace.com
Keith has spent 30+ years repairing machines, starting as a military mechanic and later maintaining food processing equipment before moving into appliance repair. He founded RemoveAndReplace.com to share field-tested repair advice.
More about Keith →

Do you also have the step by step plans without pictures like a blueprint for the novice wood worker? This is the bench I want to make.
Your instructions are easy to follow. If I wanted to shorten the length and make another bench connected to this one to make into a 2 seat corner bench, how would I do that?