A bathroom vent fan that vibrates, hums, stops running, or won’t turn on at all almost always comes down to a worn-out fan motor. Replacement motors run around $20, and most people can finish the job in under an hour. Dried-out sleeve bearings are the failure I run into most often after 30-plus years of hands-on repair work, and they are exactly what you’re hearing when a fan starts to howl, slow down, or just sit there humming.

- Kill power at the wall switch and at the breaker feeding the bathroom, then verify with a non-contact voltage tester before you reach into the housing.
- Take the old motor to the store or match the manufacturer part number online. Universal bathroom fan motors exist if yours is discontinued.
- Rattles from the grille, the backdraft damper, or a loose duct are not motor problems and won’t be fixed by a new motor.
Why Is My Bathroom Vent Fan Making Noise?
That fan works harder than almost anything else in the room. It pulls heavy moisture, cold air, heat, hairspray and cleaner overspray, and a constant load of dust and lint through a small shaded-pole motor with sleeve bearings. Those sleeve bearings dry out and seize long before the windings ever fail. When the bearings go, the motor either starts vibrating and howling, slows down, or locks up and just hums. When someone tells me their fan hums but the blade won’t spin, I’m already thinking seized bearings before I think about anything else. With the power off, I’ll spin the blade by hand to confirm it — a healthy impeller coasts, a seized one barely moves.
Most bathroom venting exhaust fans last many years, and how long yours lasts depends mostly on moisture conditions and how often the fan actually runs. The other thing worth knowing is that this fan is doing real work — when it stops moving air, the moisture stays in the room and mold follows. If you’ve already got dark spots forming on the ceiling or grout, read up on how to fix and prevent a mold problem in the bathroom while you’re up there.
Clean And Test Before You Replace Anything
Before you buy a motor, deal with the dust. I always start with a vacuum before I spend a dime on parts, because there may be a weird noise coming from inside the vent simply because so much dust and dirt is covering the moving parts. Clean everything out with a wand-style vacuum cleaner, get the blade impeller and the surrounding housing clean, then test to see if the noise has stopped. If the sound is still there, work through the grille, damper, and duct checks in the section further down before you blame the motor. And if you can’t even tell the racket is coming from this fan, our guide to fixing a wobbling ceiling fan covers the other overhead suspect.
Next, bench-test the motor. You can remove the fan motor assembly (see the steps below) and plug it into another power outlet in the house to see if it’s turning properly. If the shaft has seized up, a few drops of oil on the fan motor shaft will sometimes free it. I’ve had that buy people another year or two, though on a motor that’s already gummed up I treat it as a temporary fix, not a repair.
Once you’ve done everything you can without replacing anything, put it all back together and test it. If it runs quiet, it was only dirty and you’re done. If it still doesn’t work properly, follow the replacement steps below. When I want a second opinion on a sound, Broan-NuTone has a good rundown of the other noises a bath fan can make and what each one means, and RepairClinic’s guide to why a bath fan isn’t working covers the electrical side if yours is completely dead.
Bathroom Vent Exhaust Fan Replacement Instructions
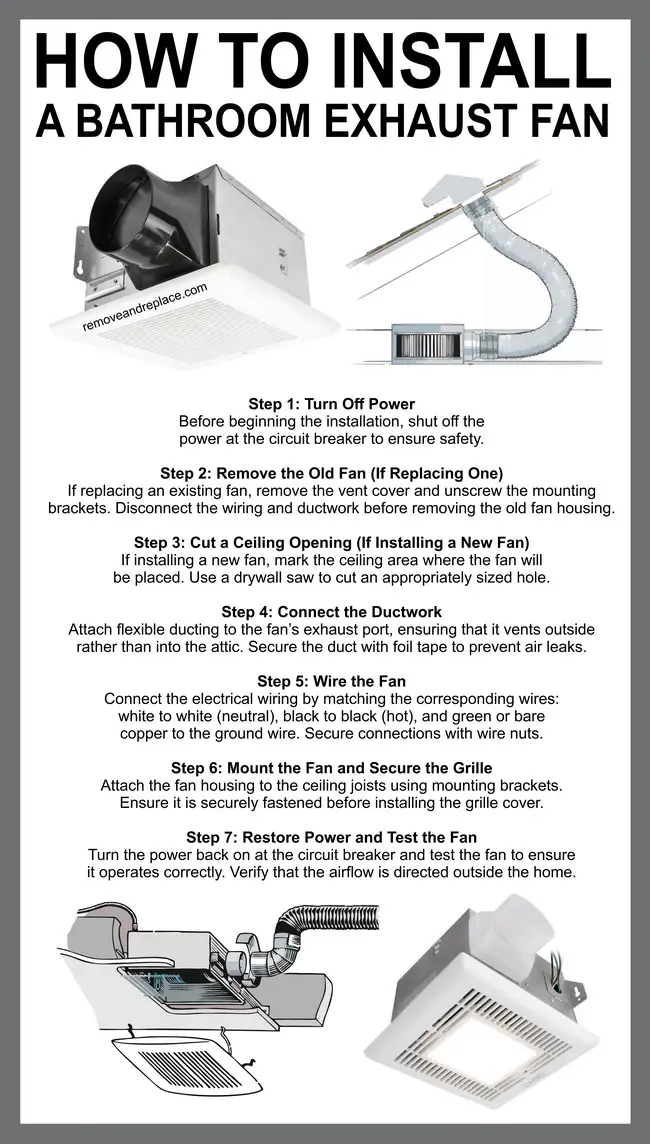
Before you start: you’ll need a screwdriver, a vacuum with a wand, a flashlight, a non-contact voltage tester, and eye protection — the inside of that vent is packed with dust that will fall straight into your eyes when the assembly comes down.
Step 1 — Turn Off The Power
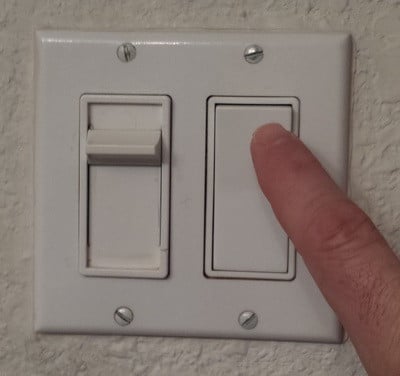
Shut the wall switch off, then go to the panel and shut off the breaker feeding the bathroom circuit as well — in some wiring setups the receptacle built into the fan housing stays live even with the switch off. Once the cover is down, hold a non-contact voltage tester against the housing receptacle and the motor plug and confirm it reads dead before you put a hand up there. I check it twice, every time, because a fan housing gives you nothing to look at that tells you the circuit is dead. If the fan and the light are on the same switch, you’re gonna be working in the dark, so I keep a flashlight or a headlamp within reach before I flip anything off.
Step 2 — Remove The Plastic Cover
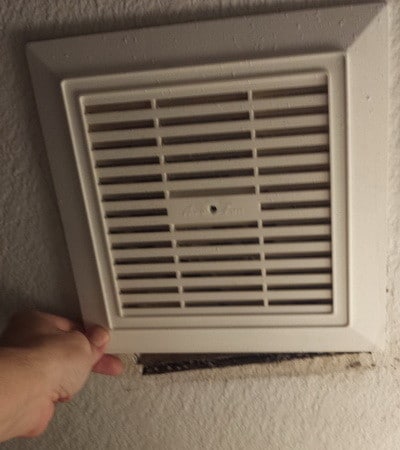
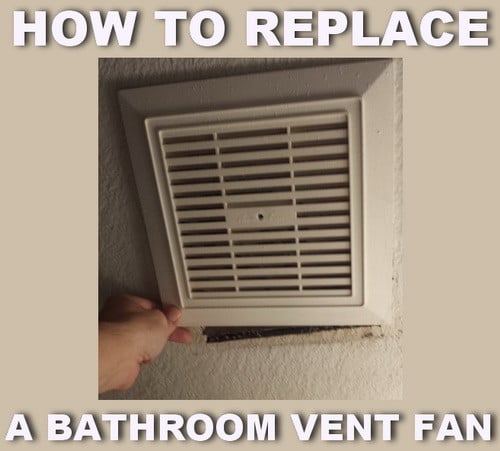
Remove the plastic cover by unscrewing the single plastic screw, or pull the cover down a couple of inches, squeeze the metal spring clips together, and pull the grille straight down. I set the grille and its screw in the sink so neither one walks off while I’m working overhead.
Step 3 — Unplug The Fan Motor
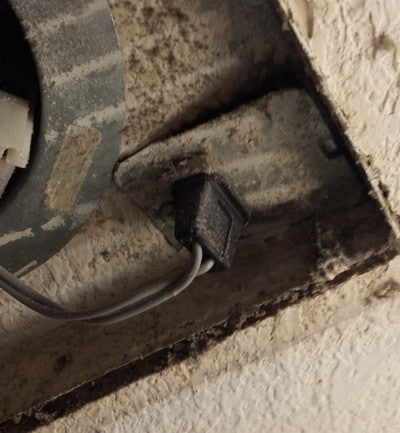
After years in the ceiling these plugs get stiff, so grip the connector body and rock it straight out — never pull on the wires themselves or you’ll tear a conductor loose from the terminal. If one really doesn’t want to let go, I’d rather work it loose slowly than yank it and end up rewiring a junction box.
Step 4 — Loosen The Mounting Screws
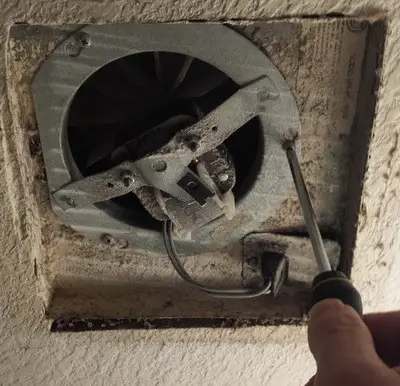
Remove or loosen the screws holding the fan motor assembly to the vent housing. Some assemblies use clips or slotted tabs instead of screws, so look at what you have before you force anything. When the design allows it, I just loosen these rather than backing them all the way out — that’s one less small screw to drop into the toilet.
Step 5 — Drop The Fan Motor Assembly Out
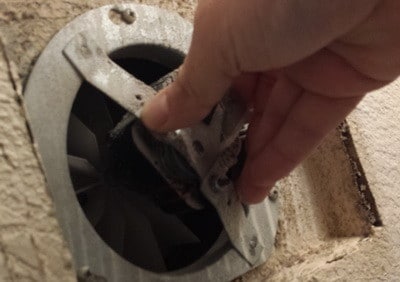
This is the only piece that leaves the ceiling. The outer vent housing stays nailed to the joists with the duct still attached to it, which is why you never have to open the ceiling for this repair. All that lint has to land somewhere, and it’s usually your face, so I hold an open trash bag right under the opening as the assembly comes free.
Step 6 — Match And Install The New Motor
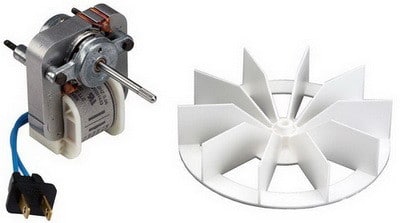
Take the fan motor assembly to your local home improvement store (Lowe’s, Home Depot, or ACE all carry them) and match it up, or look online for the company that makes your bathroom vent. Search for the exact manufacturer replacement first and make sure it’s still available. Common brands include Broan, NuTone, Craftmade, Panasonic, Delta, Air King, Progress, and Fan Tech. There are also universal bathroom fan replacement motors that will fit an existing vent assembly if the original part number has been dropped.
The part most people skip is the data label on the old motor. I write the numbers on a strip of masking tape and stick it to the old motor before I leave the house, so nothing gets guessed at in the parts aisle. Before you buy, write down:
- Voltage — 120V on residential fans.
- Amp draw and RPM — both are printed on the data label.
- Rotation — stamped CW or CCW viewed from the shaft end. Get this wrong and the fan spins, sounds perfectly normal, and moves almost no air; I’ve been fooled by that one before.
- Impeller outside diameter and shaft diameter — measure both.
- Mounting plate screw pattern — a motor that’s electrically correct but physically a quarter inch too tall will rub the housing and make a new noise you didn’t have before.
Reinstall in reverse order: seat the motor assembly, secure the screws or clips, plug it back in, then snap the grille on and restore power at the breaker and the switch. I like to run it for a minute with the grille still off so I can hear the motor on its own before the cover goes back up.
Noises That Aren’t The Motor At All
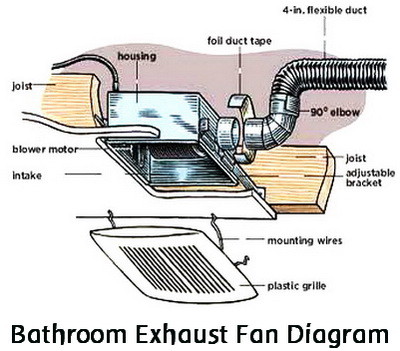
Three failures fool people into buying a motor they don’t need, and honestly it’s kinda hard to tell them apart by ear alone the first time. Matching the sound to the part is the same process I use on a refrigerator compressor that has gotten noisy — the character of the sound tells you which component is worn. The first suspect here is the grille. A cover that isn’t seated tight, or that has a clip sprung out of its slot, buzzes against the housing and sounds exactly like a bad bearing. Push up on the cover while the fan runs; if the sound changes or stops, you found it. I do that test before I pull a single screw.
The second is the backdraft damper — the little gravity flap at the fan outlet or out at the roof or wall cap. When the counterweight or hinge wears, that flap slaps open and shut and you get a rhythmic clacking that’s worst on windy days or right when the fan shuts off. I check the damper first any time the noise changes with the weather. Turn the fan off and push on the flap with a finger; if it flutters loose instead of dropping shut once, that’s your noise.
The third is the duct itself. Flex duct that has come loose from the housing collar in the attic will vibrate against a joist and drum, and it also means you’re dumping warm wet air straight into your insulation. Kinked or crushed flex duct makes the fan work against back pressure, which makes it louder and shortens motor life. In my experience loose duct is the more common cause of a low drumming sound than anything inside the fan housing.
When The Whole Fan Housing Has To Come Out
A motor swap fixes the majority of noisy fans, but it isn’t always the answer. Plan on replacing the complete unit when:
- The metal housing is rusted through, cracked, or the mounting brackets have pulled loose from the joist.
- No manufacturer or universal motor will physically fit the old housing — this happens on discontinued builder-grade units.
- The fan is undersized for the room, or you want fewer sones, a light, or a built-in humidity sensor.
- The old fan vents into the attic instead of outside, or the duct size needs to change to match a larger fan.
That job is a bigger one, and you’ve gotta be ready for it before you start pulling things apart. You’re working from the attic if you have access, or cutting and patching drywall if you don’t, disconnecting the branch wiring at the housing junction box, mounting a new housing to the framing, and connecting duct to a proper roof or wall cap. Personally, I’d rather swap the whole unit than fight a rusted housing that won’t hold a screw. Family Handyman’s full bathroom exhaust fan replacement walkthrough is a good look at what’s involved before you commit to it.
Video: Replacing A Bathroom Vent Fan Motor
This step by step video walks through the same removal and replacement if you’d rather watch it done than read it.
If the bearings are gone, I wouldn’t nurse the old motor along — oil buys you a little time, but the fan will be back to howling. I’d put the $20 into a new motor and be done with it. And if it turns out the racket in the house isn’t the bath fan at all, our guide to a noisy microwave oven and what parts to check covers the other appliance people usually blame first. If your fan is doing something I didn’t cover here, leave a comment with the brand and the exact sound and I’ll help you narrow it down.

Written by Keith Schneerer
Certified Appliance Tech · Founder, RemoveAndReplace.com
Keith has spent 30+ years repairing machines, starting as a military mechanic and later maintaining food processing equipment before moving into appliance repair. He founded RemoveAndReplace.com to share field-tested repair advice.
More about Keith →