What is Aeroponics? Aeroponics is the process of growing types of plants in an air or water mist environment without the use of soil. Simply put, it is to grow plants suspended in a closed environment by spraying the plant’s hanging roots with a sprayed mist or a drip from a nutrient based water solution. If you live in a smaller area where growing outdoors is impossible, consider the DIY Aeroponics method below. This project should cost you under $25 dollars and take approximately 30 minutes. New to Aeroponics? This Guide To Aeroponics book will tell you everything you need to know.
Supply list for DIY Aeroponics System:
1 – large plastic planter (pot without holes)
1 – small rounded bottom flower pot (make sure it does not touch the ground of the planter)
1 – 3 to 7 feet of garden hose (any type is ok)
1 – “T” hose fitting (see pics below)
1 – aquarium water pump (outlet must fit garden hose diameter)
1 – bag of hydroballs
1 – wall outlet timer (to time the pump)
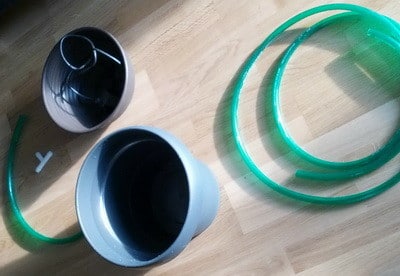 1. Here are the supplies needed to make the DIY Aeroponics system.
NOTE: The garden hose has been cut into 2 pieces, one for filter, and one for “circle” dripper.
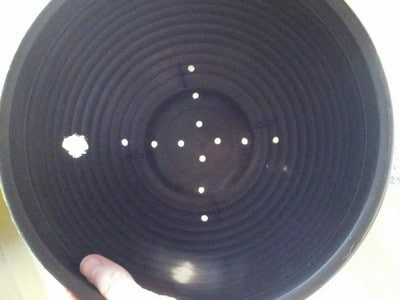 2. Drill small holes in the bottom of the flower pot and a large hole for the hose to fit through.
NOTE: Drill holes in a similar pattern to the ones in the picture above.
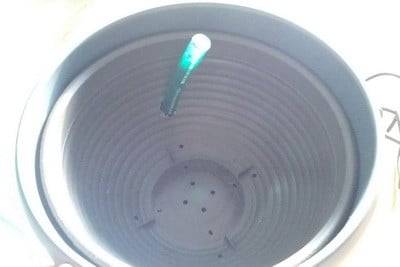 3. Slide the garden hose for the pump into the large hole you made in the flower pot.
NOTE: The piece of hose in the above picture will connect to the “T” fitting.
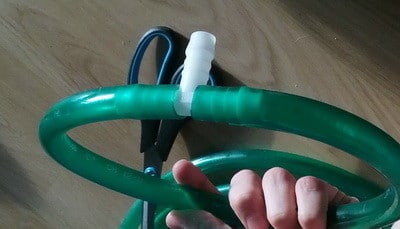 4. Use the other piece of the garden hose and connect both ends to the “T” fitting.
NOTE: You can use any type of rubber or flexible tubing in place of the garden hose.
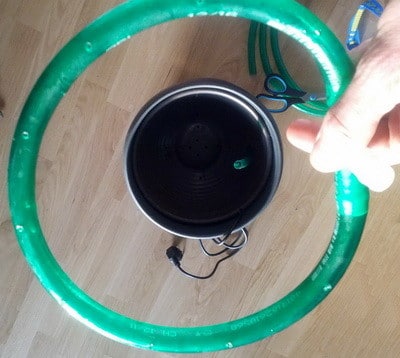 5. Drill about 30 small holes into the “circle” hose to allow for water to drip downward.
NOTE: Do not drill the holes to big as the water needs to dispense all around the circle.
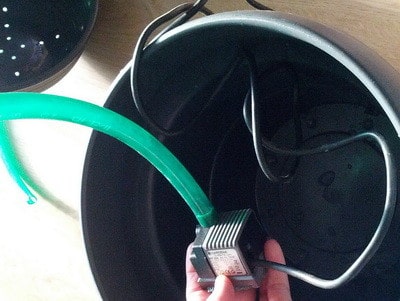 6. Connect the end of the garden hose to the pump outlet, fill bottom planter with water and set pump inside.
NOTE: You can drill a hole in the bottom planter for the pump cord to come out if you desire.
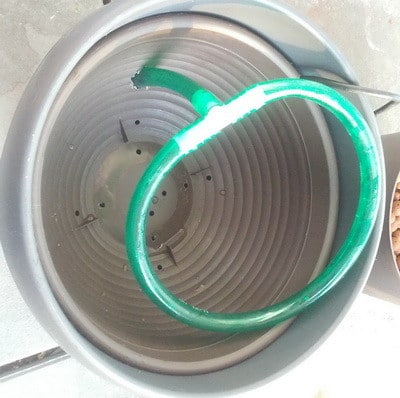 7. Drop in the flower pot and feed the hose up and through and connect it to the “circle” water dripper.
NOTE: The pump sits in the bottom of the large planter and large planter has water in the bottom.
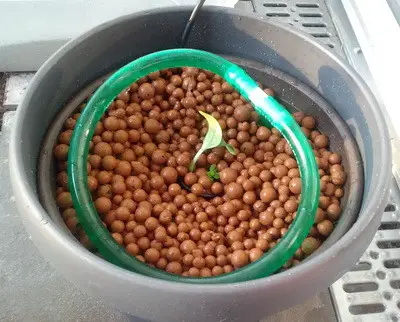 8. Fill the flower pot with hydroballs and place your seedling down in the hydroballs.
NOTE: When everything is set you can turn on the pump and let the water drip from the hose.
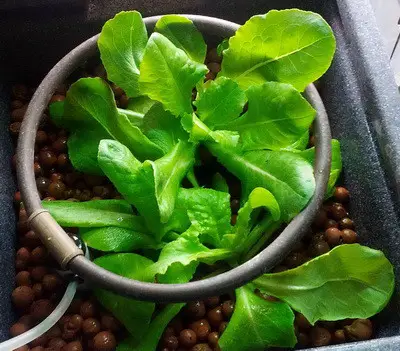 9. Let the water continually drip as you see fit and watch your plants grow.
NOTE: Plug the aquarium pump into an outlet timer and set as needed for watering.
You will also need to check the water level daily inside of the bottom planter and refill if needed.
Please always use caution with DIY projects such as these as dealing with water and electricity can be hazardous.



Leave a Reply