If your refrigerator has ice build up on the inside, here are a few things you can check yourself to fix the issue. A common cause for ice buildup is a faulty door seal. If a refrigerator has a bad door seal, the outside air will pass into the fridge and cause the ice build up problem you are experiencing.
Another cause for this could be that the door hinges are loose or not attached properly leading to outside air entering your fridge/freezer. Check to be sure the door hinges are tight and are attached and aligned properly.
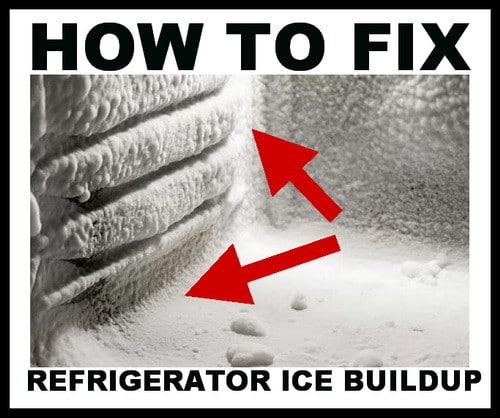
Some other simple things you can do to try and remedy this issue are easy to try yourself. You can try moving the refrigerator away from the wall a little bit more to give it extra room for the air to circulate. The heat from the compressor should have sufficient room to dissipate. If the refrigerator is too close to the wall problems will occur.
Another solution may be to clean the vents on the back or below the fridge as they can be clogged with dust and debris. Clogged vents cause air circulation problems that lead to many common refrigerator problems.
If the ice build up is only happening in the freezer, the freezer drain is probably clogged. To unclog the drain you should first unplug the unit from the wall. Remove the freezer covers to expose the frozen drain. Pour hot water down into the drain hole until you see the water dripping into the drain pan under the refrigerator.
How to remove and replace the door gasket on a refrigerator
How to unclog a refrigerator defrost line
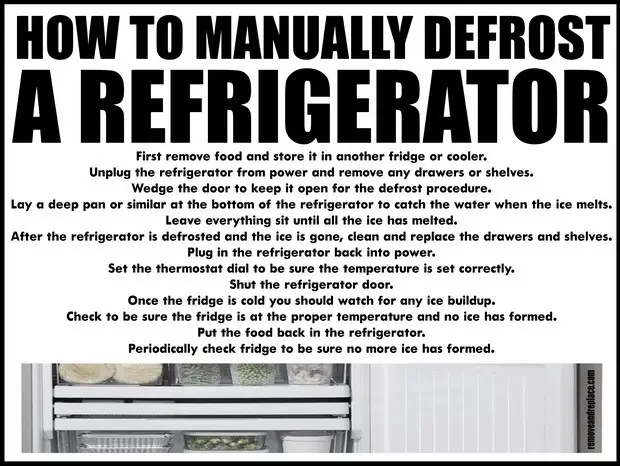
Modern day refrigerators are frost free. They should not have to be defrosted manually. If however you have an older refrigerator or you want to manually defrost your newer fridge, here is how:
- First remove food and store it in another fridge or cooler.
- Unplug the refrigerator from power and remove any drawers or shelves.
- Wedge the door to keep it open for the defrost procedure.
- Lay a deep pan or similar at the bottom of the refrigerator to catch the water when the ice melts.
- Leave everything sit until all the ice has melted (this is a good time to wipe down the inside of fridge).
- After the refrigerator is defrosted and the ice is gone, clean and replace the drawers and shelves.
- Plug in the refrigerator back into power.
- Set the thermostat dial to be sure the temperature is set correctly.
- Shut the refrigerator door.
- Once the fridge is cold you should watch for any ice buildup.
- Check to be sure the fridge is at the proper temperature and no ice has formed.
- Put the food back in the refrigerator.
- Periodically check fridge to be sure no more ice has formed.
If your refrigerator is still under warranty, make sure to call the company you purchased it from or call the 800 number of the company who manufactured it and schedule service. Find out if it is under warranty before doing repairs as doing repairs yourself could void the warranty on the unit.
NOTE: At times a powdery type of ice will form in your refrigerator if it is being repeatedly opened and closed. Keep this in mind as your only issue may be this and no repairs are necessary.
Other things causing this issue could be a defrost timer, bad temperature sensor or bimetal defrost thermostat. In this case you will most likely need to call a repair person or find someone who is experienced with diagnosing appliance faults and removing and replacing components.
Have experience with ice buildup in your freezer refrigerator? Please help out everyone who seeks information on this page by leaving a comment below.

Written by Keith Schneerer
Certified Appliance Tech · Founder, RemoveAndReplace.com
Keith has spent 30+ years repairing machines, starting as a military mechanic and later maintaining food processing equipment before moving into appliance repair. He founded RemoveAndReplace.com to share field-tested repair advice.
More about Keith →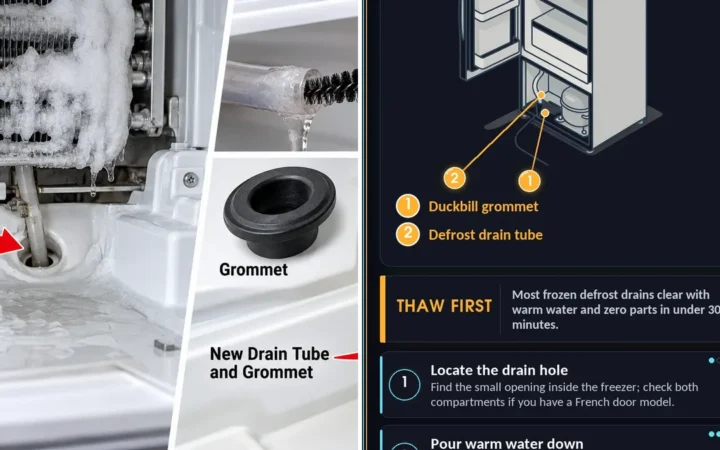
Thank you for your response.
on the inside of the freezer door the following AFU numbers appear: 1201, 1504, 1567, 1704, 1767, 2004, 2067
additional numbers are 2-82033-001 & 12631502
I purchased the Amana Freezer March 2002.
Connie,
Our assumption would be that the Amana Deepfreeze has a defrost timer issue.
Replace the defrost timer and it should fix your issue.
We need the model number to point you in the right direction for parts.
The number IA52204 is not the model number, that is actually the company State and Zip Code.
State: IOWA
Zipcode: 52204.
-RR
Problem with frost build up – 2002 Amana Deepfreeze IA52204
Need to defrost every other month.
Please help.
Hello fellow DIY’s
I experienced and solved an ice build-up issue with my 4 year old Whirlpool side by side on the freezer side (ED5VHEXVQ04).
Before proceeding with what is listed below with the unit still plugged in, open the fridge compartment and check to see if you are getting air flow from the units left side mounted air diffuser. This is a small vented apparatus that allows cold freezer air to circulate throughout the fridge compartment….mine had ZERO air coming out. I surmised that since I could see the ice buildup on the freezer side that the ice could me a possible issue. A possible failure in that little diffuser box was also a possibility as well as possible defrost component system failure(s) as well. As always regardless of how minor, please unplug the unit. I then used a shop vac to blow & vac dust away from the fins in the bottom front of unit after the removal of front, & possibly the rear sturdy cardboard panel may be necessary).
Yep I made a mess in the kitchen area with the flying dust! The rear fin access panel is located towards bottom on the back side of course. Remove food and all shelves in the freezer compartment to include ice bin and the rectangular metal ice auger turning assembly located at the rear and directly behind the ice maker by taking out the four screws near all 4 corners (not sure what the exact name for that part would be) and unplugging it’s wiring harness. This is the unit that houses the light bulb. I then removed the upper air duct housing that funnels cold air from freezer to fridge compartment (again a very easy thing—- a few screws and it pops up). You may have to remove the right screw holding the ice maker down, and loosen but don’t remove the left screw, this will allow for the upper air duct panel to clear the ice maker water inlet tube. I proceeded by then dropping the thin sheet-metal freezer rear wall panel (very easy 4-6 screw job). This will allow for the rear coils of the freezer to be exposed, you will want to do this because it will eliminate the guess work involved with trying to figure out if you’ve thoroughly melted all the ice from those coils. Not to mention it will also allow for quicker melting of the ice as well. It may be necessary to remove the “single screw held” three shelf holders on the right side of freezer compartment to ease the removal of this panel.
CAUTION HERE!
Next I used a very low wattage small heater sitting just inside the bottom floor of freezer aimed at the frozen coils and the ice completely melted in well under an hour. I would suggest a bit of caution here as NO amount of water or ice should ever be allowed to melt onto, or come anywhere remotely close to the heater as it does its thing. Please note also that while the heater is on, make certain that no internal components to include any fragile sensitive plastic parts are exposed directly to the heat that may melt, or warp them. This was not even remotely an issue with my model and may not be with yours but thought I would mention. Some other models may/may not have restricted spaces which would rule out this heater technique all together. A hand held hair dryer would suffice but you will have to be patient as it would take it longer to do the same job. Word of caution: Drop that ice pick or screw driver….. NEVER manually chip-away at the frozen ice….NEVER!
After a while even though it was obvious the ice had melted, I allowed the heater to continue going for some time to leave no doubt. I then removed the heater and while leaving the components briefly disassembled, plugged the unit back up, to check the condenser fans operation to insure it was working as it should. Unplugged unit once again, put everything back together and using a digital upright thermometer on the fridge compartment and an analog dial type for freezer, checked the temps after approximately 1 hour and several times afterwards to insure that things were proceeding OK. This did the trick! Air was also now flowing properly through the fridge’s left mounted air diffuser as it should. No icing or air flow issues and it’s been several days after the fact, long enough to where if I had issues with the defrost components it would have reared its ugly head by now. Freezer runs between -1 to 10 degrees F, the fridge is consistently within normal range as well 35-44 F depending on how I adjust setting. YEAH!!!!
Summary, I believe this whole issue was a possibly result o two things. I can remember going through one of the major holidays and absolutely packing both the fridge, & fridge units’ chock of food, and full possibly blocking its flow of air. The other possible problem could have been an over accumulation of dust on the units fins underneath front, & rear kick panels as mentioned above. Hope this can help someone!
Jon,
If you are going to fill up your empty chest freezer with containers of water (ice) to save energy, we suggest to NOT use open containers. Use large 5 gallon jugs that have a cap or lid.
-RR
Howdy – I recently purchased a 7.1 cu ft chest freezer. It’s mostly empty at present, but I read that filling it with containers full of water can make it more efficient. I don’t have many jugs/containers, but I do have deep plastic trays (ie, no lid). Would you envision a downside to using these in place of plastic gallon jugs (or something with a top)? Ie, since the water is exposed, might it caused frost to build up more quickly? Thanks!
Andrew,
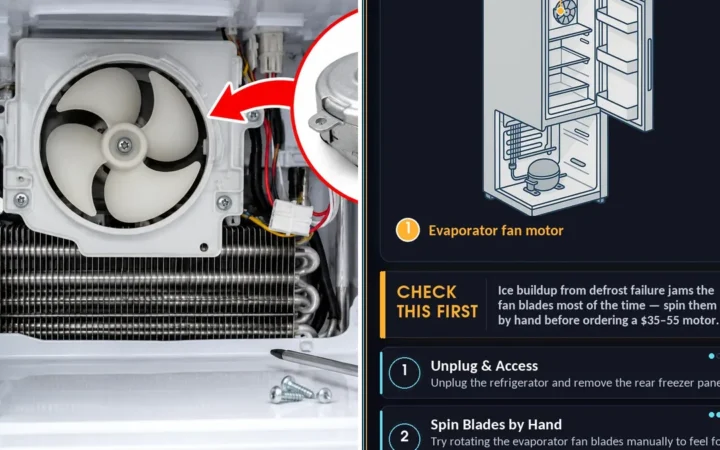
Check this page here as there are hundreds of Refrigerator Fans to choose from.
-RR