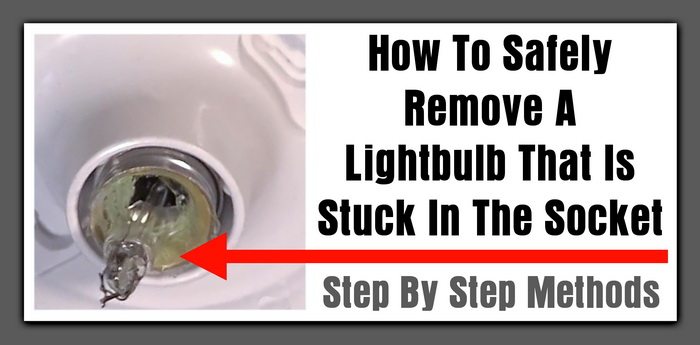
Best ways to remove a broken lightbulb. Light bulbs are made of glass, and glass breaks. Broken light bulbs are difficult to deal with and can actually be incredibly dangerous as well. Removing them from the socket is actually easy enough if you know the safe ways to do so, and it doesn’t tend to take any special tools. We’ve provided a few different ways for you to safely remove your broken bulb without the risk of electrocution or laceration.
 How To Safely Remove A Lightbulb That Is Stuck In The Socket
Things you can use to remove a broken lightbulb:
-Lightbulb remover
-Pliers
-Epoxy
-Potato
-Screwdriver
Before You Remove The Lightbulb
Before you even try to touch the bulb, you should always cut power to the light source. This will make it safer to deal with, buy avoiding the risk of electrical shock. Cut the power at the breaker, as just turning off the switch isn’t always enough to be safe, especially if the light is controlled by more than one switch.
Be sure that there isn’t any broken glass on the ground or furniture where you’re working. It’s a good idea to wear shoes and gloves when dealing with any project that involves broken glass. Thoroughly sweep and vacuum the area, so that you don’t risk cutting yourself on hidden glass. Before you work on removing the remainder of the bulb, make sure you’re still wearing your gloves, and put on some protective eyewear, since glass splinters are likely to happen.
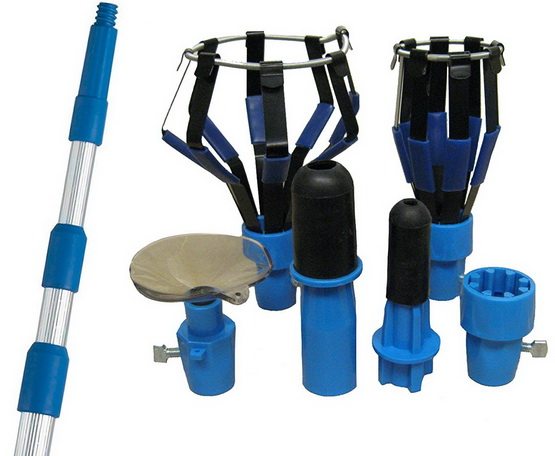
Lightbulb Remover
A lightbulb remover can be purchased can be seen here or at your local home improvement store. Usually it will come in a kit with an attachment that removes all types of light bulbs from high on the ceiling. It will include many pieces to remove and replace light bulbs either broken or new.
 Broken Bulb Changer Kit with Pole
Use Pliers To Remove Broken Bulb From Socket
This is probably the most recognizable way to remove a broken bulb; using a pair of pliers. The more intact the bulb the easier it is with this version. Use the pliers to grip the glass base of the filament, and very gently twist counter-clockwise. This should allow the base to unscrew from the socket and be removed. If not, however, it’s likely that the filament will break instead.
If the filament breaks off, carefully dispose of it and return to the broken bulb. Place the needle nose pliers into the base of the bulb and open them as wide as you can, so that the two tips ware on opposite sides of the base. Turn counter-clockwise and your bulb should start to unscrew. If you need more grip on your pliers, wrap the ends with electrical tape.
Use A Potato TO Remove The Broken Light bulb
Yes, you’ve heard this right: you can use a potato to remove a broken bulb from its socket.
Break off any remaining glass, being very careful while doing so. Cut the potato in half and press it firmly against the socket. Twist counter-clockwise; the potato should allow the base of the bulb to turn while the socket stays still. Your broken base will be removed, and then you can throw both it and the potato away (don’t use the potato afterwards, as it may have glass in it still).
Use Epoxy To Remove A Broken Lightbulb
If your bulb is in a hard-to-reach place, you can use some quick setting epoxy to remove it from the socket. Before you begin with this route, clean the remainder of the glass off the bulb, so that there’s none left. Mix up your piece of epoxy and pack it into the base of the bulb. Press a flat head screwdriver into the epoxy and remove it, leaving the impression.
After the epoxy dries (this depends on the kind you’ve used, but for quick drying it’s generally round five minutes), you can use the screwdriver to unscrew the base, much like it were a screw itself.
DO NOT USE THESE METHODS TO REMOVE A BROKEN LIGHTBULB
Don’t ever try to remove the bulb base with your hands, as you’re likely to get cut. There’s also the risk of damaging the socket as well. If none of the above ways have worked for you, you can always buy a broken bulb extractor from your hardware store.
When your light bulb breaks, you don’t need to worry about removing it. Just follow one of the procedures above, always remembering to do so safely, and you shouldn’t have any problems at all.
If you have questions or comments, please leave your information below and we will get back to you to assist.


The glass part of the light bulb separated from the base and the glass was not broken. I wrapped duct tape with the sticky side out around the narrow bottom of the glass bulb and then wrapped duct tape sticky side in to secure the sticky in tape to the bulb. I then lightly jammed the taped bulb into the base and turned. Worked great. Base of bulb came right out. Don’t try this with a broken bulb as the glass will crack and cut you,
I had a broken light bulb. The actual bulb was hanging loosely from the socket. To avoid a mess with broken glass I wrapped the bulb with duct tape before working on the actual socket. No glass mess!
I have removed the broken bulb from my electric fire but the screw part of the bulb is still in the socket. How can I get it out?