It seems everyone is interested in how to make your own beehive in a jar. Have the rows of organic honey jars at the farmers market got you thinking about starting your own backyard beehive? If you live in a suburban area, you may think that starting a beehive cannot be done. However a common suburban backyard can be a perfect place for beehives if done correctly and you do a bit of research and planning before ordering your bees and supplies. It is actually a very simple and easy process with the right tools. Everything you need is below including a supplies list and pictures of our DIY beehive.
Materials Needed TO Make Your Own Backyard Beehive In A Jar:
1 – Piece of 2″ x 12″ x 6′ wood (cut 2 pieces for the sides to 22″)
1 – Piece of 2″ x 12″ x 6′ wood (cut 2 pieces for the front and back to 18″)
1 – Piece of 1″ x 1″ x 6′ wood (cut 2 pieces for the top frame left and right sides to 22″)
1 – Piece of 1″ x 1″ x 6′ wood (cut 2 pieces for the top frame front and back to 18″)
1 – Piece of thick plywood (cut to 16″ X 20″)
1 – Bottom beehive kit (for the bees to enter and exit)
12 – Big mouth quart sized jars (for honeycomb)
1 – Box of wood screws (size 1″ screws)
1 – Can of wood stain (use a dark wood stain of your choice)
And of course, you need bees, most bees are available only in March and April but you can try these links to order your honey bees online – 3lbs of honey bees – Queen Bees For Sale
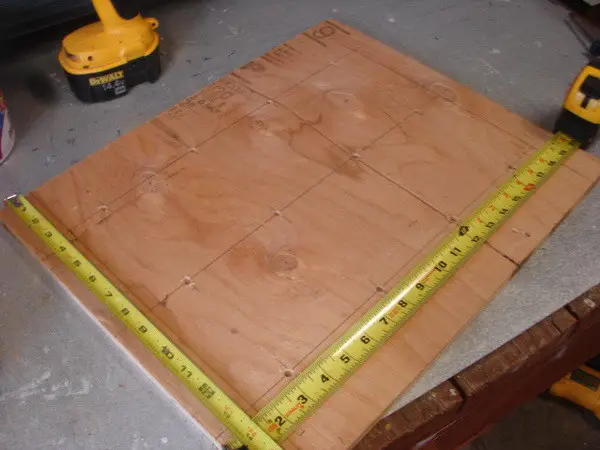 First get a piece of thick plywood and cut to 16″ x 20″.
Then measure and center for 12 holes and drill the pilot holes.
Next, drill 12 – 3 1/2″ holes with a hole saw (for the jars to fit into).
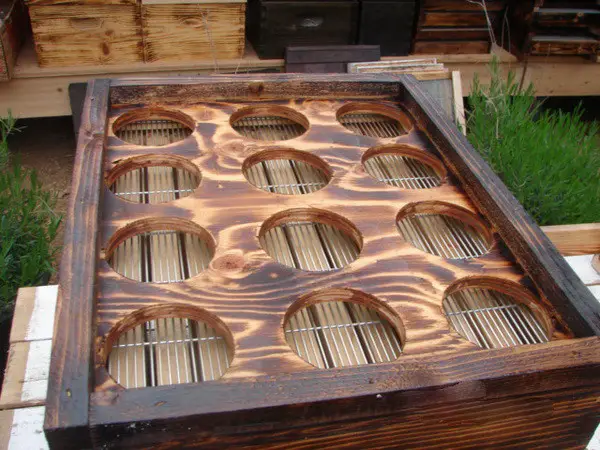 Next cut 2 – 22″ pieces from a 2″ x 12″ x 6′ board and 2 – 18″ pieces from a 2″ x 12″ x 6′ board.
Then screw everything together and stain the wood with dark wood stain (or whatever you choose).
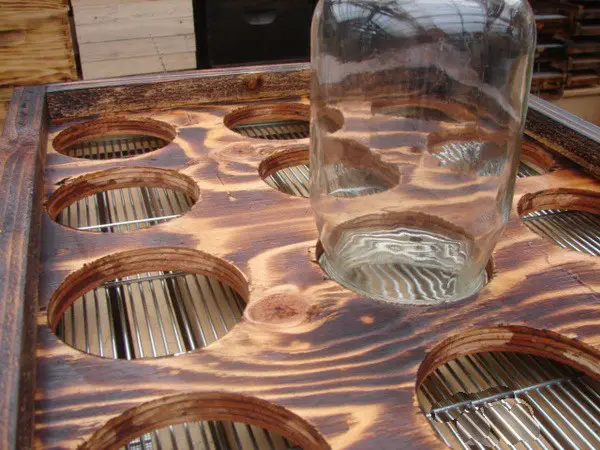 Get your 12 wide mouth mason 1/2 gallon size jars (or a normal quart sized jar).
Then arrange them and make sure they all fit properly over the holes.
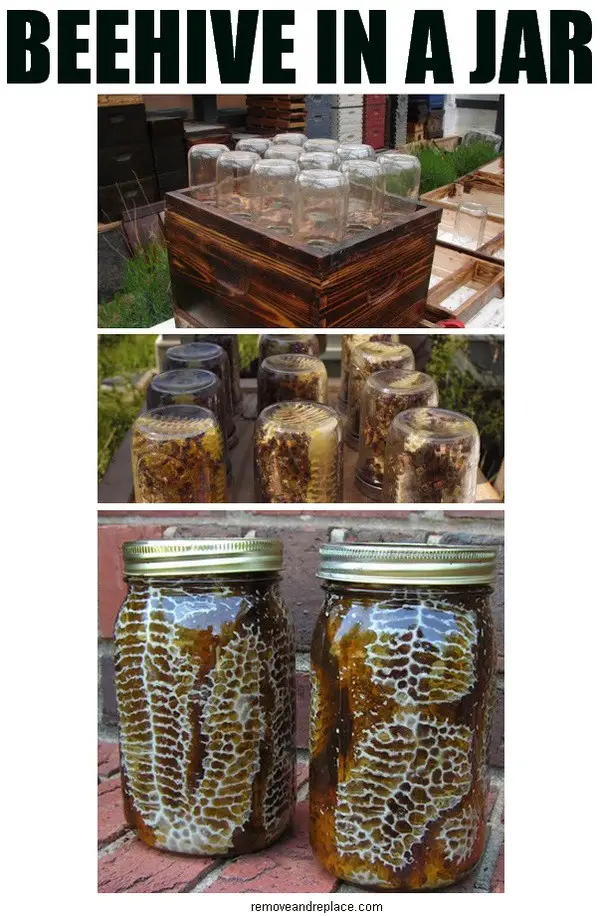
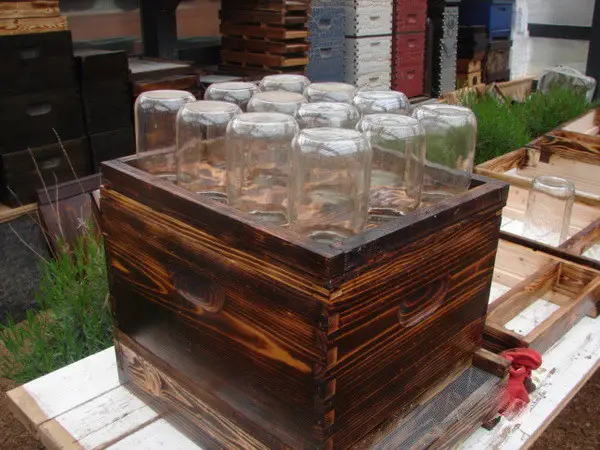 Here is the 12 beehive jars arranged and installed in our backyard beehive.
The jars sit with the screw lid on for less than 1/16″ gap between the jar and the beehive hole.
You may need to add some shims to support the weight so it won’t sag with the weight of the honey.
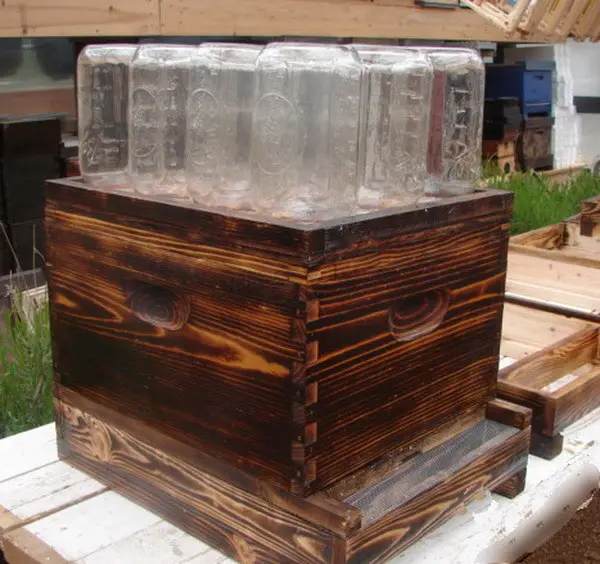 Another view of our DIY backyard beehives in a jar project.
You can vent and screen this chamber if there is excess heat or put the beehive where it gets late day shade.
The bottom wooden piece we purchased as a kit and this is where the bees enter and exit the beehive.
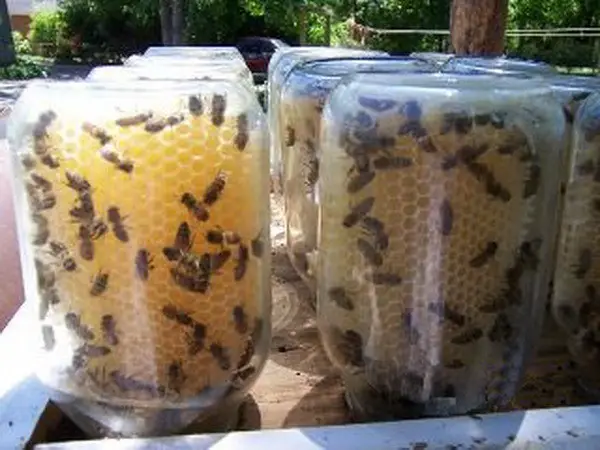 The bees are seen here after we added them to the jars, they are now ready to make organic honey.
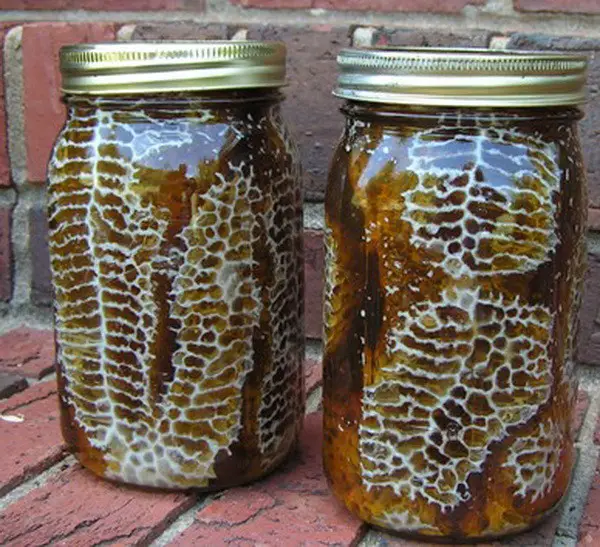 After much time, here is what the honeycomb jars look like filled with honey.
MORE QUESTIONS ABOUT BEES IN A JAR?
PLEASE WATCH THE VIDEO BELOW…

Written by Keith Schneerer
Certified Appliance Tech · Founder, RemoveAndReplace.com
Keith has spent 30+ years repairing machines, starting as a military mechanic and later maintaining food processing equipment before moving into appliance repair. He founded RemoveAndReplace.com to share field-tested repair advice.
More about Keith →

Do you put the beeswax sheets inside the jars before adding to the hive to help them build their comb? It looks that way in the pictures but you don’t mention it in the instructions. Ideally bees need wax frames to build their cells in, and you can buy the wax sheets either on or off the metal wires. As long as you did it when the wax was warm (not hot) they would bend into circles to fit the jars and make the job of the bees a lot lot easier. If you left them on the metal wires you should also be able to pull them out of the jars more easily which would help alot when it comes to putting them in the centrafuge for removing all the liquid honey. Then they can easily be reused.
Heather– The same reason honey doesn’t drip out the bottom of a conventional bee box.
Everyone else– That first video explains everything. The jars are mounted atop traditional bee boxes, the frames underneath. You aren’t regulating the bees to ONLY the jars; you are letting them extend their combs into the jars so you can have an interesting effect. The man says straight “It’s a novelty item.”
Is the that foundation in the jars or have the bees built the comb?
You mention the lids being put on or do the jars just fit over the queen excluder?
Surely the bees will go into the jars from the brood box and build thier comb etc, do you put foundation the jars to start them off?
This looks very interesting. I am planning on getting into beekeeping and like this idea.
I’ve read this before and this is a great idea and IF i have a good honeyflow here and IF i have enough time to work up the woodwork i would love to try it on one of my hives. You don’t extract it you just top it off with extracted honey. There is such a thing as combed honey or chunk honey that you could sell it as. The only gotcha i see is since the bees are building the comb from top to bottom of the jar and there is a 6 degree angle poiinting to the bottom of the jar if fthe honey isn’t capped it will empty out of the comb unless you immediately fill the jar with honey once its harvested. i assume you would need a bee one-way entrance underneath the jar board when it’s time to get rid of the bees, correct?
As to keeping the weather out, the hive remaining cool, and sun exposure. Its Simple, any beekeeper would realize that the frame less honey super box was removed for photo purposes. That keeps the chamber dark, cool, and allows for your telescoping cover to rest on the super and the bees remain happy. This works best for ferral swam hive captures. They are better at making comb and in a frame less comb.
@ Nancy
you just use the ring… not the lid