It seems everyone is interested in how to make your own beehive in a jar. Have the rows of organic honey jars at the farmers market got you thinking about starting your own backyard beehive? If you live in a suburban area, you may think that starting a beehive cannot be done. However a common suburban backyard can be a perfect place for beehives if done correctly and you do a bit of research and planning before ordering your bees and supplies. It is actually a very simple and easy process with the right tools. Everything you need is below including a supplies list and pictures of our DIY beehive.
Materials Needed TO Make Your Own Backyard Beehive In A Jar:
1 – Piece of 2″ x 12″ x 6′ wood (cut 2 pieces for the sides to 22″)
1 – Piece of 2″ x 12″ x 6′ wood (cut 2 pieces for the front and back to 18″)
1 – Piece of 1″ x 1″ x 6′ wood (cut 2 pieces for the top frame left and right sides to 22″)
1 – Piece of 1″ x 1″ x 6′ wood (cut 2 pieces for the top frame front and back to 18″)
1 – Piece of thick plywood (cut to 16″ X 20″)
1 – Bottom beehive kit (for the bees to enter and exit)
12 – Big mouth quart sized jars (for honeycomb)
1 – Box of wood screws (size 1″ screws)
1 – Can of wood stain (use a dark wood stain of your choice)
And of course, you need bees, most bees are available only in March and April but you can try these links to order your honey bees online – 3lbs of honey bees – Queen Bees For Sale
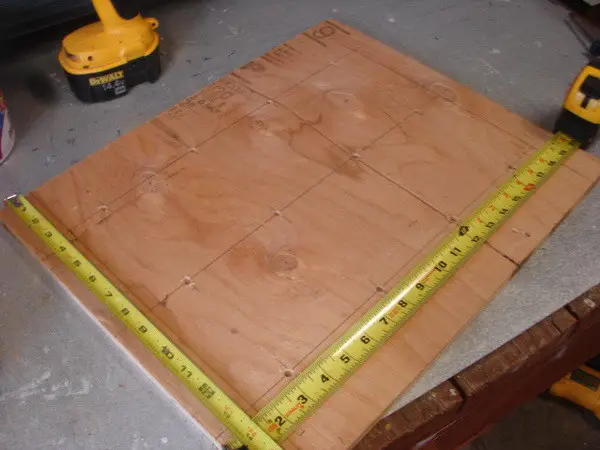 First get a piece of thick plywood and cut to 16″ x 20″.
Then measure and center for 12 holes and drill the pilot holes.
Next, drill 12 – 3 1/2″ holes with a hole saw (for the jars to fit into).
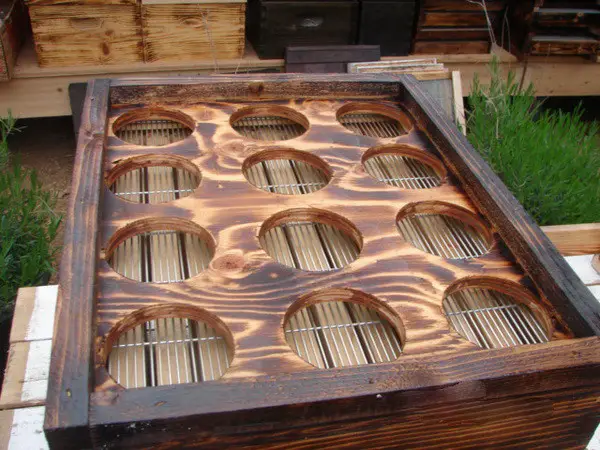 Next cut 2 – 22″ pieces from a 2″ x 12″ x 6′ board and 2 – 18″ pieces from a 2″ x 12″ x 6′ board.
Then screw everything together and stain the wood with dark wood stain (or whatever you choose).
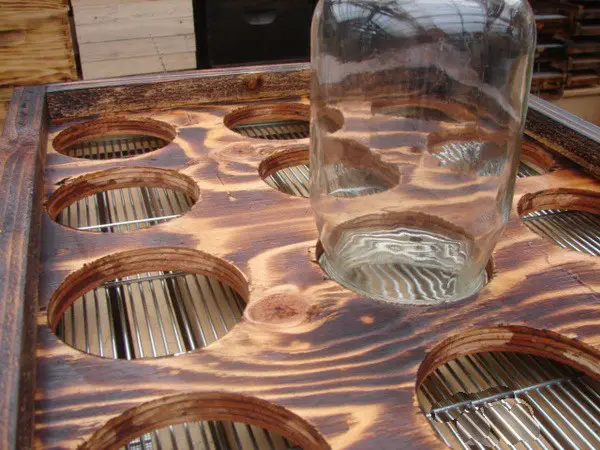 Get your 12 wide mouth mason 1/2 gallon size jars (or a normal quart sized jar).
Then arrange them and make sure they all fit properly over the holes.
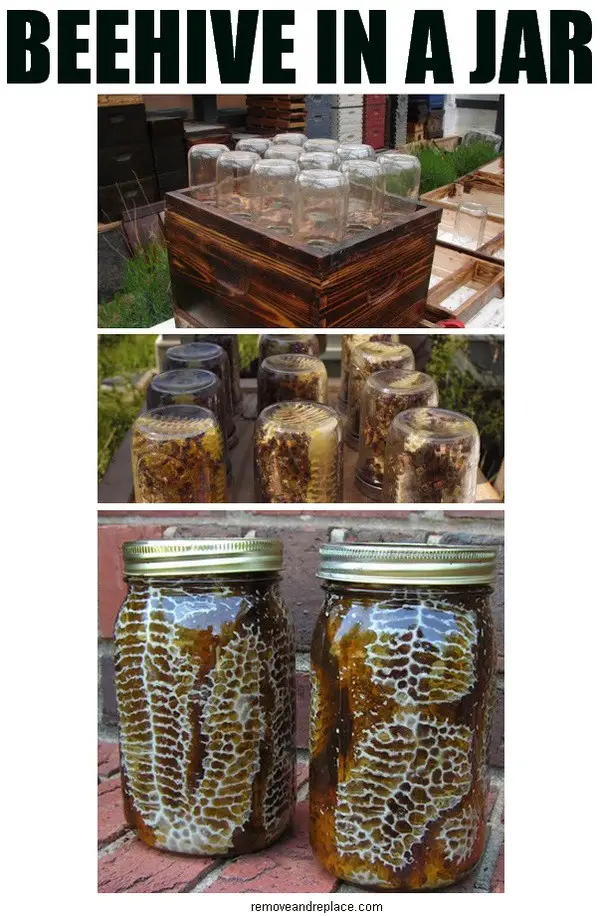
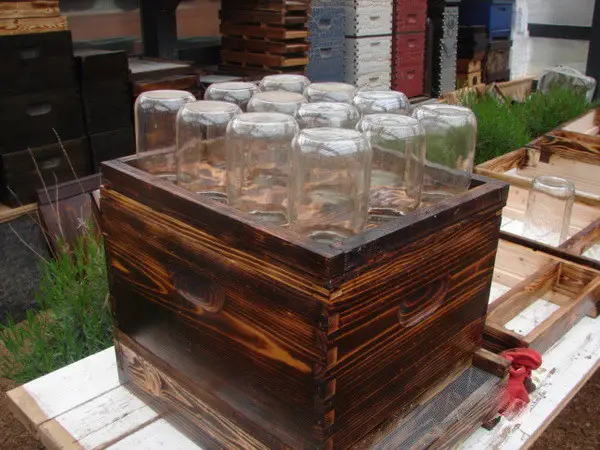 Here is the 12 beehive jars arranged and installed in our backyard beehive.
The jars sit with the screw lid on for less than 1/16″ gap between the jar and the beehive hole.
You may need to add some shims to support the weight so it won’t sag with the weight of the honey.
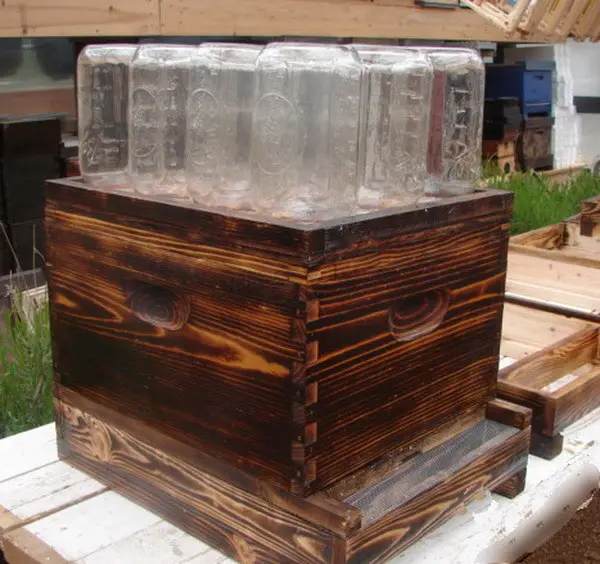 Another view of our DIY backyard beehives in a jar project.
You can vent and screen this chamber if there is excess heat or put the beehive where it gets late day shade.
The bottom wooden piece we purchased as a kit and this is where the bees enter and exit the beehive.
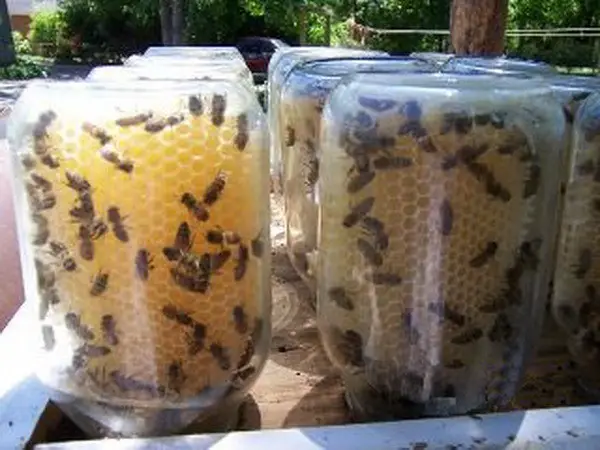 The bees are seen here after we added them to the jars, they are now ready to make organic honey.
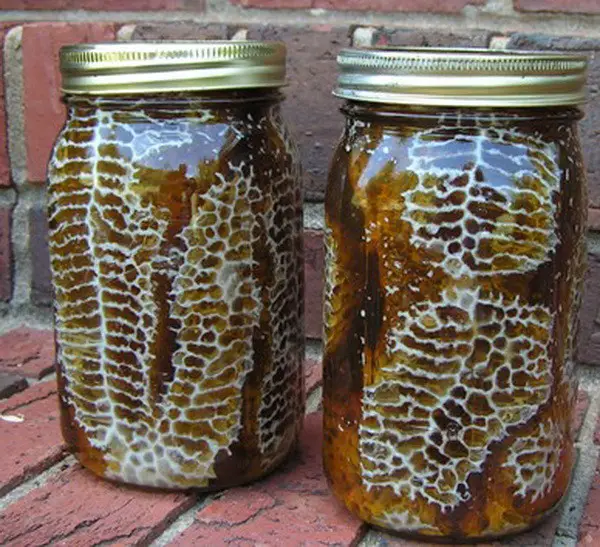 After much time, here is what the honeycomb jars look like filled with honey.
MORE QUESTIONS ABOUT BEES IN A JAR?
PLEASE WATCH THE VIDEO BELOW…

Written by Keith Schneerer
Certified Appliance Tech · Founder, RemoveAndReplace.com
Keith has spent 30+ years repairing machines, starting as a military mechanic and later maintaining food processing equipment before moving into appliance repair. He founded RemoveAndReplace.com to share field-tested repair advice.
More about Keith →


The bees make the comb in the jars and will fill the comb with honey. Lids stay off while jars are on hive. Cover the jars with deep super and lid. The jars get filled with honey by you after the bees are done with the comb.
If your worried about weather just put on a frame box and lid. Just leave the frames out
I am not a bee person but I do eat honey. My question is why would somebody want the honeycomb? For example if I bought this jar of honey what would I do with the honeycomb? It seems it would be in the way.
This was actually a fairly common practice in the late 1800s, and beekeepers competed (at county fairs, etc.) to have the loveliest comb drawn out in glass globes that had been attached to the rest of the hive. I do believe the bees fill most if not all the comb with their own comb, then the beespace between the honey combs is filled with extra honey.
I tried this about 2 weeks ago in lieu of a regular honey super (above 2 deeps) covered with a medium super and telescoping outer cover – after about 10 days with no real activity in any of the pint jars I replaced with a conventional honey super — once that is 85 – 90% full I will retry to see if the bees will take to it. I may drop some melted beeswax into the jar bottoms before inverting for the honey super to give them a base to start from this time. One concern is ventilation as this closes off the normal inner cover venting — i may add some screened vent holes to between jars or possibly replace the center jar (or jars) to ensure the bees don’t get too hot…
@Karen (and others that made similar comments): The bees build out the comb in the jars. You would remove the jars when they are all drawn out. Turn the jars right side up. Add your own honey from a prior extraction. It’s a novelty idea to either increase the wow factor (so you can charge a higher price), or to give away as a gift that is unusual and unique. Note; you cannot remove the comb without destroying it. You add your own honey…the bees don’t do it. This is not in lieu of a normal beehive system. You will still need at least two brood chambers below this setup. The bees will build the comb without you needed to add wax. Bees create wax from 8 wax-producing glands on their sides, which is what they do naturally in the wild. The goal here is to provide a novelty item, and not a jar that you would want to extract the comb or honey from. That defeats the purpose of this project. Finally, I recommend that an empty super be placed over the jars to block the heat and sun.
I was told by a beekeeper that the bees only make the comb and the honey is just poured in over the honeycomb. She said that the bees cap the honey in each cell and if you look at the picture, none of the cells have been capped.