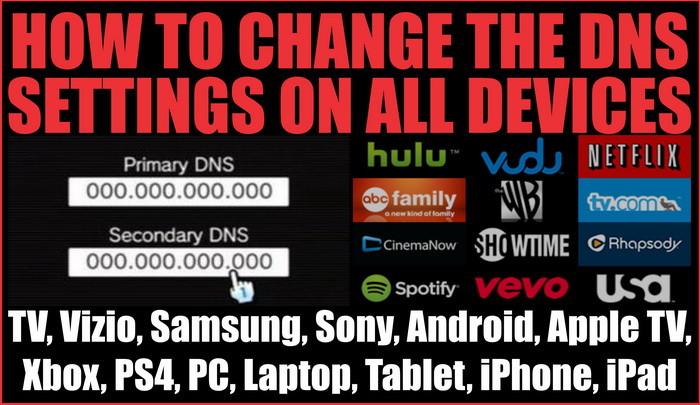
This guide will show you the steps to change your DNS address numbers on any device (TV, Vizio, Samsung, Apple TV, Sony, Xbox, PS4, PC, Laptop, Tablet, iPhone, iPad) If you need to change your DNS codes on your TV or Apple device, the proper method to do so is below. This is mostly for watching Netflix based from the USA Netflix as other countries have a limited choice of shows and movies to watch. (Need Netflix DNS Codes to watch US Netflix?)
 Change DNS settings on any device
Below are the ways to change the DNS on ALL Apple devices including iPad, iPhone, and Apple TV.
How to set the DNS codes on IPAD:
- Go to SETTINGS
- Choose WIFI
- Click the INFO (arrow) button on your wifi connection and you will see the part that says DNS.
- ENTER in a new Netflix DNS code into the DNS box and save.
- RESTART your device.
How to change your iPhone DNS server numbers:
- Choose Settings.
- Click on Wi-Fi.
- Find your wireless network in the list and click it.
- Click on the DNS and delete the numbers.
- Enter the new DNS server. (NOTE: If you enter more than one DNS number be sure to put commas between them or they will not work.)
- Test NETFLIX.
How to change your Apple TV DNS server numbers:
- Choose Settings.
- Choose General.
- Choose Network.
- Choose Ethernet or your WiFi network.
- Choose Configure DNS.
- Choose Manual, overwrite DNS address and choose Done.
Below are the ways to change the DNS on ALL Televisions such as Samsung, Sony, and Vizio.
 Change the DNS settings on any smart TV
How to set the DNS codes on Samsung Smart TV:
- Press Menu on your remote.
- This will open the settings menu.
- Scroll down to Network.
- Select Network Settings.
- The TV will show you how it has connected to the internet.
- Press Start.
- At this point, if you have a WIFI Network you will need to select it and type in your pass. (NOTE: If you are connected via Ethernet it will not show up)
- The TV will now test the internet connection.
- Select IP Settings.
- Go to DNS settings and input the new DNS address and press OK.
- The connection will test to see if connected.
- Press Next to save your settings.
How to set the DNS codes on Vizio TV:
- Push the VIA button on your television remote.
- Go To HDTV Settings App. (This opens a Settings menu)
- Go To Network. (This opens the Network Connection menu)
- Go To Manual Setup. (This opens a screen containing a list of your current network settings)
- Go To Preferred DNS. (You may need to turn off DHCP first.)
- Enter primary and secondary DNS.
How to set the DNS codes on Sony TV:
- Press HOME.
- Select Setup.
- Network.
- Network Setup.
- Select Wired Setup or Wireless Setup depending on how it is connected to your home network.
- Select Custom and enter the DNS server numbers.
Below are the ways to change the DNS on ALL Gaming consoles such as Xbox ONE, 360, PS3, PS4, Wii, and more.
 How to change DNS on game consoles
How to set the DNS codes on your PS3 for US Netflix:
- Log into your PS3.
- First choose Network Settings.
- Then choose Internet Settings.
- Answer Yes, and it will disconnect you from the internet.
- Select the custom option.
- Keep all settings except the DNS Settings.
- Choose manual option.
- Enter the DNS numbers.
- Save your settings and reboot your PS3.
How to set the DNS codes on your PS4 for USA Netflix:
- Go to Settings.
- Go to Network.
- Go to Set up internet connection.
- Choose Use Wi-Fi.
- Choose Custom.
- Choose your Wi-Fi network and enter password.
- Choose Automatic.
- Choose “Do Not Specify.
- Choose Manual.
- Change your Primary and Secondary DNS codes.
- Click Next.
- Choose Automatic.
- Select Do not use.
- Select Test Internet Connection.
- Go to Netflix and TEST.
How to set the DNS codes on XBOX ONE:
- From the Xbox One home screen.
- Go to Settings.
- Go to Network.
- Go to Advanced settings.
- Go to DNS settings.
- Go to Manual.
- (If Settings doesn’t appear on the home screen, select My Games & Apps, then Settings.)
- Enter the Primary DNS.
How to set the DNS codes on your XBOX 360 for UNITED STATES Netflix:
- Go to settings tab.
- Choose system.
- Go to network settings.
- Choose your WiFi network.
- Choose configure network.
- Select the box with your DNS address.
- Choose manual.
- Edit your primary and secondary DNS servers.
- Press done.
- Press B to go back, and choose Test Xbox Live Connection.
- After the test is done then test Netflix.
How to set the DNS codes on your Wii for US Netflix:
- Start at Wii Options.
- Wii Settings.
- Choose Internet.
- Connection Settings.
- Select your connection.
- Change Settings and Scroll right to “Auto-Obtain DNS” and select No.
- Select Advanced Settings.
- Input primary DNS and secondary DNS.
- Below are ways to change the DNS on a Blu-ray player to watch Netflix.
Below are the ways to change the DNS settings on ALL Blu-ray players and more.
 Change DNS on Blu-ray players
Setup USA DNS codes on a VIZIO Blu-ray:
- Main Menu.
- Select Settings.
- Select Network.
- Select Wired or Wireless depending on your network setup.
- Change IP setting from Dynamic to Manual.
- Select Primary DNS and click Edit.
- Input primary DNS.
- Select Secondary DNS and click Edit.
- Input secondary DNS.
- Click Apply to save settings.
Setup DNS codes on a Sony Blu-ray player:
- Press HOME.
- Select Setup.
- Network.
- Network Setup.
- Select Wired Setup or Wireless Setup depending on how it is connected to your home network.
- Select Custom and enter the DNS server numbers.
Below are the ways to change the DNS on ALL Android devices.
Setup DNS codes on Android:
- Open Settings.
- Select Wi-Fi.
- Long press your current network then select Modify network.
- Mark Show advanced options check box.
- Change IP settings to Static.
- Add the DNS servers IPs to the DNS 1 and “DNS 2 areas.
- Press Save button.
- Disconnect from the network.
- Reconnect for changes to take effect.
Below are the ways to change the DNS on a PC computer or laptop with Windows:
Setup DNS codes on a PC:
- Control Panel.
- Network Connections.
- Select your local network.
- Click Properties.
- Select Internet Protocol (TCP/IP).
- Click Properties.
- Select “Use the following DNS server addresses”.
- Enter the desired DNS server in the space provided.
- To add more DNS servers, click Advanced then the DNS tab at top.
Below are ways to set up DNS setting on MAC computers:
Setup DNS codes on a MAC computer:
- Click on your “Apple” menu.
- Choose “System Preferences“.
- Double-Click on the “Network” icon.
- Go to the “TCP/IP” tab.
- Enter DNS server IP address.
If you are sick of getting new DNS codes each week to watch Netflix, consider using watch USA netflix or getting an Android TV Box.
Are we forgetting any device out there that needs the DNS settings changed? Please leave us a comment below and let us know.


I have a 32″ Smart LED HD Television, so can you give me the full instructions of how to change my dns and also can I add any more apps on the tv, like YouTube and netflix, can I get any other apps, like a new Internet app?
Thanks
Alie
Alie,
Which Element TV do you have? What is the model number?
-RR
Cab you please tell me the full description of how to change the dns settings on a element smart tv?
Hey did you ever find out a way to change the settings? I still can’t find it on my element TV either.
Bill,
To change the DNS settings:
-Open the Settings on the device.
-Select “Wi-Fi”.
-Long press your current network, then select “Modify network”.
-Mark “Show advanced options” check box.
-Change “IP settings” to “Static”
-Add the DNS servers IPs to the “DNS 1”, and “DNS 2” fields.
-Press “Save” button, disconnect from the network, and reconnect for changes to take effect.
ALSO.. There is an application called DNSet that allows you to change the DNS servers used by your device and doesn’t require root privileges.
-RR
Hi there, I just bought a GooBang Doo M8S Plus TV Box from Amazon. It’s android based TV box with remote control. How can I access and change DNS value? Thanks a lot.
Bree,
When you are in the DNS settings on your Element TV, there should be a Manual Setup option? If so click that and enter in the DNS settings.
-RR
I can’t find an option on my Element smart TV to change the DNS. When I go to network settings and click IP address I can see DNS server IP address but no option to change it. It’s a 40″ smart LED FHD television. Please help! Thanks.
Wynter,
To change DNS settings on an ELement Smart TV:
Go into MENU.
Click SETUP.
You should see a place to change the settings…. Here is a user guide for an ELEMENT SMART TV.
What model number TV is your element?
-RR
Can you please tell me how to change the settings on an element smart tv?