Cracked or crumbling grout gets removed with a grout saw or a chisel and hammer, then you clean the joints out completely, mix fresh grout, and float it in. Budget an afternoon. Once it’s set, you cure it with water for 48 hours and seal it. That last step is the one everyone skips — and it’s why they’re back doing it again in two years.
- Loose grout comes out with a grout saw; solid grout needs a chisel tapped with a hammer. Match the tool to the condition.
- Clean the joints spotless before you mix anything — a shop vac and a small brush do the real work here.
- Mix small batches. Grout sets in the bucket faster than most people expect.
- Cure the fresh grout with light water spraying several times a day for 48 hours.
- Seal it when it’s done. Unsealed grout is the number one reason a regrout job fails early.
Should You Regrout or Retile? Start Here
Most people get this backwards: when they see cracked grout, they assume the tile job is failing and start pricing out a full tear-out. Nine times out of ten, that’s not it at all. Grout is the sacrificial layer — it’s supposed to be the thing that wears before the tile does. If your tiles are solid and only the grout lines are cracking or falling out, you’ve got a grout job, not a tile job. I spent 19 years doing aircraft maintenance where you learn fast to replace the wear part, not the whole assembly, and this is the exact same logic. Pull the failed grout, put fresh grout in, and you’ve saved yourself a weekend and a few hundred dollars. The only time you’re looking at more than that is if tiles are lifting, hollow-sounding when you tap them, or the crack runs straight through a tile itself. Otherwise, regrout and move on.
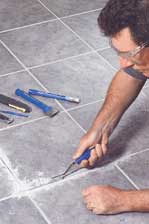
If grout is cracked or beginning to fall out, it should be removed and replaced. Simple as that. Grout doesn’t heal, and once a joint opens up, water starts getting behind the tile — and water behind tile is how you turn a cheap fix into an expensive one. So don’t sit on it.
What You’ll Need
Nothing exotic here. You can grab all of this at any home improvement store, and if you’ve done any DIY tile work before — like a kitchen backsplash install — you probably already own half of it.
- Bag or bucket of grout
- Small mixing bucket
- A rubber grout float
- Eye protecting goggles
- Portable heavy duty vacuum (shop vac)
- A hammer
- A pair of heavy duty rubber gloves
- A thin chisel or grout saw removal tool
- A large new sponge
- Small scrubbing brush
One note on the gloves and goggles — I’m not just listing those to fill out the box. Grout is cementitious and it’s alkaline. It’ll dry out and crack your skin, and a chip of old grout in the eye when you’re chiseling is a genuinely bad afternoon. Wear them.
1. Remove the Old Grout
How you pull the old grout depends entirely on what shape it’s in, and this is where people either save an hour or waste one. There are two situations and two different tools — pick the right one before you start swinging anything.
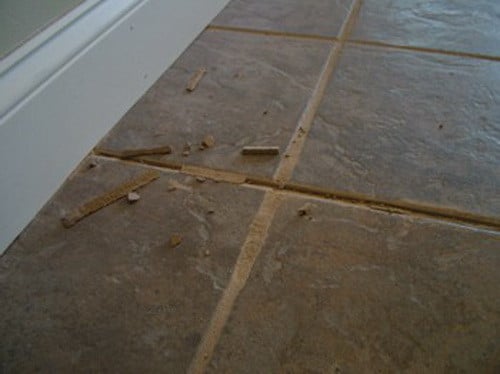
If the Grout Is Already Loose and Crumbling
Grab a grout removal tool — the little handheld grout saw you’ll find at any home improvement store. Scrape it along the damaged grout line and dig the old grout out of the joints. It comes out easier than you’d think when it’s already failing. Use a small brush to clean the loose and damaged grout out, then hit it with a portable vacuum to completely remove the debris. Get the area totally clean before you move on. I mean spotless — any grit left in the joint keeps the new grout from bonding.
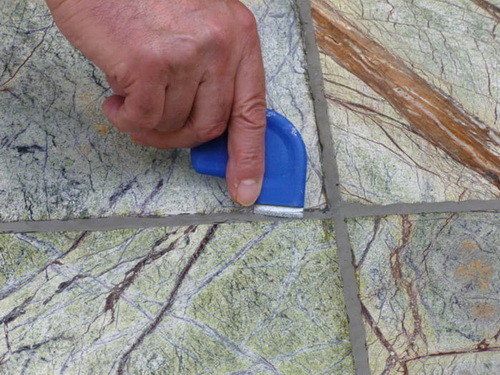
If the Grout Is Still Solid but Needs to Come Out
This is the tougher case. Take your chisel, hold it right above the grout line, and tap it with the hammer to break the old grout away. Do small areas at a time — I know it’s tempting to muscle through a whole run, but small sections keep you from chipping a tile edge. Clear the broken grout away with the heavy duty vacuum as you go. One field trick that saves your knuckles and your tile: instead of leaning your full weight into the chisel, let the hammer do the work with light, controlled taps. Steady pressure slips and cracks tiles. A tapping rhythm breaks the grout right along the joint where you want it. I learned that the hard way on a bathroom floor years back — cracked a perfectly good tile trying to force it, then had a tile job on top of my grout job. Don’t be me.
2. Mix the Grout
In your small bucket, mix the grout according to the instructions on the bag, bucket, or box — the ratio matters and every product’s a little different, so read it. And this is the part everyone gets wrong the first time: don’t mix a large portion of grout all at once. It’ll harden in the bucket before you can finish the job, and there’s nothing more frustrating than watching forty bucks of grout turn to concrete while you’re still on the far corner. Mix small, work it, mix more. You’ll get a feel for your pace after the first batch.
3. Apply the New Grout
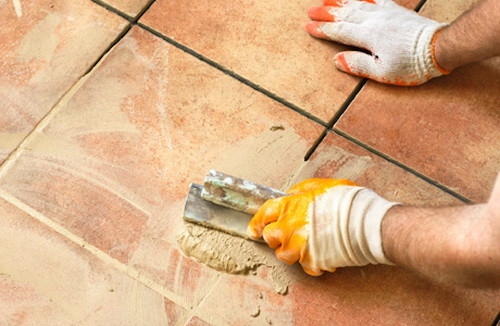
Start at the corner farthest from the main walk path of the room — you want to work your way out toward the door so you’re not stepping on fresh grout to get out. This is one of those things nobody tells you and then you’re standing in a corner you just grouted with no way out. Pour the newly mixed grout over the cleaned tiles and use the grout float to push it down into the joints.
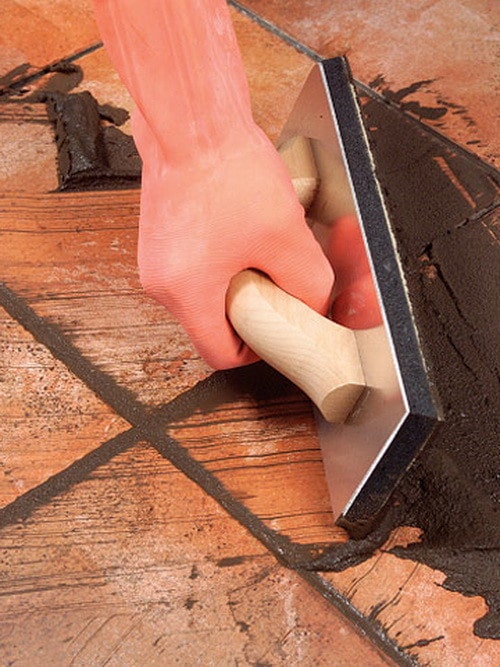
- Force the new grout into all the open spaces between tiles. Work the float across the joints at an angle so it packs the grout in instead of dragging it back out. Clear the extra grout off your float with every pass you make.
- Use the float to scrape excess grout off the tile faces as you go. Hold it at a steeper angle, like a squeegee, and it’ll skim the surface grout right off while leaving the joints full.
- Swipe a wet sponge across the grouted joints using back-and-forth movements, covering about a foot or so at a time. Each pass removes a little more grout, so don’t overdo it — you’re cleaning the tile face, not digging the joint back out.
- Keep the sponge moist, not wet. Squeeze the excess water out constantly so it stays damp, and wipe any leftover grout off the tiles. Too much water on the sponge washes the grout out of the joints and weakens it.
Let the grout dry about 8 to 10 hours. After that, use a rag to wipe away any remaining haze — that cloudy film left on the tile surface. It comes off easy once the grout’s set.
How Long Does Grout Take to Cure?
Drying and curing aren’t the same thing, and this trips people up. The grout feels dry to the touch in 8 to 10 hours, but it isn’t cured. For a full 48 hours you need to cure it by lightly spraying it with water multiple times a day. Sounds backwards — you just cleaned the water off, now you’re spraying it back on — but grout is cement, and cement cures by staying damp, not by drying out fast. Cement that dries too quickly cures weak and crumbly. So mist it a few times a day for two days and let it do its thing. Rush this and you’ll be pulling the same grout out again sooner than you’d like.
Seal It — This Is the Step Everyone Skips
Do not forget to seal the newly applied grout with grout sealer. I’m putting this in its own section because in my experience, roughly 8 out of 10 regrout jobs that fail early failed because nobody sealed the grout. Unsealed grout is porous — it soaks up water, dirt, and every spill, and then it stains, mildews, and breaks down. A bottle of sealer is cheap and takes twenty minutes to wipe on. It’s the difference between a grout job that lasts a decade and one you’re redoing in two years. Wait until the 48-hour cure is done, then seal.
Keeping It From Cracking Again
Once you’ve sealed it, reseal the grout about once a year in high-traffic and wet areas — kitchens, bathroom floors, showers. It’s a fifteen-minute maintenance job that keeps water out of the joints, and water in the joints is what starts the whole cracking cycle over again. If you notice a single joint starting to fail, dig that one out and patch it right away instead of waiting for the whole floor to go. Small problems stay small if you catch them. And while you’re down there, if you spot a tile that’s actually cracked rather than just the grout around it, that’s a different repair — learn how to remove and fix a cracked floor tile before it spreads.
Frequently Asked Questions
Can I put new grout over old grout?
No. I know it’s tempting, but new grout won’t bond to old grout — it’ll just sit on top, crack, and pop right back out. You have to remove the old grout down into the joint first so the fresh grout has clean tile edges to grip. Skipping the removal step is a waste of a whole batch of grout.
How deep do I need to remove the old grout?
Get it down at least a couple millimeters below the tile surface — deep enough that the new grout has real depth to hold onto. If you just skim the top and leave a thick layer of old grout underneath, the thin new layer on top has nothing to bond to and it’ll fail fast. When in doubt, go a little deeper.
Why does my grout keep cracking?
Usually one of three things: the grout was mixed too wet and cured weak, it never got sealed, or there’s movement in the subfloor. I’d bet on the sealing issue nine times out of ten — that’s the one I see most. But if you regrout, seal it, and it cracks again in the same spot within months, you’ve likely got flex in the floor underneath, and that’s a subfloor problem no amount of grout will fix.
Do I really have to spray it with water for 48 hours?
You should. Grout is cement and cement cures stronger when it stays damp during the first couple days. Will it fall apart if you skip it? Not necessarily — but I’ve seen the difference in hardness between grout that got cured and grout that didn’t, and it’s real. It costs you nothing but a spray bottle and a little attention, so I do it every time.
What kind of grout should I use — sanded or unsanded?
Depends on your joint width. Sanded grout for joints wider than about 1/8 inch, unsanded for anything narrower. Using sanded in a tight joint is a pain to work in, and using unsanded in a wide joint tends to crack because it shrinks more. Match the grout to what’s already between your tiles and you’ll have an easier time all around.

Written by Keith Schneerer
Certified Appliance Tech · Founder, RemoveAndReplace.com
Keith has spent 30+ years repairing machines, starting as a military mechanic and later maintaining food processing equipment before moving into appliance repair. He founded RemoveAndReplace.com to share field-tested repair advice.
More about Keith →