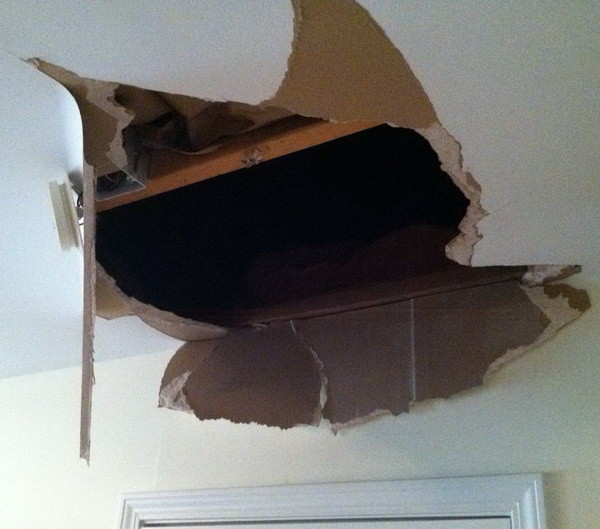
We have all had to deal with an incident where a large hole is accidentally made in the ceiling or drywall of your house or home. A person in the attic accidentally steps in the wrong place and boom, a hole appears. Fixing a large hole in your wall can be an easy fix and other times it may take much work to make it look as good as new. We are going to help you with getting the wall or walls back to looking original and undamaged again with plenty of tips and professional instructions. Sometimes accidents happen. See below for our Professional diy Method to Fix a Hole in your Drywall.
A ceiling drywall hole like the size above can can be fixed easily by following the steps below.
Materials Needed To Fix A Hole In Your Wall Or Ceiling Drywall:
1 – Piece of drywall cut to fit over hole (square piece)
1 – Box of drywall screws
1 – Roll of drywall tape
1 – Can of drywall spackle
1 – Spackle applicator tool
1 – Sheet of sandpaper
1 – Can of primer paint
1 – Can of matching paint
The easiest professional procedure for fixing the hole: The easiest method to fix a hole in your drywall is to cut the hole to a square using a handsaw. Then measure the exact dimensions of the hole. Many pieces of pre-cut drywall sections can be found at your local home improvement store. Take the dimensions of your hole to the home improvement store and try to find a piece of drywall that will cover the hole that is already pre-cut.
The hole we were fixing was under 2ft by 2ft, so we purchased a piece of drywall that was 2ftX2ft, bought some drywall screws, drywall tape, wall spackle, a spackle applicator, some sandpaper, primer and matching paint. We got home and organized all of our materials. We then screwed the drywall replacement square to the ceiling joists (into the 2×4’s in the ceiling). We then used our drywall tape to cover the joints (where the new piece of drywall meets our old piece). We applied spackle over the drywall tape and applied it making it even and smooth.
After the spackle was fully dry, we then sanded it with our sandpaper to make it smooth and level. The better job you do sanding down the spackle, the less likely it will be that anyone notices that work was done on the wall or ceiling. We sanded down a little too much so we added more spackle, let dry, then sanded again. Once our sanding was finished we applied our prime paint with 3 coats to hide the area well. It is best to prime not only the area you are concealing but also a little further out to have the area that was damaged match with the rest of the wall.
Once our primer was on and fully dry, we applied our perfectly matching paint. If you did a good job spackling, sanding and priming, the wall will be smooth and you should not feel any uneven areas when you apply your paint. Once you have applied at least 3 good deep coats of paint, let dry and examine the wall. Now, stand back from the wall and look to see if you notice any areas of your drywall repair that stand out or do not look even.
If all looks good then you have successfully repaired your wall. If the wall still has an obvious flaw or looks uneven, then you may want to start over and try again. If the area in question just cannot be repaired correctly, then do what most do and hang a picture over the damaged area. Hopefully these tips and procedures for repairing a hole in your wall or ceiling have helped you and your job is complete.


Leave a Reply