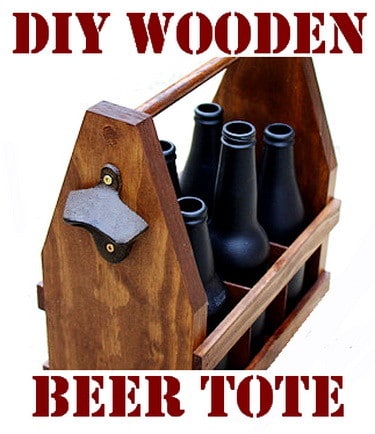
Looking to make a unique and custom wooden beer carrying tote? We have it here. Carry your beers with class! This beer caddy consists of wood and a wall mounted metal bottle opener. It should take a half day to build this whether you are a beginner or a pro. If you have woodworking skills, then this project should be easy for you. Go here for a FULL STEP BY STEP build of a similar DIY Wooden Beer Tote.
DIY Wooden Beer Tote Materials List:
1 – 34″ of 1″ X 6″ Wood Board (your choice of wood type = 34″ length)
1 – Rod of 1/2″ Wood Dowel (10″ length)
1 – 1/4″ Plywood (3ft X 3ft)
1 – Can of Wood Stain (Any Color)
1 – Metal Bottle Opener (Wall Mounted)
If you are interested in these very unique beer tote’s, but do not want to build one yourself, here is an Etsy link to choose from 8 to 10 different amazing designs. They are priced from $35 to $50 dollars and they are made one at a time, not mass produced.
How To Build A Wooden Beer Bottle Carrier
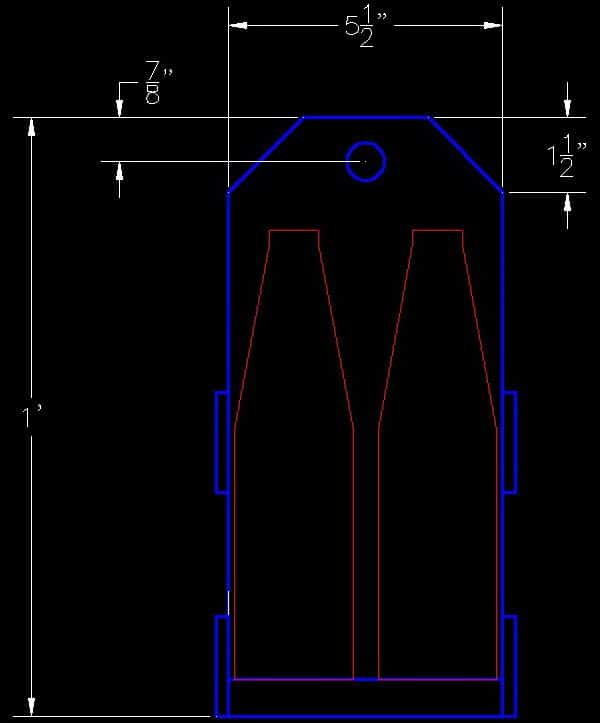
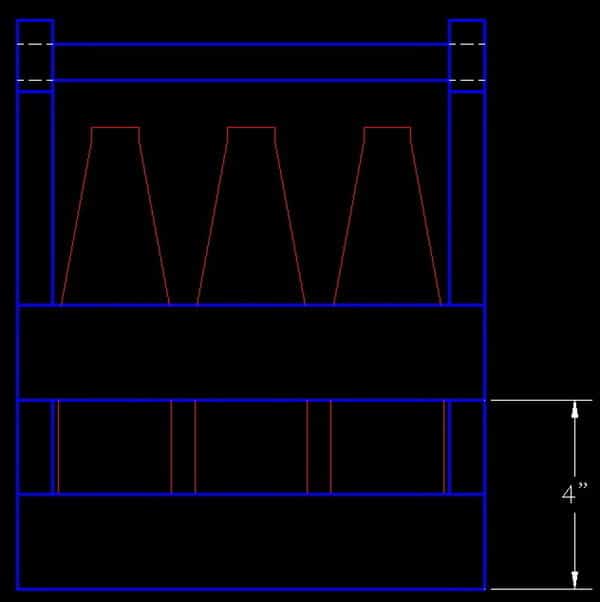
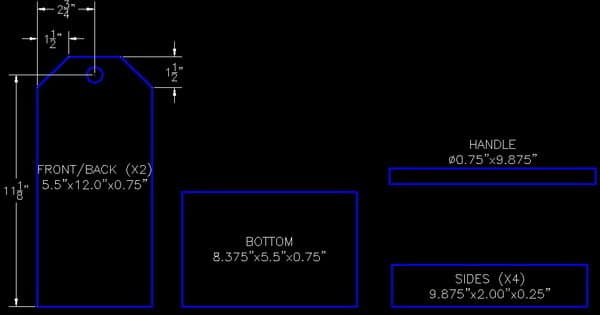
Below we have the build plans showing the measurements of the wood if you choose to make this yourself.
(Thanks to Markus in Sweden for sending us the build plans below)
Below are a few videos showing similar beer totes that may give you some other ideas




These are great! I just built a beer caddy (got a kit with everything I need to build this through hatchkits.com) and am looking for additional projects as they only have one other kit at the moment — what did people build after this that required a similar level of skill?
I made four of these, but I had a suggestion that would make it it a bit easier. For the bottom, I found that if you start the 1/4-inch grooves 2.75 inches from the edge (on both sides), you’ll have a much easier time. Also, I did not make the inserts as wide here – just cut the groove on one side, rather than both. It’s still very sturdy. Furthermore, I can’t imagine making this without a table saw -too many cuts! However, unlike the video – I do not have a router. So, I used a table saw with a standard blade and then offset the cut enough to make the groove.
Hi Debora,
We added a YouTube video at the top of the page that explains much better.
-RR
Hey there…are there anymore directions to go with this beer tote? I know its pretty self explanitory, but a little more direction would be awesome, especially for the inserts.
thanks bunches,
debbie.