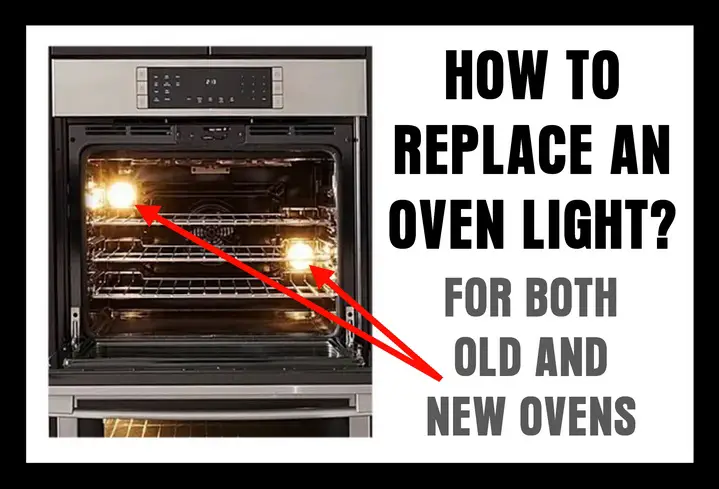
Having a working oven light bulb is essential in order to be able to see what’s cooking in your oven. With regular use, it’s not uncommon for an oven light bulb to burn out. Knowing how to replace an oven light is an important skill to have. Here are step-by-step instructions on how to replace an oven light bulb safely and quickly.
Before Replacing The Oven Light
If your oven light is not working, it’s important to replace the light so it is functioning as normal. Knowing how to replace the light can save you time and money, as well as the hassle of having to call a professional. We’ll take you through the steps of how to fix oven light not working, as well as provide you with some troubleshooting tips.
Oven Repair Safety
Before you begin to replace an oven light bulb, you should take some safety precautions. Turn off the power to the oven. You can do this by unplugging the oven from the wall or flipping the circuit breaker. Be sure to wear protective gloves and safety glasses.
Using a flashlight may also be a good idea as it may be dark and you may not be able to see the oven light cover. Be aware of any sharp edges or hot surfaces and exercise caution when replacing the light. If you have been using your oven recently it could still be hot, so let the oven cool down before you begin to remove the old bulb.
What Type Of Oven Light Bulb Do I Have?
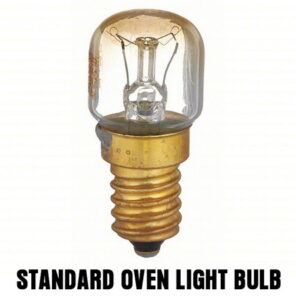
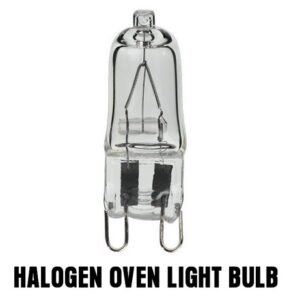
If the “light not working” is the problem you have. Before you can replace the light, you should first determine what type of oven light bulb you have. Remove the racks in the oven or any pans so you can access the light bulb with no problems. Older ovens may have standard bulbs, while newer ovens may have halogen bulbs. To determine the type of oven light, you’ll need to remove the oven light bulb cover.
To do this, simply unscrew the light cover from the oven. The bulb cover may have 2 or 3 screws, a glass cover needs to be removed by unscrewing it or removing a few clips. Once the cover is removed, you should be able to see the light bulb. Remove the bulb from the oven. You then need to check the fitting type and wattage on the old bulb so you can replace it.
What Types Of Bulbs Fit My Oven?
The types of light bulbs that are used in standard ovens are the 15w SES bulb, 25W SES bulb, and the 40w SES bulbs. In a newer oven, the types of lights used are the 25w G9 halogen bulb and the 40w G9 halogen bulbs.
Pro Tip: It is best to not touch the new oven light bulb or halogen light with your bare hands. Use gloves while handling the bulb as oils from your hands can cause the bulb or halogen light to burn out prematurely.
How To Replace A Standard Oven Light Bulb
Replacing standard oven bulbs is a simple process. You’ll need to remove the burnt out old bulb first. To do this, simply unscrew the old bulb.
You will then need to screw in the new bulb. Make sure the bulb is tightened securely in the socket. Once the new bulb is in place, you can replace the light cover.
How To Replace A Halogen Oven Light
Replacing a halogen oven light bulb is a bit more complicated than replacing a standard oven light bulb. Remove the burnt out light first. You’ll need to be careful when handling the old bulb as halogen bulbs can be fragile. Take the new bulb and insert it into the socket.
Make sure the bulb is secure in the socket. Once the new bulb is in place, you can replace the oven light cover. Once the light has been replaced, you can turn power back on and open the door to check that your oven has a working light.
Oven Light Troubleshooting Tips
If you’re having trouble replacing your oven light bulb, there are a few things you can do. Make sure the bulb is inserted securely in the socket.
If it’s not, you may need to adjust the bulb until it is properly secured. If the bulb is still not working, you may need to replace the socket. To do this, you’ll need to unscrew the old socket and replace it with a new one.
How To Replace A Whirlpool Oven Light Bulb
How To Remove and Replace The Light in Your Oven
Replace Your Oven Light Summarized
Replacing the light bulb in an oven is straightforward. You’ll need a replacement bulb that is compatible with your oven’s make and model.
Find the access panel on the oven, usually located near the top or bottom. Remove the screws to gain access. Locate the light bulb, which is typically behind a small glass or plastic covering.
Unscrew the covering and gently remove the old bulb. Insert the new bulb into the oven, making sure it’s secure. Finally, replace the access panel and all the screws.
By following the instructions, you should be able to replace an oven light easily. Just remember to exercise caution when handling the oven light bulb and to use gloves and safety glasses.
Need Professional Oven Help?
If you need any extra assistance replacing the light in your oven, feel free to leave a comment below with the model number of your oven, and we can help you either find the light bulb that you need or walk you through how to replace it. All ovens are different and some may have different types of lights. If you’re not sure what type of bulb it is or how to remove it, please let us know in the comments and we can help you fix your oven.


Leave a Reply