A gas fireplace that won’t light even with a good pilot and working switch almost always means the on/off valve has failed internally, not the gas line. Replacement valves run around $40 online, and swapping one in is a slow, careful job — a loose fitting here means a real gas leak, not just an inconvenience.
- A stuck or seized on/off valve is a far more common failure than the gas line or pilot assembly.
- Replacement valves run about $40, and the swap is a slow, careful job — not a rushed one.
- Turn off gas at both the outside meter and the shutoff valve before removing anything.
- Test every fitting with soapy water before you ever relight the fireplace.
- The safety/heat cover has to go back over the new valve before you close everything up.
Is Your Gas Valve Actually the Problem?
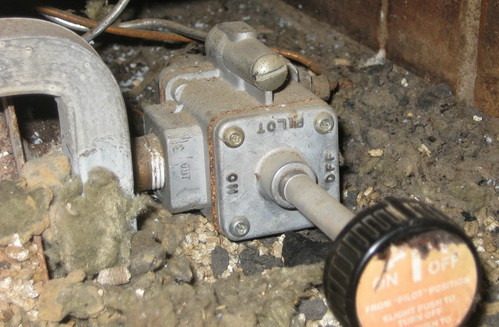
Before you touch anything, rule out the easy stuff: check that gas is actually on at the meter and the shutoff, confirm the pilot’s lit, and swap batteries in the wall switch or remote if your fireplace uses one. After 9 years spent repairing commercial food service equipment, I’ve seen this exact failure pattern over and over — something moves fine on the outside but does nothing on the inside. If the easy stuff checks out and the fireplace still won’t fire, the on/off valve on the gas line is the next likely failure point, and it’s the one I run into most. Most people assume it’s the gas line itself or the pilot assembly, but in my experience the valve has usually just seized internally — the ball or gate inside stops turning open even though the handle outside still moves freely.
Quick gut-check before you go any further, and it’s the same order I’d walk through myself: Fireplace does nothing at all when you flip the switch → check batteries and gas supply first. Pilot lights fine but the main burner never comes on → the valve is very likely your problem, keep reading. Handle turns and you can hear a faint hiss of gas, but it never reaches the burner → same story, skip down to Removing the Old Valve.
One mistake I see people make once they suspect the valve: they crank the handle harder, figuring it just needs muscle to break loose. Don’t. Forcing it can snap the stem or crack the valve body, and now you’ve turned a $40 part swap into something a lot more expensive. If the handle doesn’t turn smoothly with light pressure, the valve’s done — replace it, don’t wrestle it.
What You’ll Need Before You Start
The valve is the only part you’re actually replacing — a universal on/off gas valve, the same basic type used across brands like Napoleon, Heatilator, Heat & Glo, and Majestic fireplaces, runs about $40 online (that’s the exact price we paid, not a rough guess). I always tell people not to overthink the brand match here — Robert-Shaw and Honeywell-style valves are interchangeable enough across manufacturers that you usually don’t need an exact OEM match, which is part of why this stays a $40 repair instead of a $150 one. I’d rather spend an extra few minutes matching a valve style than force an exact OEM part that costs three times as much for no real benefit.
You’ll also want a couple of adjustable wrenches, thread seal tape or pipe joint compound rated for gas connections, a container for the sand bed, an air compressor for the leak test, and a spray bottle with dish soap and water for the leak test — that last one isn’t optional.
If you want a second walkthrough before you dive in, this gas valve replacement guide covers the same basic sequence from a different angle. There’s also a solid troubleshooting walkthrough on Obadiah’s channel worth watching if you’re still not 100% sure the valve is actually your problem.
Turn off the gas at both the outside shutoff and the inline valve before you touch anything. This isn’t optional, and it isn’t paranoia — the CPSC has issued actual recalls over fireplace gas valves creating fire and explosion hazards. If you’re not confident working around gas lines, this is the repair to hand off to a licensed technician instead.
Removing the Old Valve
I always clear my workspace completely before I start pulling logs out — this job creates more dust and sand than you’d expect from something the size of a valve, and honestly it’s kinda messy work. Work through it in order and don’t skip the sand bed step; it’s easy to think you can just reach around it, and that’s how you end up cracking a fitting you didn’t mean to touch.
- Confirm the gas is off outside and inside. Don’t move on until you’re sure of this.
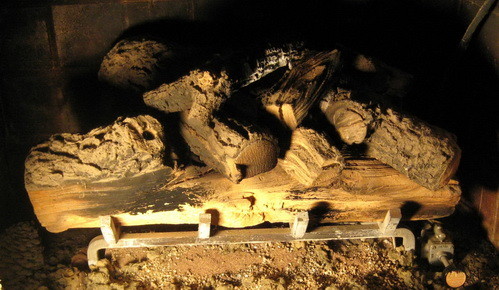
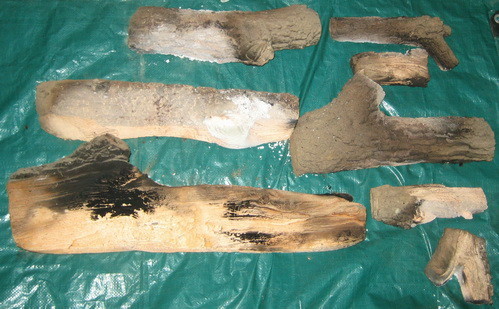
- Carefully remove the artificial logs and set them aside somewhere they won’t get scratched or cracked.
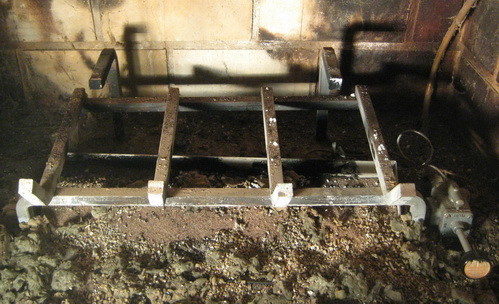
- Remove the metal log holder assembly that sits underneath the logs.
- Scoop out the sand bed covering the gas assembly and valve. That sand isn’t just there for looks — it protects the burner pan and shields the gas lines from heat. It has to come out to get to the valve.
- Disconnect the gas line and carefully remove the complete gas assembly once the valve is exposed.
- Pull the faulty valve off the assembly and set it aside — you won’t need it again, but I always keep it until the new one’s tested and working, just in case.
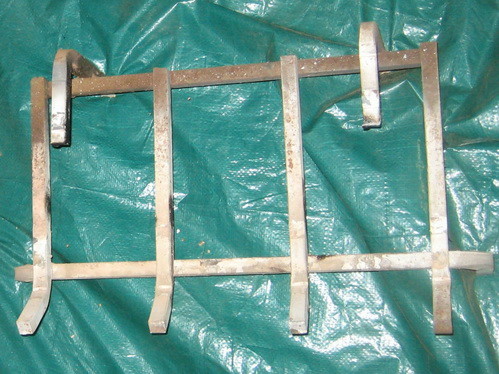
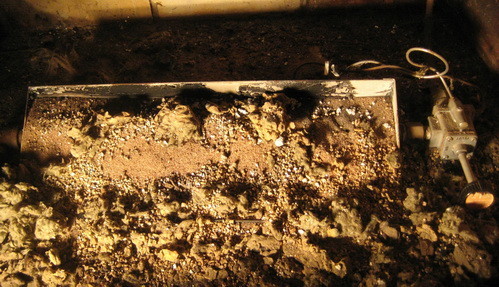
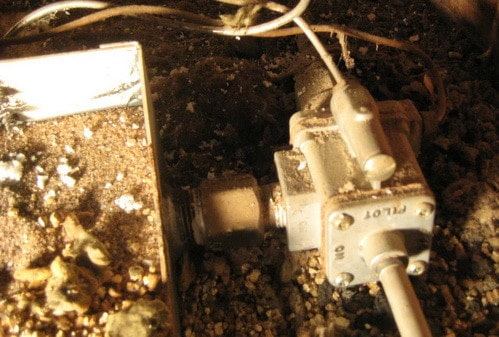
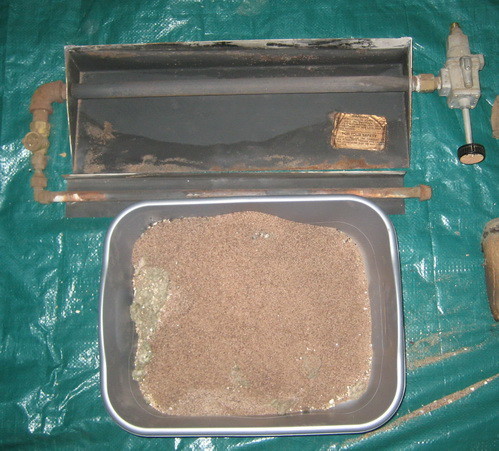
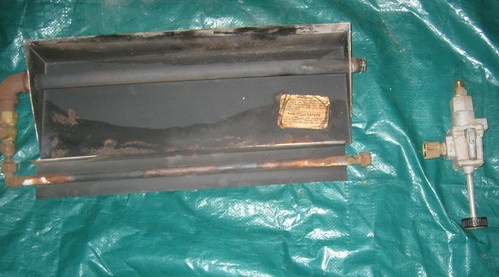
Installing the New Valve and Testing for Leaks
This is the section where careful actually matters more than fast. Assemble the new valve fully before it ever goes near the fireplace, and don’t skip the leak test — I don’t care how confident you feel about the fittings. I never skip this step, no matter how many times I’ve done it.
- Fully assemble the new gas valve onto the gas assembly hardware before reinstalling anything.
- Attach the new valve to the complete gas assembly, tightening each fitting snug but not over-torqued.
Run air from an air compressor through the gas assembly and check every connection with a soapy water solution before you do anything else. Apply the soapy water at each fitting while air is moving through the line. If bubbles form, you’ve got a leak — tighten that fitting and test it again. Only move forward once you’ve confirmed there are no leaks anywhere on the assembly.
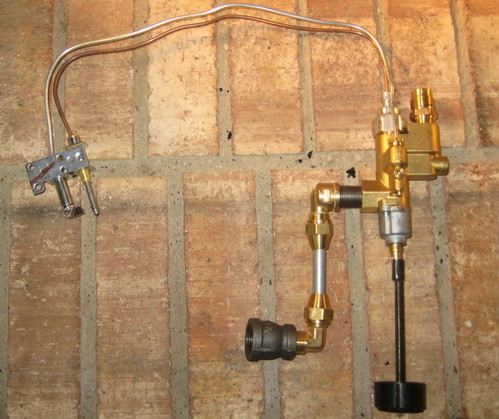
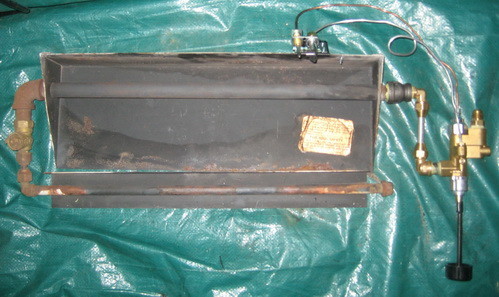
Putting Everything Back Together
Once the leak test comes back clean, the rest of this is really just working back through what you already took apart.
- Place the complete gas assembly back into the fireplace and reconnect the gas line at the fitting.
- Double-check every connection is properly tight, then test the fireplace before you close anything back up.
- Rebuild the sand bed, reinstall the metal log holder, and set the logs back in place.
- Do a final test once everything’s back together, and confirm the fireplace fires and holds a steady flame.
One thing that gets skipped more than it should: there’s a safety/heat cover that sits directly over the valve once everything’s reassembled. I always double-check it’s actually in place before I call a job like this done — it’s there to keep radiant heat off the valve body long-term, and running the fireplace without it is asking for the same failure to happen again sooner.
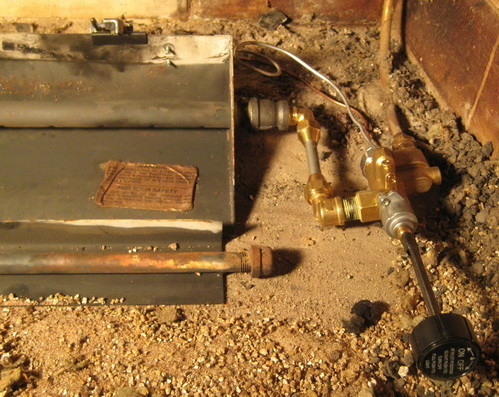
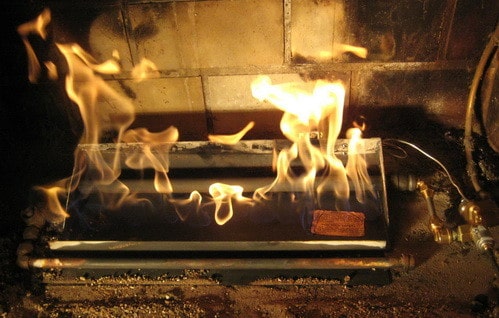
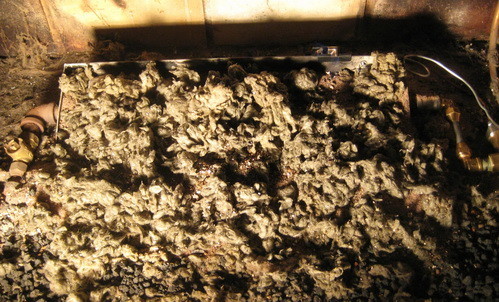
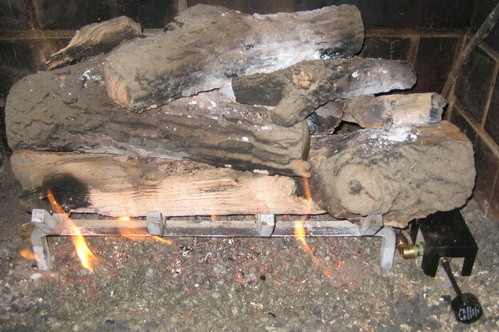
The valve itself runs about $40 online. A licensed technician coming out to diagnose and replace a fireplace gas valve typically runs $150-300 depending on your market, so doing this yourself saves real money. But that math only works if you’re already comfortable with basic gas fittings and you understand exactly what a soap-bubble leak test is telling you. If either of those makes you hesitate even a little, I’d take that hesitation as your answer — call a pro instead.
How to Keep This From Happening Again
Valves that sit unused for long stretches are more likely to seize than ones that get exercised regularly. If your fireplace is mostly decorative and only runs a few weeks a year, I’d run it for a few minutes every month or two even in the off-season, just to keep the internal mechanism moving. I check mine every so often even though it’s rarely used, just out of habit. Never force a handle that feels stiff — that stiffness is the valve telling you something’s starting to go, and catching it early usually means a $40 fix instead of a bigger one.
If you’re already elbow-deep in this fireplace and the surround itself is looking dated, this might be the moment to also think about a full fireplace reface while everything’s already apart. And if valve failures on this unit keep piling up because the whole system is just old, it may be worth reading what’s actually involved in removing a chimney or fireplace entirely rather than keep nursing an aging setup along.
How do I know it’s the valve and not the pilot assembly?
If the pilot lights and stays lit but the main burner never comes on when you flip the switch, I’d put my money on the valve every time. A pilot problem usually means the pilot won’t even light or won’t stay lit — that’s a different repair.
Can I replace a gas fireplace valve myself?
If you’re mechanically confident and understand gas fittings, yes. I wouldn’t hand this one to someone who’s never worked around gas lines before, though — there’s genuinely no room for a fitting that’s “close enough.”
How much does a replacement gas valve cost?
The universal valve we used ran about $40 online. Compare that to a $150-300 service call and the savings are real, assuming you’re comfortable doing the work.
Why bother with the soapy water test instead of just relighting it?
Because a leak you can’t see or smell yet is still a leak. I always run the air-and-soap test on every fitting before I ever put a flame near a gas assembly — bubbles tell you instantly what your nose won’t catch for a while.
What’s the metal cover that sits over the valve?
That’s the safety/heat cover, and it has to go back on before you close the fireplace up. It shields the valve from the radiant heat of the burner, and skipping it is a good way to shorten the life of the new valve you just installed.
I’ll be straight with you: this isn’t a repair I’d hand to someone who’s never worked with gas fittings before. But if you’ve got a mechanical background and you actually respect what a soap-bubble test is checking for, it’s a slow Saturday afternoon job that saves a couple hundred bucks and gets the fireplace back before it’s cold enough to matter.

Written by Keith Schneerer
Certified Appliance Tech · Founder, RemoveAndReplace.com
Keith has spent 30+ years repairing machines, starting as a military mechanic and later maintaining food processing equipment before moving into appliance repair. He founded RemoveAndReplace.com to share field-tested repair advice.
More about Keith →

This is exactly what I need to do… but I cant find the valve replacement you are showing… can anyone shoot me a link to a replacement?