If you only remember one tie knot, make it the Four-in-Hand — it’s the easiest one to tie and it works with almost any tie or collar. I’ve spent the past 13 years building RemoveAndReplace.com into a resource with more than 1,400 practical how-to guides, and ties are one of those things people ask about right before a job interview or a wedding, when there’s no time to fumble through it. If you want to look sharp for those occasions, or for a job that actually requires a tie every day, it’s worth knowing a couple more knots so you’re not stuck with the same look for every shirt collar and occasion.
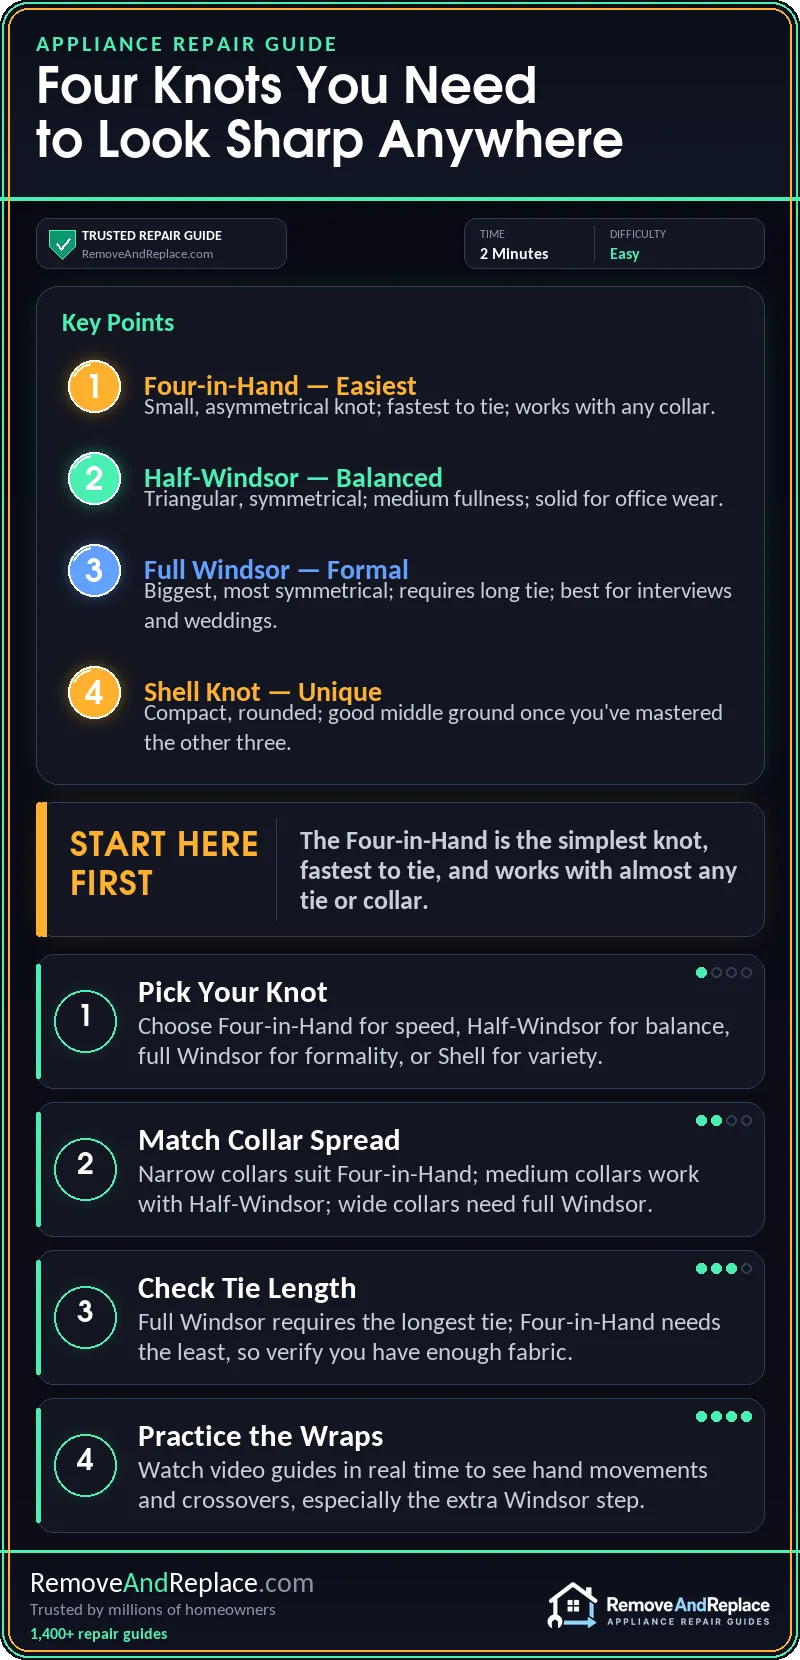
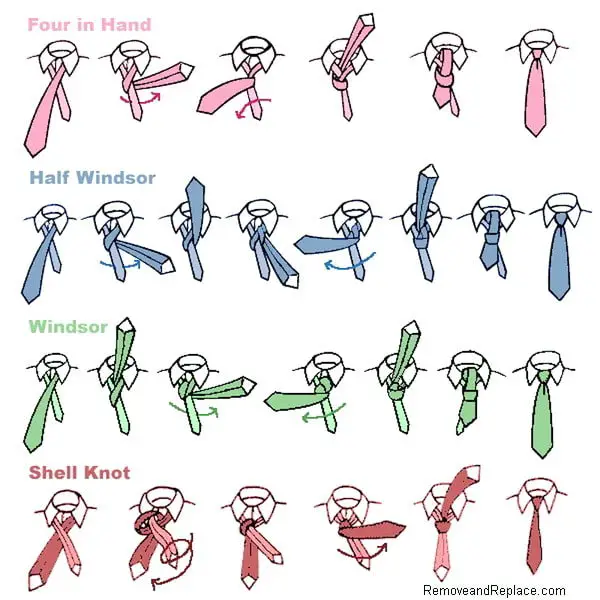
Below are the four knots I think most guys actually need: the Four-in-Hand, the Half-Windsor, the full Windsor, and the Shell Knot. Each one takes a different amount of tie length, ties at a different size, and suits a different collar spread, so knowing all four means you’re never stuck.
What Are the 4 Basic Ways to Tie a Tie?
Each of these knots uses the same two pieces of fabric — the wide end and the narrow end of the tie — but the number of wraps and which side you cross first changes both the shape of the knot and how big it ends up. I always tell people the same thing: pick the knot based on your collar and how much tie length you’ve got, not just whatever knot you already know.
1. Four-in-Hand Knot
This is the simplest knot out there, and it’s the one most guys learn first. It’s a small, slightly asymmetrical knot that works well with narrower ties and most collar styles, including button-down collars where a bulkier knot would look cramped. It only takes a handful of wraps, so it’s also the fastest knot to tie when you’re running late — I default to this one myself on an ordinary workday.
2. Half-Windsor Knot
The Half-Windsor sits in between the Four-in-Hand and the full Windsor — it’s a triangular, symmetrical knot that’s a bit fuller than the Four-in-Hand but not as wide as the full Windsor. It works well with medium-spread collars and is a solid everyday choice for the office. Ties.com has a clear step-by-step for the Half-Windsor if you want to see the wraps broken down one at a time. I’d suggest practicing this one a few times before you need it, since the extra wrap trips people up at first.
3. Windsor Knot
The full Windsor is the biggest, most symmetrical knot of the four, and it’s the one you want for a wide-spread collar or a more formal occasion — job interviews, weddings, or anywhere you want the tie to look deliberate rather than thrown on. It takes more wraps and more tie length than the other three knots, so it works best with a slightly longer tie. If you’ve never tied one before, Ties.com’s Windsor knot guide shows the extra cross-over step that trips most people up the first few tries. In my experience, that extra cross-over is the one step people skip by accident, and it’s usually why the knot comes out lopsided.
4. Shell Knot
The Shell Knot is less common but worth knowing — it produces a neat, compact, slightly rounded knot that’s a good middle ground when a Four-in-Hand looks too plain but a full Windsor feels like overkill. It’s a nice option for a slim tie with a spread collar, and I like it as a change of pace once someone already has the other three down.
Watch: How to Tie a Tie Step by Step
If you’d rather watch the wraps in motion instead of following still images, this video walks through the knot-tying process in real time, which makes it a lot easier to follow than a diagram the first couple of times. I find video helps more than photos for anything involving wraps and crossovers, since you can see which hand moves where.
Which Tie Knot Should You Use?
For everyday wear with a standard collar, I’d default to the Four-in-Hand — it’s quick, it looks fine with almost any shirt, and it’s the one your hands will remember without thinking about it. Save the Half-Windsor for a slightly dressier day at the office, and pull out the full Windsor for interviews, weddings, or anything where you want the knot itself to make a statement. The Shell Knot is worth learning once you’re comfortable with the other three and want a change of pace with a slim tie.
One more thing I think matters as much as the knot itself: tie length. A too-short tie usually means you tied a knot that needs more fabric than you fed into it (the Windsor is the biggest offender here), so if your tie keeps coming up short, I’d try dropping down to a Four-in-Hand or Half-Windsor instead of fighting the wrap. For more written detail on the wraps for the Four-in-Hand and Windsor specifically, Paul Fredrick’s how-to-tie-a-tie guide is a good reference to keep bookmarked.
Practice each knot a few times in front of a mirror before you actually need it for something important — the wraps get faster and more consistent the more times your hands repeat them. That’s really the only trick I’ve found that works: repetition, not a shortcut.

Written by Keith Schneerer
Certified Appliance Tech · Founder, RemoveAndReplace.com
Keith has spent 30+ years repairing machines, starting as a military mechanic and later maintaining food processing equipment before moving into appliance repair. He founded RemoveAndReplace.com to share field-tested repair advice.
More about Keith →