Popcorn ceilings look intimidating from the ground, but the removal itself isn’t complicated — it’s just messy if you go at it wrong. In 39 years of hands-on repair work, I’ve learned that the single biggest mistake people make when they’re figuring out how to remove a popcorn ceiling is scraping it bone dry, which turns into hours of dust and sore arms for barely any progress. The fix is one of the simplest tricks in home improvement: wet the texture first, and the whole thing gets dramatically more manageable.

Overview: Removing a popcorn ceiling is a manageable DIY job if you wet it first. Lightly mist the texture with a spray bottle until it softens, then scrape in long, even strokes with a wide blade. Sand smooth and prime when done. Budget a full weekend for one room — and if your home predates 1979, test for asbestos before you touch it.
- Wetting the ceiling first is the single biggest thing that makes this job doable — dry scraping is misery.
- Homes built before 1979 may have asbestos in the texture. Test before you start. No exceptions.
- A wide-blade scraper like the Homax 6100 with a debris bag cuts the job time and the mess noticeably.
- Dampen, don’t soak — soaked drywall paper bubbles and tears, and now you’re patching instead of painting.
- Painted popcorn ceilings need the paint skin scraped off first, then wetted underneath.
Before You Wet Anything: The Asbestos Rule That Isn’t Optional
I’m going to put this first because it’s the one part of this job that can actually hurt you, and it’s the part everybody wants to skip. If your home was built before 1979, the ceiling texture might contain asbestos. That’s not a scare tactic — popcorn texture was one of the most common places builders used the stuff, and it’s completely invisible to the naked eye. Asbestos exposure can lead to severe health issues, including cancer, and the danger comes specifically from breaking it up and breathing the fibers — which is exactly what scraping does. Before you proceed, have your ceiling tested by professionals or contact the EPA for guidance. A test kit runs cheap and the lab turnaround is a few days. I know waiting on a lab result is annoying when you’re fired up to start a project. Do it anyway. Both HGTV’s removal guide and This Old House’s breakdown of removal methods put this same warning right at the top of their instructions, for good reason, and I’d tell you the exact same thing if you asked me in person.
Pre-1979 home? Stop. Do not dry-sand, dry-scrape, or vacuum popcorn texture until you know it’s asbestos-free. Sealed and undisturbed, asbestos texture is stable. The second you start scraping, you’re aerosolizing it. Test first — the whole rest of this job waits on that result.
Step 1: Prep the Room Like You Mean It
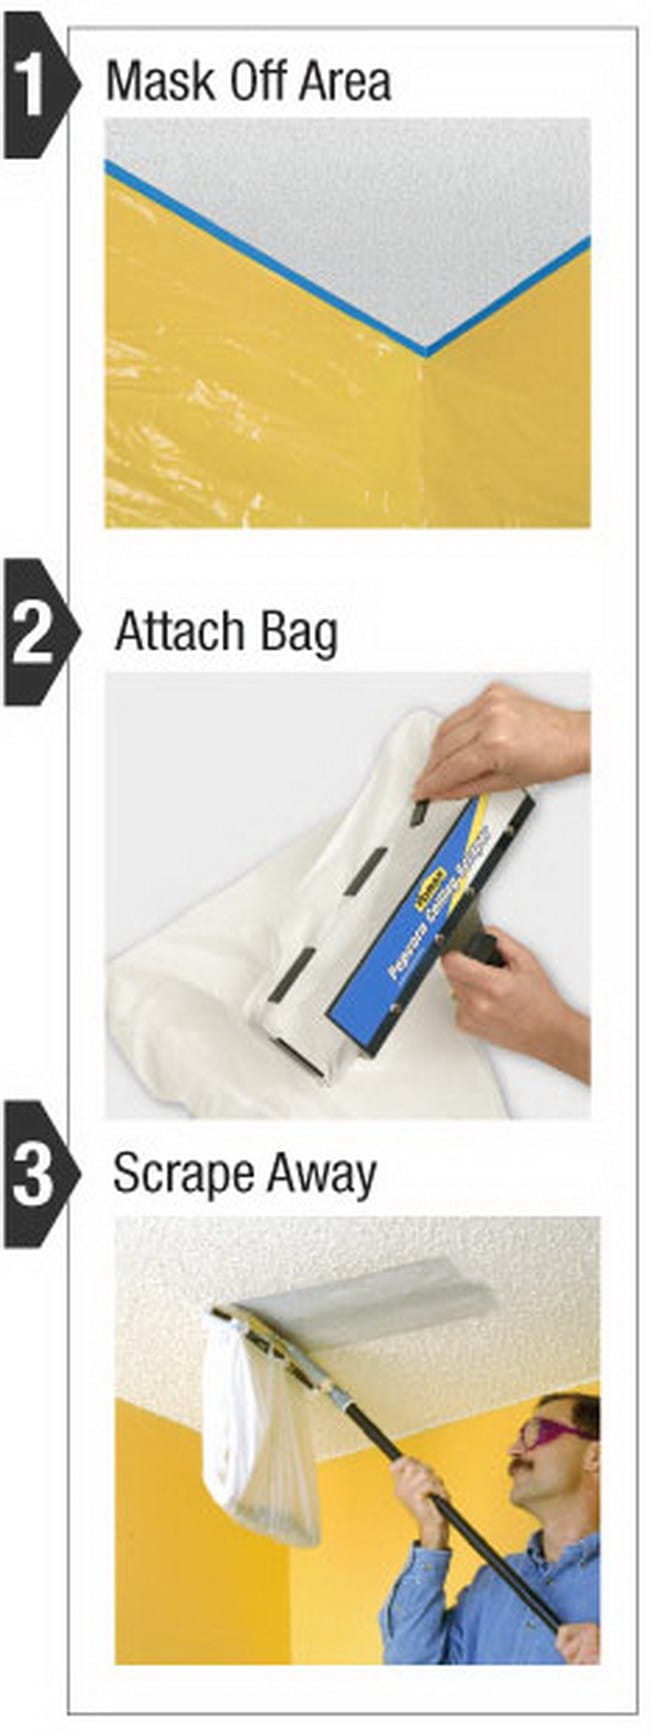
Preparation is the difference between a satisfying weekend and a two-week cleanup. I’ve walked into plenty of rooms where someone skipped this step, and it never ends well. Wet popcorn texture falls in sheets and turns to gray mud the second it hits the floor, and it gets everywhere. Protect the floors and any large furniture with plastic drop cloths before you even open the spray bottle. Move the smaller stuff out of the room entirely — it’s faster than working around it. Cover the big pieces you can’t move, like sofas or large cabinets, so falling debris doesn’t stain them. Don’t skip this step, no matter how small the room is — it always takes less time than the cleanup does if you don’t.
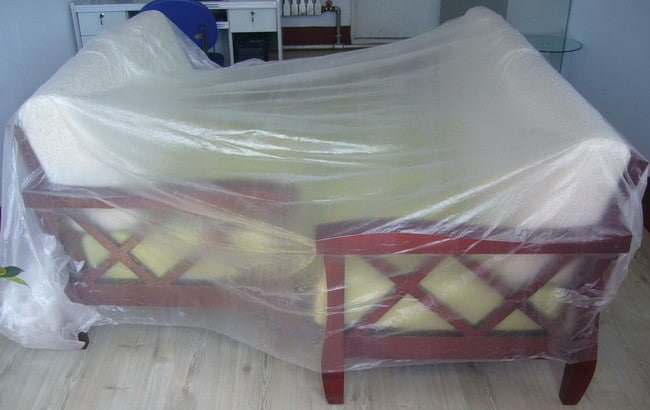
Tape plastic sheeting up the walls too if you’re planning to repaint them anyway — it makes the final cleanup a matter of rolling everything up and hauling it out. And wear eye protection. I always tell people this part: wet ceiling gunk landing in your eye while you’re standing on a ladder is exactly how people fall.
Step 2: Dampen the Ceiling — Don’t Soak It
This is the whole secret to how to remove a popcorn ceiling without losing your mind. Use a spray bottle or a pump sprayer to lightly moisten the popcorn texture. This softens the material so it scrapes off in ribbons instead of stubborn flakes, and it knocks down the airborne dust that makes dry scraping so miserable. Getting the moisture right is what separates an easy afternoon from an all-day fight. What I look for is a change in color and a slight give when I press the texture — that’s your cue it’s ready. The goal is to dampen, not soak — wet the drywall paper underneath too much and it bubbles, tears, and now you’re skim-coating a whole ceiling instead of just painting it.
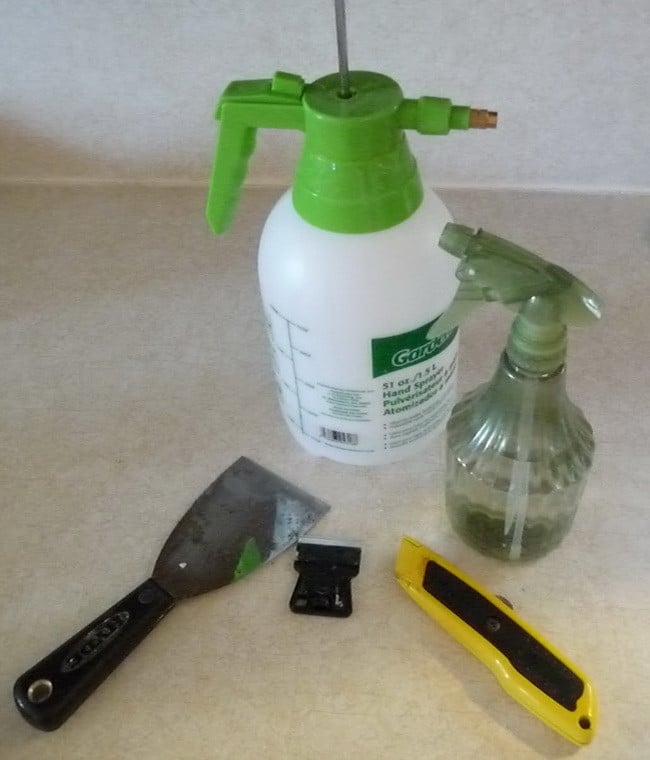
Work in sections about the size of what you can scrape in ten minutes. Spray a section, let it drink for ten to fifteen minutes, then scrape while it’s still damp and move to the next. Spraying the whole ceiling at once is a common mistake — half of it dries out before you get to it, so don’t repeat that one. I’d rather work slower in small sections than chase dried-out patches all afternoon.
Step 3: Scrape in Long, Smooth Strokes
Now the satisfying part. Use smooth, long strokes and apply consistent pressure, holding the blade at a shallow angle so you shave the texture rather than gouging the drywall. Work across the entire ceiling until all the popcorn texture is removed. This is where most people go wrong — they jab at it in short angry stabs and dig little half-moon divots into the drywall paper that you’ll have to patch later. I always tell people the same thing here: long, even, patient strokes. Let the moisture do the work. In my experience, rushing this part never pays off — slow, even passes beat fast, choppy ones every time.
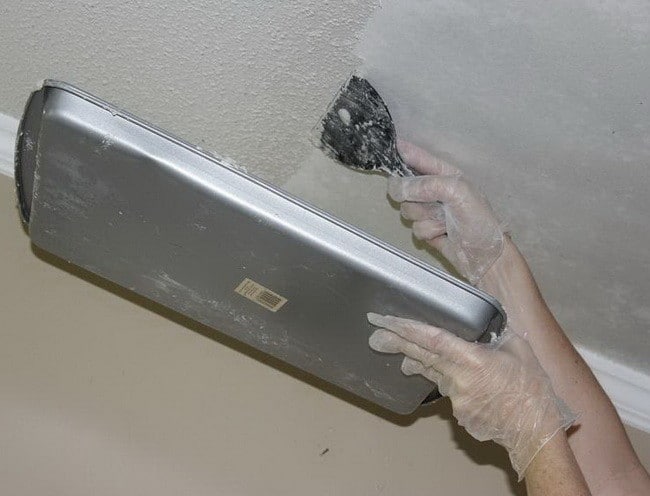
Painted ceilings are their own animal, and this is the part nobody tells you upfront. On a painted popcorn ceiling the paint forms a waterproof skin, so misting it does nothing — the water just beads and runs off. Spraying harder or waiting longer won’t fix that; the fix is scraping off the top paint layer first to expose the raw material underneath, then dampening it and continuing to scrape. Once the paint skin is broken, the water finally reaches the texture and it comes off like any other ceiling. This is one of the more common places I see people get stuck when they’re learning how to remove a popcorn ceiling that’s been painted over, and it’s an easy fix once you know why it’s happening.
Step 4: Sand Smooth and Prime
Once the popcorn material is completely removed, sand the ceiling to smoothness. You’ll find little ridges and leftover nubs of texture that the scraper missed — sanding knocks those flush. Finish by applying a primer coat of paint. This seals the exposed drywall, evens out the porosity so your finish coat goes on uniformly, and gives you that clean flat ceiling you did all this work for.
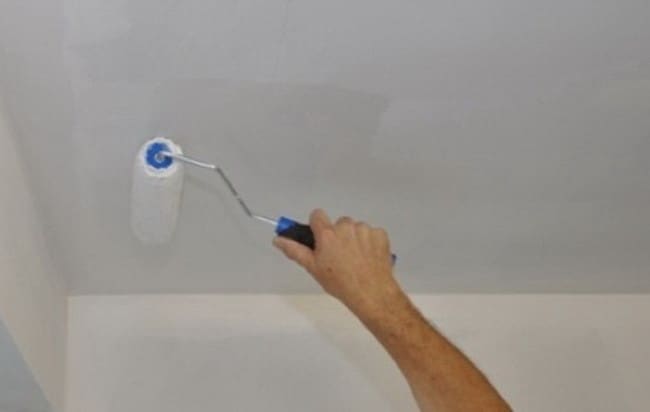
Don’t skip the primer even if you’re in a hurry. Bare drywall and old joint compound soak up finish paint at different rates, and if you skip straight to color you’ll see every patch and seam ghosting through. I’ve seen that mistake more than once, and usually, the boring sealing step is the one that saves you a redo down the line.
Tools That Make This Way Less Miserable
You can do this whole job with a spray bottle and a putty knife, but I wouldn’t. Once you know how to remove a popcorn ceiling the right way, a couple of purpose-built tools speed things up considerably.
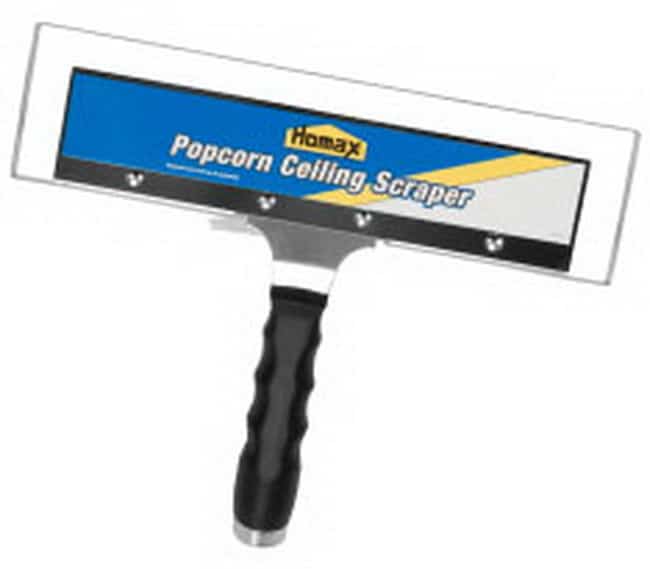
The Homax 6100 Ceiling Texture Scraper is the one I point people to. Its wide blade speeds up the job, and the attached bag catches most of the debris right as it comes off the ceiling, which minimizes the mess landing on your drop cloths. On a full room, that bag alone is worth the price of the tool, in my opinion.
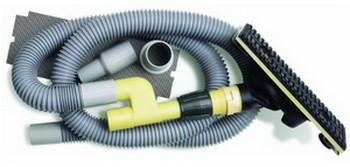
For the sanding stage, I like the Ceiling and Drywall Dust Free Vacuum Sander. It connects to a standard shop vac, capturing ceiling and wall particles as you sand so you’re not breathing a fog of dust or coating the whole room a second time. (Remember the asbestos rule — never dry-sand until you’ve confirmed the texture is clean.) Family Handyman’s DIY walkthrough recommends the same dust-control approach if you want a second source before you buy anything, and it lines up with what I’d tell you here.
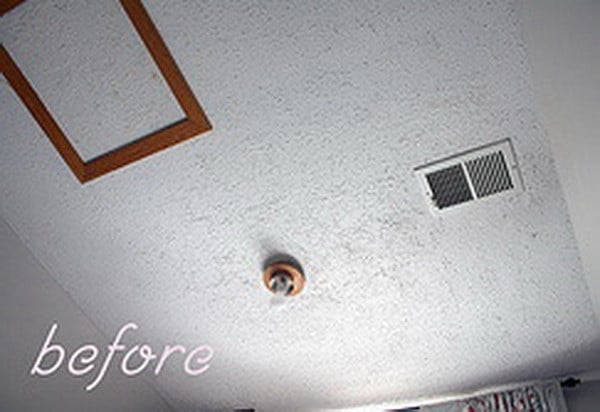
Before and After: What You’re Actually Signing Up For
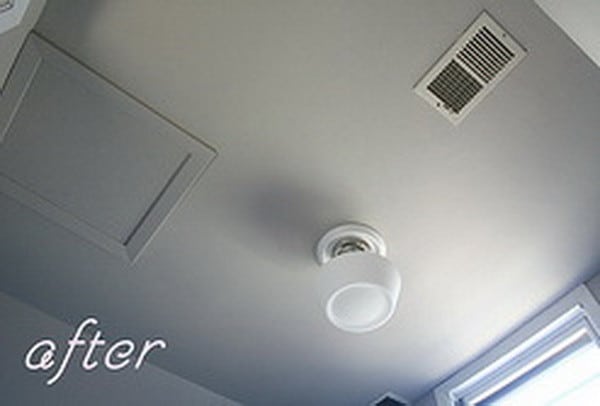
Seeing the before-and-after side by side sets honest expectations. This is real work — a full weekend for one average room, more if it’s painted or you’re moving slow your first time. But the payoff is a flat, modern ceiling that makes the whole room feel bigger and cleaner. I’d rather see someone budget the time honestly than rush it and end up with gouges to patch. Respect the asbestos rule, and it’s absolutely a job you can own yourself.
Keeping the New Ceiling Looking Right
Once it’s smooth and painted, a flat ceiling is genuinely low-maintenance — no more texture trapping dust and cobwebs. The one thing I always tell people to watch for going forward is water. A smooth ceiling shows a stain instantly where the old texture used to hide it, so if you spot a brown ring, chase down the leak above it fast and repaint the spot before it spreads. Check your ceilings for that kind of staining every so often, just out of habit. If you ever have to deal with a mark, seal it with a stain-blocking primer before you topcoat, or it bleeds right back through.
When Should You Just Hire It Out?
Honestly, if your home is pre-1979 and the texture tests positive for asbestos, this stops being a DIY job — call a licensed abatement contractor and don’t argue with yourself about it. Same if you’ve got tall vaulted ceilings, more than a couple of rooms, or a ceiling that’s been painted multiple times over the years. For a single standard-height room that tests clean, though, this is a very doable weekend project. I’d spend my money on the good scraper and the vacuum sander before I’d spend it on labor for a job I could clearly handle myself, and I think you’ll feel the same once you’ve read through this.
FAQ
Do you have to wet a popcorn ceiling before scraping?
You don’t have to, but you don’t want to do it dry. Wetting softens the texture so it comes off in clean ribbons and it keeps the dust down. Dry scraping takes hours for barely any progress — wet it first.
How do I know if my popcorn ceiling has asbestos?
You can’t tell by looking — it’s invisible in the texture. If your home was built before 1979, have it professionally tested or contact the EPA for guidance before you disturb anything. Test any pre-1979 ceiling, period. It’s cheap insurance against a very expensive health problem.
What’s the best tool for removing a popcorn ceiling?
A wide-blade scraper with an attached debris bag, like the Homax 6100 Ceiling Texture Scraper. The wide blade covers more ceiling per stroke and the bag catches most of the falling mess. Pair it with a spray bottle and you’ve got the whole job covered.
Why won’t my painted popcorn ceiling absorb water?
Because the paint is sealing it. Spraying a painted ceiling over and over gets you nowhere. Scrape the top paint skin off first to expose the raw texture underneath, then dampen it, and it’ll finally soften up.
How long does it take to remove a popcorn ceiling from one room?
Budget a full weekend for one average room your first time — spraying, scraping, sanding, and priming all take longer than you’d guess. Painted ceilings and vaulted rooms add time. Plan for two full days and finish early rather than the opposite.

Written by Keith Schneerer
Certified Appliance Tech · Founder, RemoveAndReplace.com
Keith has spent 30+ years repairing machines, starting as a military mechanic and later maintaining food processing equipment before moving into appliance repair. He founded RemoveAndReplace.com to share field-tested repair advice.
More about Keith →

Eric,
Have you tried the large razor scrapers? What are you using to scrape the popcorn texture off now?
-RR
How can I remove painted popcorn ceilings. If not painted I usually just put water on it and scrape it right now. But this one, the water doesn’t absorb it and it don’t loosen it up. What can I use that is quick?
Have to say that we couldn’t get this to work. All other direction were right on. Tape everything off, use the heavy platice you would buy when you paint. A lot of work but looks great when all done.