Change your refrigerator water filter every 6 months — every 4 months if you’re on hard water like most of Arizona. On modern fridges it’s a 2-minute job with no tools: find the filter, turn-and-pull it out (or push the release button), pop the new one in, and note the date. No moving the fridge, no shutting off water valves.
- Replace the filter every 6 months — 4 months on hard water. It’s a $30-50 part, not a service call.
- Modern fridges use one of five spots: bottom grille (turn-lock or push-button), inside door side, top interior, or a round screw-in housing.
- Match the filter to your manufacturer’s exact part number — a “universal” filter is where most people go wrong.
- Older fridges built before 2002 have an inline filter behind the unit that DOES require shutting off the water valve.
- Run 2-3 gallons through the new filter before you drink it to flush out the carbon dust.
I’ve swapped hundreds of these over the years, from home kitchens to the commercial reach-ins I worked on for nine years in food service, where a neglected filter meant cloudy ice in front of paying customers. Here’s the thing nobody tells you up front: 90% of the time this is the easiest repair in your whole house. The other 10% is an old inline filter behind the fridge that scares people off — and I’ll get to that. Let me show you where yours is and how to change it.
Where Is My Refrigerator Water Filter Located?
Your water filter is in one of five places, and which one depends entirely on your brand and model year. On most fridges built after 2002 the filter lives somewhere you can reach without moving the unit — a 2-minute swap with no tools and no shutting off any water valve. That’s the good news, and it covers the vast majority of what I see. Whirlpool, KitchenAid, JennAir and Amana usually put it in the bottom grille. GE tucks it inside at the top right toward the rear. Samsung and some newer KitchenAid units put it in the side of the left door. LG hides it up in the ceiling behind the left door. The one that actually requires work is the pre-2002 inline filter mounted behind the fridge — that one needs the water valve shut off. Before you buy anything, check your owner’s manual for the exact location and part number, because that part number is the single thing people get wrong most often.
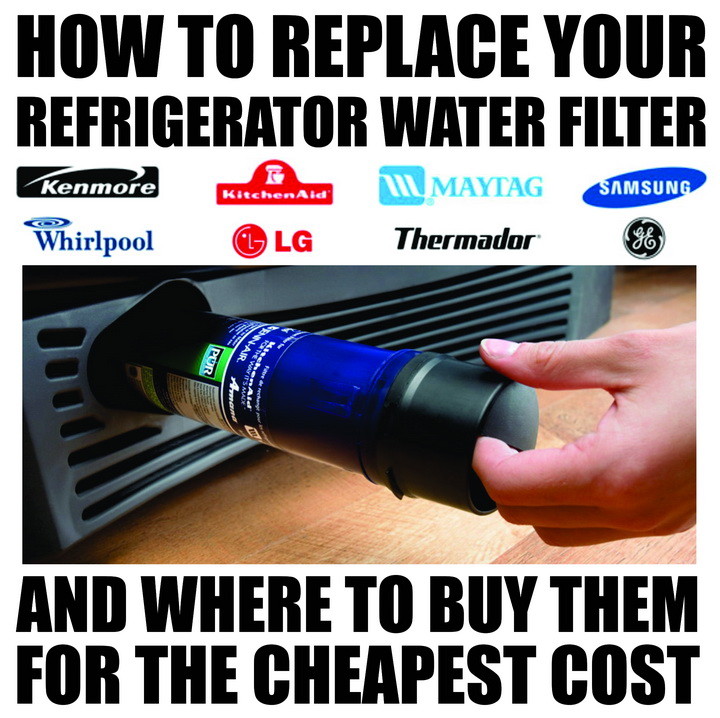
Quick diagnostic so you jump to the right section: Is your filter in the bottom front grille and it twists? → go to The Turn-Lock Bottom Grille Method. Bottom grille but it has a little button beside it? → The Push-Button Bottom Grille Method. Behind a flap on the front face of the fridge compartment? → The Slide-Out Front Compartment Method. Inside a round plastic canister you have to unscrew? → The Screw-In Housing Method. And if your fridge predates 2002 and there’s nothing inside → skip to Older Refrigerators Built Before 2002.
Why Bother Changing It At All?
Because that filter gets used every single day. Every glass of water, every batch of ice, all of it runs through the same cartridge. After six months the carbon is spent and you’re basically drinking through a dirty sponge. Continually using water and ice from a fridge with a clogged, dirty filter can cause problems for both the refrigerator and your health — restricted flow, funny-tasting ice, and in bad cases enough back-pressure to stress the dispenser valve.
A clogged filter causes the majority of “my ice tastes weird” and “my water dispenser slowed to a trickle” complaints I hear — replace it before you go chasing anything more expensive. I learned that the hard way years back on a customer’s Whirlpool: I spent 20 minutes poking at the dispenser assembly convinced it was the valve, then pulled a filter that hadn’t been changed since the fridge was new. My first instinct was always to suspect the mechanical parts. I did that for a good while. Then I learned to pull the filter FIRST, every time, because it’s free to check and it’s the answer more often than not. If you want to see how this fits into the bigger picture, this fridge is one of the appliances on our average lifespan chart for every major home appliance — keeping the filter fresh is one of the cheapest ways to hit that lifespan.
The Turn-Lock Bottom Grille Method
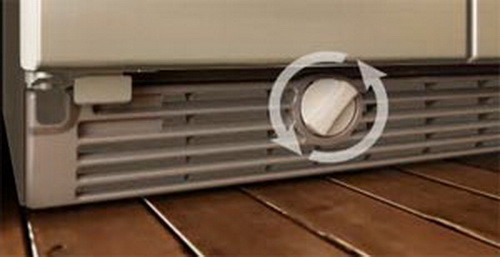
This is the one I see most on Whirlpool-family fridges, and it’s about as easy as it gets.
- Locate the filter in the bottom front grille and turn the knob on the end to the left.
- Pull the old filter straight out and throw it away.
- Insert the new water filter and turn the knob to the right to lock it into place.
- Write down the date you installed it and plan to replace it after 6 months.
You’ll feel it seat with a solid stop when the knob turns fully right. Finished. Honestly, gonna take you longer to find the manual than to do the swap.
The Push-Button Bottom Grille Method
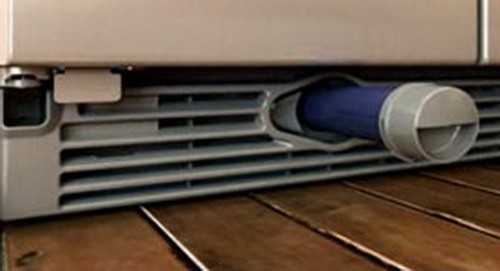
Same bottom-grille location, different release. This one’s found on a good chunk of newer units too.
- Press the button right next to the filter. The filter slides out far enough to grab easily.
- Take the cap off the old filter and move it onto the new filter — don’t skip this, that cap is what mates to the housing.
- Install the new filter and push it in until you hear a clicking noise.
- Write down the date and replace it after 6 months.
That click is your confirmation. If you don’t hear it, it’s not fully seated (usually the cap went on crooked — ask me how I know). Finished.
The Slide-Out Front Compartment Method
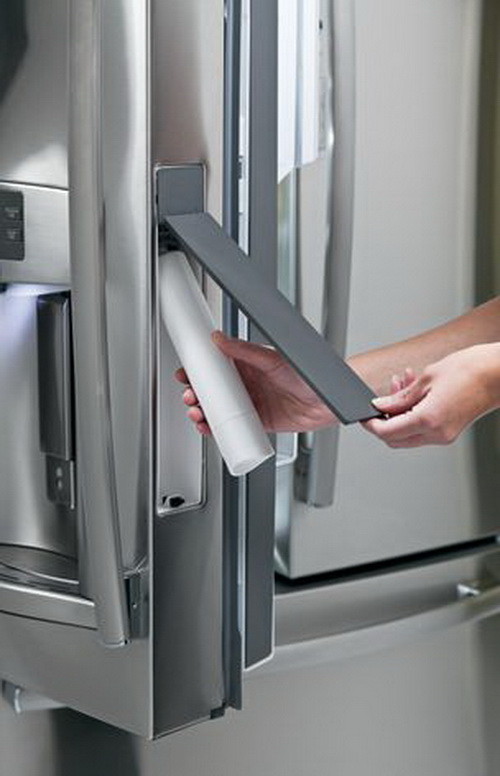
Open the filter compartment on the front of the refrigerator and remove the filter. Discard the old one. Slide the new filter into the compartment and back into place. Write down the install date and replace after 6 months. Finished — this is the quickest of the bunch.
The Screw-In Housing Method (The One That Needs a Tool)
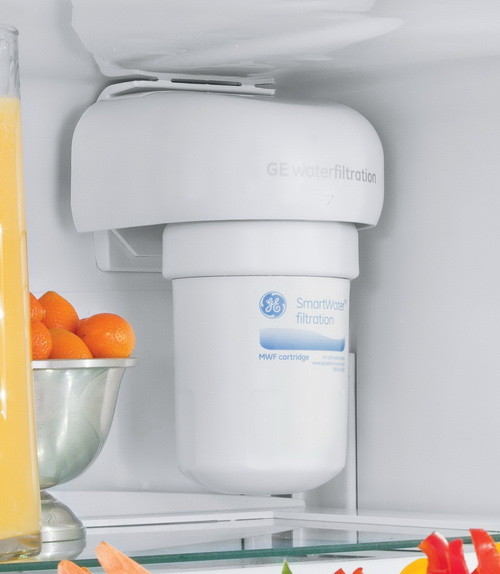
Here’s the field trick most people miss on this style: the factory torques these housings down TIGHT, and if you grab it cold with wet hands you’ll get nowhere. Grab a cheap water filter wrench instead of fighting it bare-handed — it cups the housing and gives you the use to break it loose without cracking the plastic. I keep one in the truck for exactly this reason.
- Unscrew the round plastic housing — use a filter wrench if it won’t budge by hand.
- Remove the old filter from inside the housing and discard it.
- Put the new filter inside the housing and screw the housing back on — snug, not gorilla-tight.
- Write down the date and replace after 6 months.
Finished. Just don’t overtighten on the way back — that’s how the plastic threads strip and you end up buying a whole housing.
Older Refrigerators Built Before 2002
This is the only version that involves the water supply — shut it off first. Old-style inline filters mounted behind the fridge are under line pressure. Skip the shutoff and you’ll get a face full of water when you disconnect it.
Most refrigerators made before 2002 use an old-style inline water filter located behind the unit itself, on the supply line. There’s no filter inside the fridge to swap — you have to get behind it. Here’s the order I do it in:
- Gently slide the unit out from the wall.
- Unplug the fridge from power.
- Turn off the water valve behind the refrigerator.
- Remove and replace the inline water filter.
- Turn the water valve back on and check carefully for leaks at the connections.
- Plug the fridge back in, slide it back into place, and you’re done.
Budget maybe 20 minutes on this one your first time, mostly because wrestling the fridge out and back is the slow part. This is still well within DIY territory — you probably already have everything you need.
Where To Buy The Right Filter Online
The single biggest mistake I see isn’t the install — it’s buying the wrong filter. Match your manufacturer’s exact part number. A generic “fits most” filter will physically go in and then either leak, restrict flow, or filter next to nothing. Find your replacement by brand:
- Refrigerator water filters on sale
Most name-brand filters run $30-50 depending on the model. Compare that to a service call and it’s not close — this is one of the easy appliance repairs you can do yourself with zero risk.
Watch The Water Filter Swap Done Step By Step
If you’d rather see it than read it, this walkthrough shows the whole process on a typical modern fridge — handy for the push-button and turn-lock styles in particular.
Don’t Skip This: Flush The New Filter
Here’s what the manual glosses over. A brand-new carbon filter is full of loose carbon dust, and if you drink the first glass straight off you’ll get gray, cloudy water and grit in your ice. After you install any new filter, run 2-3 gallons through the dispenser before you trust it. On fridges with an ice maker, dump the first two batches of ice too. Takes five minutes and it’s the difference between “the water tastes great” and “why is my water gray.”
How To Keep This From Being a Headache Again
The whole trick is not forgetting. Every filter swap, I write the install date right on the filter housing or the inside of the fridge door with a marker — the same date I’d note in the steps above. Six months out, it’s staring you in the face. Set a phone reminder if you’re the type to ignore a marker. If you’re on hard water (Arizona, Nevada, a lot of the Southwest), bump that to every 4 months because the minerals load the carbon faster. Do that and you’ll never chase a slow dispenser or funky ice again. And if your ice maker is already acting up, that’s a separate rabbit hole — our Frigidaire ice maker repair guide covers what to check once you’ve ruled out the filter.
Frequently Asked Questions
How often should I really change my refrigerator water filter?
Every 6 months for normal water, every 4 months on hard water. That’s not marketing — the carbon genuinely runs out. I’ve pulled filters people ran for two years and they were doing nothing but restricting flow.
Do I have to turn off the water to change the filter?
On any modern fridge (post-2002), no. The design shuts off the water automatically when you pull the filter. The only exception is the old inline filter behind pre-2002 fridges — that one you shut off at the valve.
Can I use a generic filter instead of the brand one?
You can, but I’m cautious about it. I’ve seen cheap universals leak or barely filter. If you go aftermarket, buy one that’s NSF-certified and specifically lists your exact OEM part number as a match — not “fits most.”
My water is coming out gray after I changed the filter. Did I get a bad one?
Almost certainly not. That’s loose carbon dust from a fresh filter — completely normal. Run 2-3 gallons through it and it’ll clear up. If it’s still gray after that, then I’d start suspecting the filter.
Why did my water dispenser slow to a trickle?
Nine times out of ten it’s the filter. Before you tear into the dispenser assembly, pull the filter and run the dispenser with it out. If the flow jumps back to normal, you found your problem — put a fresh filter in and you’re done.
ASK YOUR QUESTION BELOW – PLEASE GIVE US THE TYPE OF APPLIANCE, BRAND OF APPLIANCE, AND THE MODEL NUMBER. Simply ask your question using the comments form below (it’s free and you don’t have to register) and we can troubleshoot your appliance problem ASAP.
Track your own filter schedule with our Refrigerator Water Filter Reminder Tool — tell us when you last replaced it and we’ll build a reminder.

Written by Keith Schneerer
Certified Appliance Tech · Founder, RemoveAndReplace.com
Keith has spent 30+ years repairing machines, starting as a military mechanic and later maintaining food processing equipment before moving into appliance repair. He founded RemoveAndReplace.com to share field-tested repair advice.
More about Keith →
Needing location of water filter on a Frigidaire refrigerator. Model Number FRT18L4JW8 Manufactured 03-10
Sharon Smith,
A Kenmore refrigerator 795-79442-810 will take any type 795 Kenmore water filter.
If the ice maker stops working, the water filter may be the problem.
Here is a great place to get your Kenmore water filter. APPLIANCE FILTERS for Kenmore refrigerator
If after replacing the water filter, the ice maker on your Kenmore refrigerator still does not work, check here to fix ice maker not working.
-RR
I have a Kenmore refrigerator model 795-79442-810.
Can not find a water filter and my icemaker is not working?
I have a whirlpool refrigerator model ED5CH0XTQ00. I need to replace the water filter but don’t know where it is located. There is nothing in the frig.
I have read that the dispenser simply needs to be purged before using again after a new filter has been installed.
I’ve read the amount to be between 1-3 gallons, but never 5g.
I will use a gallon once I can pry my used filter from its holder as it is stuck, most likely from mineral build-up.
Any suggestions short of calling a plumber in would be welcomed.
I have a RPWF100 filter bottom left in front grill of refrigerator.
The fridge had been used in garage, ice and water not hooked up, when we moved it into the house and hooked up water, we had a puddle.
The outer case for the filter was busted (assuming it froze in garage) the majority of outer case came out with front piece that slides onto new filter.
However there is still the “nipple” area and very end of casing that I cannot get out of filter housing!
Curious if there was and “trade secrets” to getting it out?
Bob,
Check this page for more information on New Refrigerator Filter Causes Problems.
-RR