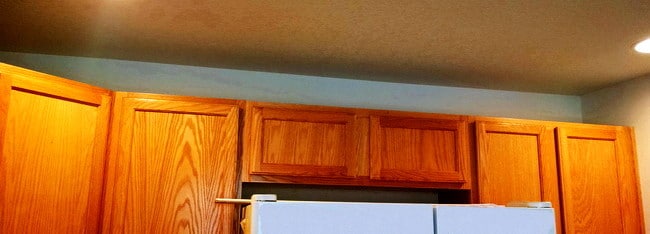
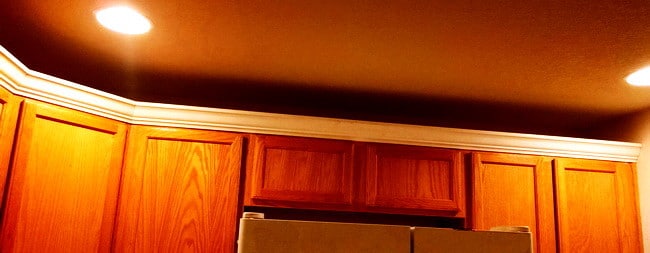
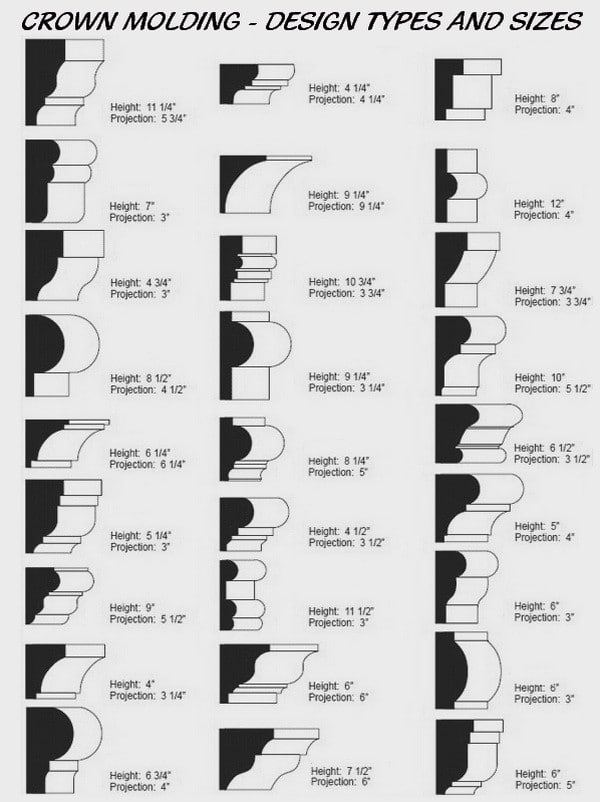
One of the easiest ways to truly spruce up your kitchen cabinets is to add crown molding (or trim) to them. Crown molding is a very cheap wood that can be applied to ceilings, cabinets, and more. It will create a more luxurious look in any room. Doing this in the kitchen can make a HUGE difference and can be done for under $100 dollars. Have a look below where we have some before and after pictures and all the supplies and tools you need to do this yourself! Different types of crown molding here.


Note: still need to paint crown molding and caulk in certain areas.
Crown Molding DIY Project Specifications:
Linear feet of our cabinets: 23
Time to complete: about 3.5 hours
Cost of materials in total: around $70 to $90 dollars
Materials Used:
$6 Gorilla wood glue
$7 Structure wood bracket pieces (to attach crown molding to cabinets)
$45 Crown molding (decorative)
$12 Brad nails
$8 Tube of caulk
Tools Used To Complete Project:
Miter saw Buy Miter Saw Here
Dremel Power Tool Buy Dremel Here
Pneumatic nail gun or hammer Buy Pneumatic Brad Nail Gun Here
How To Cut & Install Crown Moulding
How to add crown molding to your kitchen cabinets:
Cut the wood structure (holder) pieces at the same exact angle as the crown molding (aka: moulding). Usually the angle will be around 35 degrees. You can also notch them so the bottom of the angle will sit completely flush with the front of the kitchen cabinets.
Next, nail the wood structure pieces into place on the cabinets. Then, measure and cut the crown molding to exact size. (At this point you can paint the crown molding or just wait until it is installed to paint it.)
Now apply the glue to the cabinets, wood structure pieces, and to the crown molding.
Then nail the crown molding into place. Clean up any glue residue that may be present. Paint the molding if needed then you can caulk the edges and joints to fill in any gaps. FINISHED!

If you know of an easier way to measure, cut, and install crown molding on cabinets, please leave a comment below to assist our other readers.


Leave a Reply