

Updated July 3, 2026 by Keith Schneerer
Refinishing an old bathtub with a two-part epoxy kit costs about $30 and makes a worn, stained, or chipped tub look new again. The whole trick is prep — scrub the surface clean and smooth with steel wool, tape off the walls, ventilate the room, and spray on multiple light coats. It works on porcelain, fiberglass, acrylic, and marble.
I’ve been fixing and refinishing things with my hands for 39 years — 19 of those on Air Force aircraft where a bad surface prep meant a failed inspection, and another 9 in commercial kitchens where I resurfaced more than a few beat-up stainless and coated surfaces. So when somebody asks me the fastest, easiest, and cheapest way to bring an old tub back from the dead, I don’t reach for the phone to call a contractor. I reach for a $30 kit.
Why Refinish Instead of Rip It Out?
Ripping out a bathtub and dropping in a new one runs around $2,500 or more — and that number was true back when I first wrote this, it’s only gone up since. A refinishing kit runs about $30. That’s the whole pitch right there. For roughly one percent of the replacement cost, you fix chips, cracks, and years of staining, and the tub looks brand new. Nine times out of ten, a tub that “needs replacing” doesn’t need replacing at all — it needs a good scrub and a fresh coat of epoxy. The surface is worn, not the tub itself. Everyone assumes a stained, chipped tub is a demolition job. It almost never is. You’re saving thousands and skipping weeks of new-bathroom-construction mess, dust, and dumpster rental. That’s the real reason to do this yourself.
These kits restore porcelain, fiberglass, acrylic, and marble tubs — so it doesn’t matter what yours is made of. It’s a genuine stained-bathtub solution, and I’ve watched an extremely stained tub come out looking new and hold up for many years. That epoxy is durable stuff.
What’s Actually in the Kit
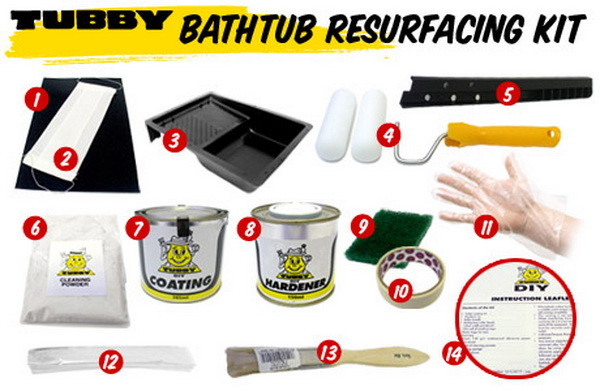
The coating in a bathtub resurfacing kit is a two-part epoxy — a resin and a hardener that you mix together. It was formulated to survive the harsh conditions of a bathroom: standing water, hot water, soap, cleaners, the whole beating a tub takes daily. This isn’t house paint you’re slapping on. It cures into a hard shell. That’s why it lasts years instead of peeling off in six months like the wrong product would.
How Do You Refinish a Bathtub Yourself?
The single most important part of this whole job is prep — and I mean that. Scrub the bathtub with steel wool until it’s very clean and completely smooth. Every fleck of soap scum, every bit of old mineral crud, gone. Then spray on the epoxy — spray, don’t paint. I’ll get into why below. Tape off your walls and floor with painters tape, keep the room ventilated because the vapors are strong, and lay down multiple light coats instead of one thick sloppy one. The kits are available at all home improvement stores and run under $30 online.
- Scrub the tub with steel wool until it’s clean and smooth. This is where most people screw up — they rush it. The finish is only as good as the surface underneath. A smooth, spotless tub takes the coating and holds it. A greasy or gritty one lets it peel later.
- Tape off the walls and floor with painters tape. Overspray goes everywhere. Protect everything you don’t want coated.
- Open a window and run a fan. The vapors are strong — don’t tough it out. Good ventilation is not optional here.
- Spray on multiple light coats. Light and even beats thick and drippy every single time. Let each coat set before the next.
Those epoxy vapors are no joke. Crack a window, run a fan, and don’t lock yourself in a sealed bathroom for an hour breathing it. I’ve worked in high-pressure repair environments my whole life and the one thing I never skimp on is ventilation. Wear a respirator rated for organic vapors if you’ve got one.
Spray It On — Don’t Paint It
Here’s what the manual won’t spell out clearly enough: spraying gives you an even, glass-smooth finish. Painting leaves brush marks and thick spots that never quite level out. My first instinct, honestly, was always to just paint the stuff on — seemed simpler, less mess, one tool. I did it that way the first time. Then I saw the brush lines cure right into the finish and had to sand it back and redo it. So I learned: spray it. Light coats. It’s the difference between a tub that looks professionally reglazed and one that looks like a weekend hack job.
Dealing With Those Ugly Non-Slip Flowers and Sticky Residue
A lot of old tubs have those adhesive non-slip flower decals stuck to the bottom, and the leftover glue is a nightmare that fights every recoat. Before you even think about epoxy, get that gunk off. Spray WD-40 on the flowers and residue, let it sit about 15 minutes, then scrape them off. WD stands for Water Displacement — that’s literally what it does, and it’s great at breaking down sticky adhesive (I’ve used it on adhesive plenty of times and it lifts it well). Goof Off works too, since its whole job is removing adhesive and paint.
For the stubborn leftover sticky spots from those flower things, a Magic Eraser product works and only costs a couple bucks. Those things are surprisingly effective on hard stains. Get the surface truly bare and clean first — the coating won’t stick over old glue, and if it does, it’ll fail right where the glue was.
When to Just Call for a Reglaze Quote Instead
If your tub has a real hole or structural crack — not just surface chips — a refinishing kit alone won’t cut it. Patch the structural damage first; here’s how to fix a hole in the bathtub yourself before you refinish over it. And if you’d rather not deal with the vapors and spray gear at all, get the tub professionally reglazed or resurfaced — it’s not as expensive as you’d think. Call a few places and get quotes. A full replacement is around $2,500; a pro reglaze is a fraction of that, and a DIY kit is about $30. Pick based on how much of the work you want to own.
Keeping the New Finish Looking New
Once you’ve got that fresh epoxy shell, baby it for the first few days — let it fully cure before you run water or scrub it. After that, skip the abrasive powders and steel wool on the finished surface (save those for the prep stage next time, not the daily clean). A soft sponge and non-abrasive cleaner will keep it glossy for years. That extremely stained tub I mentioned earlier lasted many years exactly because it got cleaned gently after refinishing instead of getting scoured back down. Treat the finish right and you won’t be back doing this again for a long, long time.
FAQ
How much does it cost to refinish a bathtub yourself?
About $30 for a two-part epoxy tub-and-tile kit, available at any home improvement store or online. Compare that to roughly $2,500 to remove and replace the tub entirely. I can’t think of a better return on thirty bucks in a whole bathroom.
Can I refinish a fiberglass or acrylic tub, or only porcelain?
All of them. These kits restore porcelain, fiberglass, acrylic, and marble tubs. The epoxy doesn’t care what’s underneath as long as you’ve prepped the surface clean and smooth first.
How do I get old non-slip flower decals and glue off before refinishing?
Spray WD-40 on them, wait about 15 minutes, then scrape them off — Water Displacement is exactly what breaks down the adhesive. Goof Off works too. Then hit any leftover sticky residue with a Magic Eraser, which runs a couple dollars and handles hard stains well. Get it bare before you coat.
Why spray the epoxy instead of painting it on?
I learned this one the hard way — I painted my first tub and the brush marks cured right into the finish, so I had to sand it back and redo it. Spraying gives you an even, smooth surface with no brush lines. Light coats, sprayed, every time.
How long will a DIY refinished tub last?
Years, if you prep it right and don’t scour it with abrasives afterward. I had an extremely stained tub come out looking new and it lasted many years — the two-part epoxy was formulated to withstand a bathroom’s harsh conditions, so it holds up as long as you clean it gently.
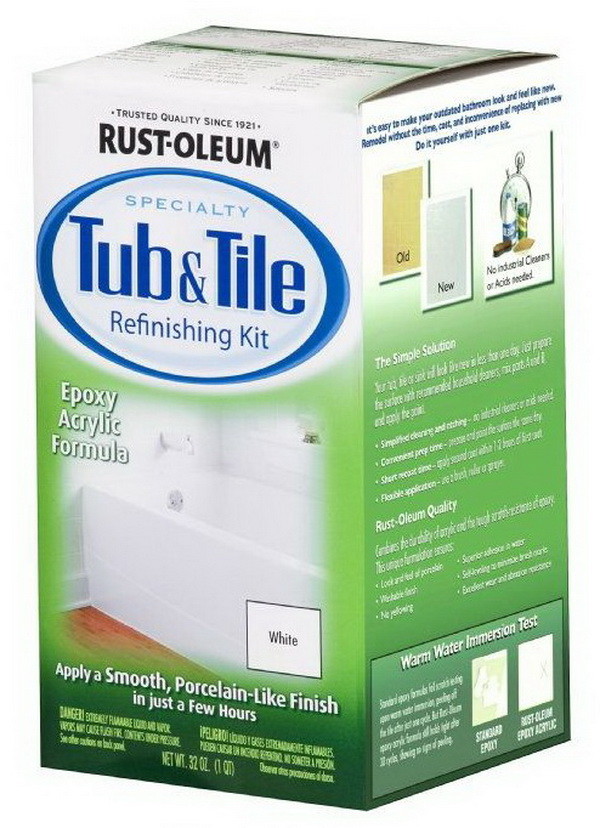
If you want a couple more walkthroughs before you start, Lowe’s has a solid 9-step refinishing guide, and Bathworks has a complete DIY refinishing guide worth a read. The product itself is a Rust-Oleum tub and tile refinishing kit if you want to see the exact two-part system I’ve been talking about.

Get the tub reglazed or resurfaced. It is not as expensive as you think so call a few places and get some quotes.